OK3568 4.19.206 Buildroot Controlling GPIO via GPIOD
1. Introduction to GPIOD
Libgpiod is a user-space API for the Linux kernel GPIO (General-Purpose Input/Output) driver library. It provides a simple way to control GPIO lines in a Linux system. These lines are usually connected to the digital input/output ports of hardware devices, such as LED and buttons. Through libgpiod, applications can easily open, read, write, and configure the states of GPIO lines, enabling operations on hardware devices and supporting cross - platform programming. Since Linux 4.8, the GPIO sysfs interface has been deprecated. User space should use libgpiod to interact with GPIO character devices instead.
2. Enabling the GPIOD Function
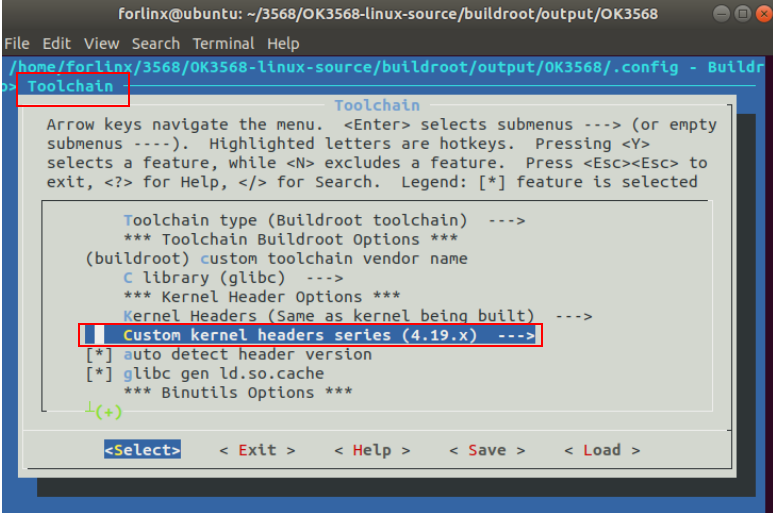
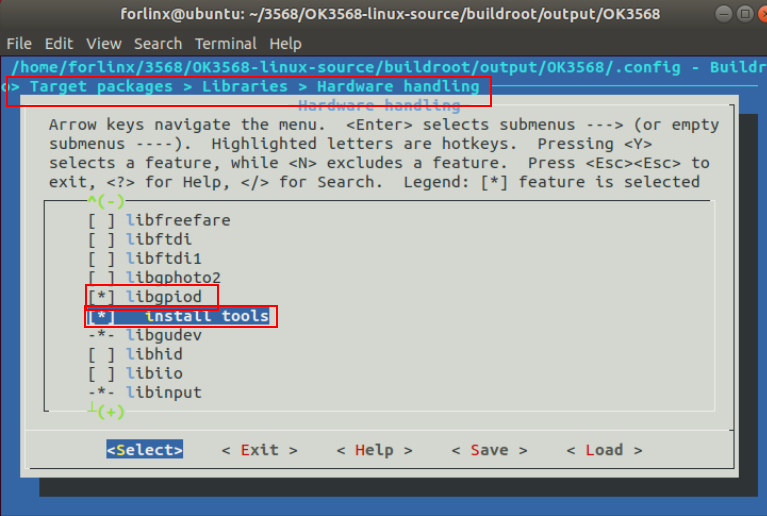
Open the graphical configuration interface of buildroot and select the following options.
After regenerating and flashing the new file system, open the development board debugging tool.
You can see that the development board generates the node /dev/gpioN.
[root@ok3568:/dev]# ls gpio*
gpiochip0  gpiochip1  gpiochip2  gpiochip3  gpiochip4  gpiochip5
At this time, the development board supports the gpiod dynamic library.
[root@ok3568:/usr/lib]# ls libgpiod.so*
libgpiod.so  libgpiod.so.0  libgpiod.so.0.3.2
3. Common GPIOD Instructions
3.1 Instruction Explanation
1)gpiodetect
List all GPIO controllers in the system.
[root@ok3568:/]# gpiodetect
gpiochip5 [rk817-gpio] (1 lines)
gpiochip4 [gpio4] (32 lines)
gpiochip3 [gpio3] (32 lines)
gpiochip2 [gpio2] (32 lines)
gpiochip1 [gpio1] (32 lines)
gpiochip0 [gpio0] (32 lines)
2)gpioinfo:
Display GPIO device information:
[root@ok3568:/]# gpioinfo
gpiochip5 - 1 lines:
        line   0:      unnamed       unused   input  active-high
gpiochip4 - 32 lines:
        line   0:      unnamed       unused   input  active-high
        line   1:      unnamed       unused   input  active-high
        line   2:      unnamed       unused   input  active-high
        line   3:      unnamed       unused   input  active-high
        line   4:      unnamed       unused   input  active-high
        line   5:      unnamed       unused   input  active-high
        line   6:      unnamed       unused   input  active-high
        line   7:      unnamed       unused   input  active-high
        line   8:      unnamed       unused   input  active-high
        line   9:      unnamed       unused   input  active-high
        line  10:      unnamed       unused  output  active-high
        line  11:      unnamed       unused   input  active-high
        line  12:      unnamed       unused   input  active-high
        line  13:      unnamed       unused   input  active-high
        line  14:      unnamed       unused   input  active-high
        line  15:      unnamed       unused   input  active-high
        line  16:      unnamed       unused   input  active-high
        ......							//Part of the pringting information
3)gpioget
Read GPIO input:
[root@ok3568:/]# gpioget gpiochip4 0
1
4)gpioset
Set the GPIO level.
The following uses GPIO3_A7 as an example to test the instruction operations.
Output:
[root@ok3568:/sys/class/gpio]# gpioset gpiochip3 7=0		//Set the pin to low level, and the D6 light on the development board will be on.
[root@ok3568:/sys/class/gpio]# gpioset gpiochip3 7=1		//Set the pin to high level, and the D6 light on the development board is off.
Note: Different from the traditional sysfs, by default, gpioset will exit immediately after setting the level. The GPIO state at this time is defined by the hardware and may vary on different products.
If you need to keep the level at a certain state persistently, please specify the working mode as signal as in the following example.
[root@ok3568:/]# gpioset -m signal gpiochip0 0=1
  //(Press Ctrl+C to stop)
6)gpiomon
Monitor GPIO events.
Test the pin GPIO3_C1.
[root@ok3568:/]# gpiomon gpiochip3 17
event:  RISING EDGE offset: 17 timestamp: [1722306410.568497882]		//Pin connected to 3.3 V supply
event: FALLING EDGE offset: 17 timestamp: [1722306410.568556216]		//Pin connected to 3.3 V supply
 //(Press Ctrl+C to stop)