Linux6.1.36_User’s Compilation Manual_V1.0
Document classification: □ Top secret □ Secret □ Internal information ■ Open
Copyright
The copyright of this manual belongs to Baoding Folinx Embedded Technology Co., Ltd. Without the written permission of our company, no organizations or individuals have the right to copy, distribute, or reproduce any part of this manual in any form, and violators will be held legally responsible.
Forlinx adheres to copyrights of all graphics and texts used in all publications in original or license-free forms.
The drivers and utilities used for the components are subject to the copyrights of the respective manufacturers. The license conditions of the respective manufacturer are to be adhered to. Related license expenses for the operating system and applications should be calculated/declared separately by the related party or its representatives.
Overview
This manual is designed to help you quickly understand the compilation process and become familiar with the compilation methods for Forlinx Embedded products. Applications need to be cross-compiled on an Ubuntu host before they can run on the development board. By following the methods in this compilation manual and through hands-on practice, you can successfully compile your own software code.
The manual will explain the environment setup process. Some unpredictable issues may arise during environment setup, so it is recommended that beginners directly use the pre-configured development environment Forlinx provide to get started quickly and reduce development time.
There are there installation methods: dual-boot on a physical machine, single-boot on a physical machine, or in a virtual machine. Each installation method has its advantages and disadvantages. This manual only provides a method for setting up Ubuntu in a virtual machine. Hardware requirements: It is recommended to have at least 8 GB of RAM or more. This ensures that after allocating memory for the virtual machine (it is recommended to allocate over 2 GB for the virtual machine), you can still perform other operations on Windows without significant lag.
There are total 5 chapters:
Chapter 1. covers the installation of VMware, specifically version VMware® Workstation 15 Pro 15.1.0. VMware must be installed before setting up the Ubuntu development environment;
Chapter 2. explains how to load the Ubuntu development environment provided by Feilin. The environment is based on 64-bit Ubuntu 22.04;
Chapter 3. outlines the process of setting up a new Ubuntu development environment. The 64-bit Ubuntu 22.04 selected in this section is used as an example to describe the process of Ubuntu creation, cross-compiler installation, and Qt creator installation. Due to different computer configurations, unexpected problems may occur in the building process. It is recommended that beginners directly use the environment built by Forlinx;
Chapter 4. focuses primarily on methods for compiling source code related to the development board, including compiling the kernel source code, creating the root filesystem, compiling command-line applications, and compiling Qt programmes;
Chapter 5. mainly covers how to flash the compiled image onto the development board.
Application Scope
This software manual is designed for the OK-MX9352-UP4 platform running Linux6.1.36. While other platforms may also reference this manual, there could be differences that require adjustments for the specific use.
Revision History
Date |
Version |
Revision History |
|---|---|---|
17/07/2026 |
V1.0 |
User’s Compilation Manual Initial Version |
1. Installing CMake
Virtual Machine (VM) refers to a complete computer system simulated through software, capable of performing all functions of a complete hardware system and operating within an entirely isolated environment. Virtual machines can emulate various types of operating systems, facilitating the management and use of different development environments and operating systems during the development process.
Popular virtualization software includes VMware (VMware ACE), VirtualBox, and Virtual PC, all of which can create multiple virtual computers on a Windows system. Forlinx uses VMware; if you are not very familiar with virtualisation software, it’s recommended to use the same virtualisation software as Forlinx.
1.1 Downloading and Purchasing VMware Software
Visit the VMware official website at VMware Official Website to download Workstation Pro and obtain the product key. VMware is paid software that requires individual purchase, or you can choose to use a trial version.
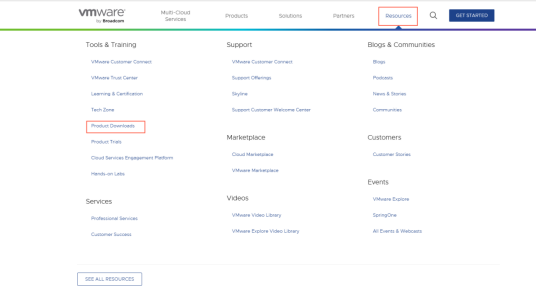
After the download is complete, double-click the setup file to launch the installer.
1.2 VMware Software Installation
Step 1: Double-click the programme to launch the installation wizard, then click “Next”;
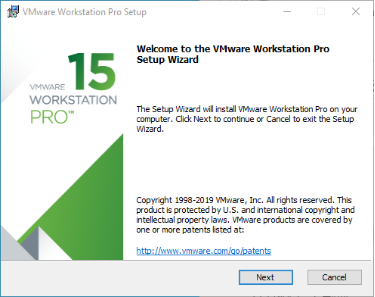
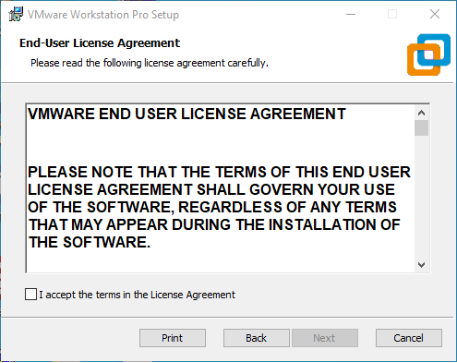
Step 2: Check “I accept the terms in the license agreement” and click “Next.”
Step 3: Modify the installation location to the partition on your computer where software is typically installed, then click “Next.”
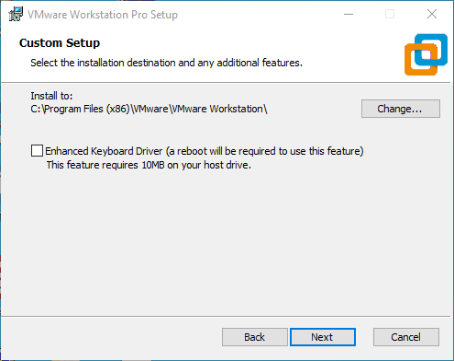
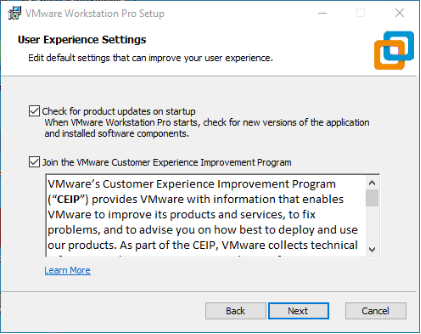
Step 4: Decide whether to check the two checkboxes based on your needs, then click “Next”;
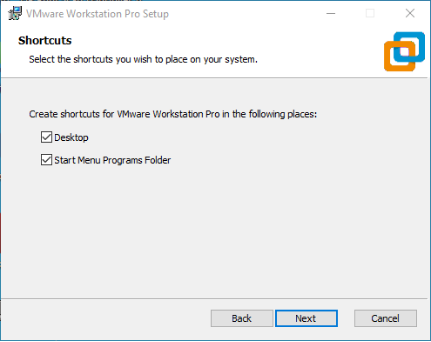
Step 5: Check the option to add shortcuts, then click “Next”.
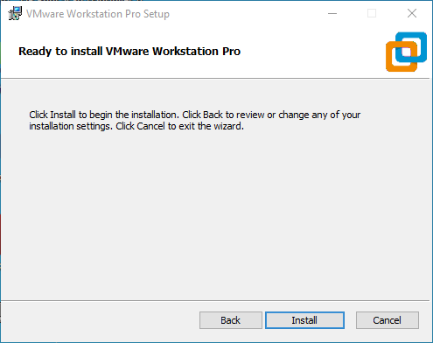
Step 6: Click “Install”;
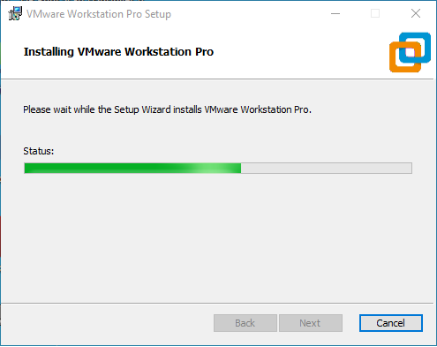
Step 7: Wait for the installation to complete;
Step 8: After installation, click “Finish” to start a trial. For long-term use, please purchase from the official website and enter the license key. You will then enter the license activation page, where you can enter your purchased license key.
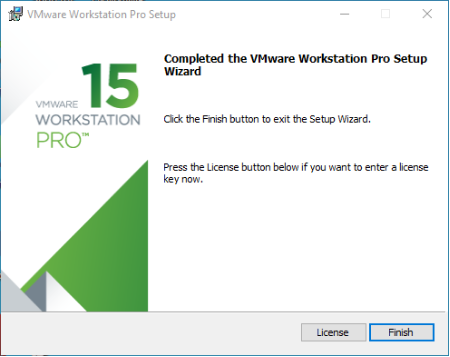
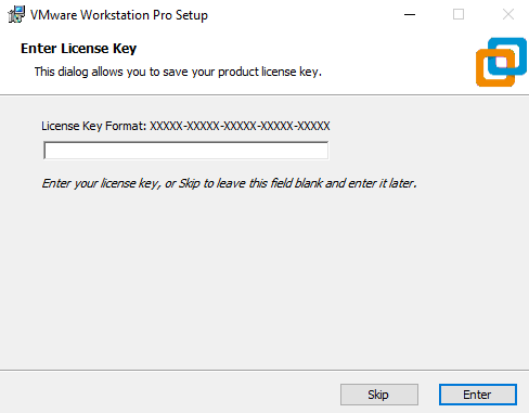
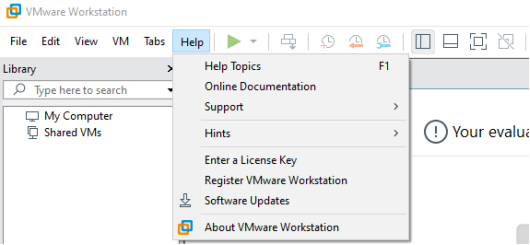
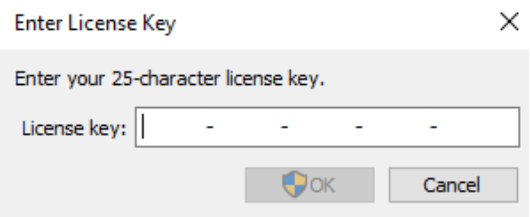
You can also click “Skip.” After completion, open the VMware software, click on “Help” in the top menu bar, and enter the license key in the pop-up window.
1.3 VMware Network Connection Method
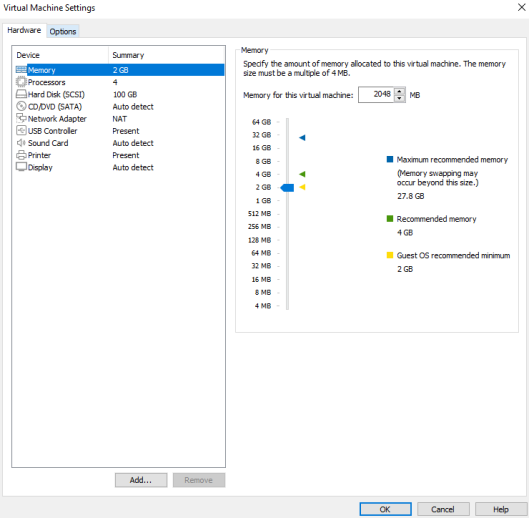
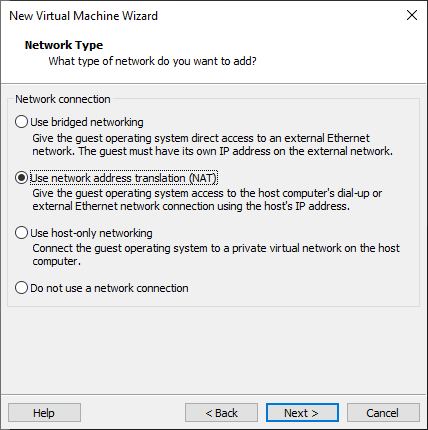
By default, after the virtual machine installation is complete, the network connection mode is set to NAT, as shown in the figure below, sharing an IP address with the host machine. This setting does not need to be changed when installing dependency packages, compiling code, etc.
In the virtual machine, when the VMware virtual network adapter is set to NAT mode, the network in the Ubuntu environment should be set to dynamic IP. In this mode, the virtual NAT device connects and communicates with the host’s network card for internet access. This is the most commonly used method for the virtual machine to access the external network.
2. Importing Forlinx Development Environment
Note:
It is recommended that beginners directly use the virtual machine environment pre-configured by Forlinx, which already has the cross-compiler and Qt environment installed. After reading this chapter, you can skip directly to “Chapter 4. Compilation”;
If you prefer to manually set up the development environment, you can skip this chapter and refer to “Chapter 3. Manually Setting Up the Development Environment”;
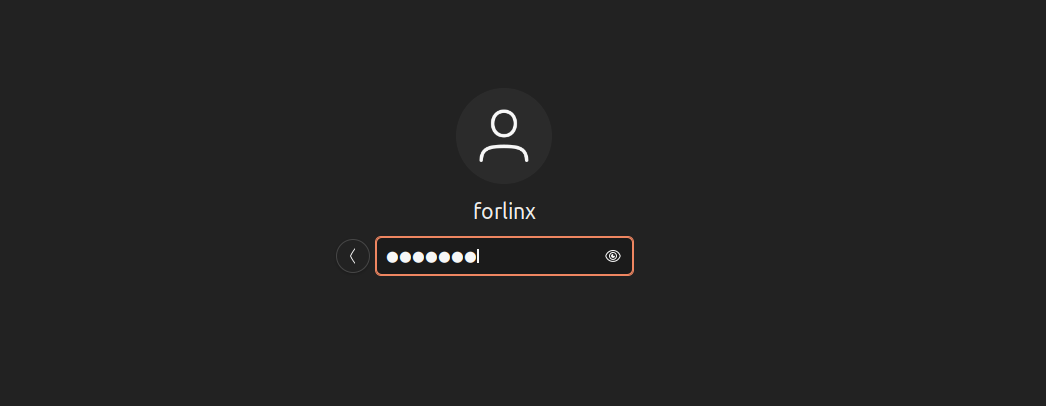
Development Environment Account: forlinx; password: forlinx.
Forlinx provides a pre-installed Ubuntu development environment that customers can open and use directly in VMware without needing to install additional software.
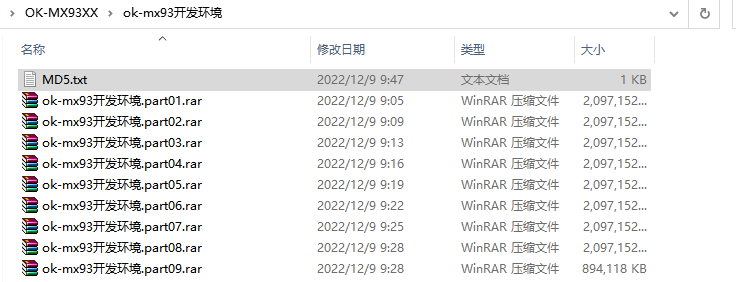
First, download the development environment provided by Forlinx. The development environment package includes an MD5 checksum file. After downloading the package, you should verify the integrity of the compressed file by performing an MD5 checksum check. You can either use an online MD5 verification tool or download a dedicated MD5 verification tool, depending on your preference. Compare the checksum that you generate with the one listed in the checksum file. If they match, the downloaded file is intact. If they do not match, the file may be corrupted, and you will need to download it again.
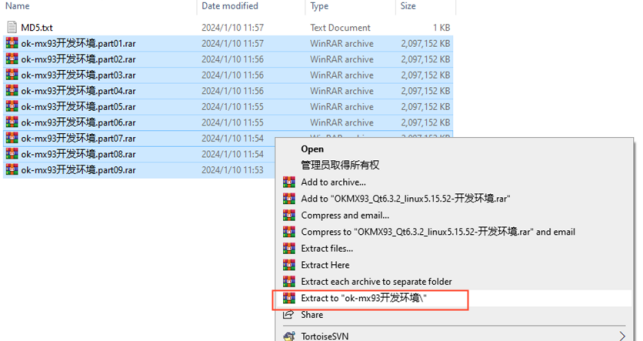
Select all compressed files, right-click, and choose “Extract to ok-mx93 development environment”.
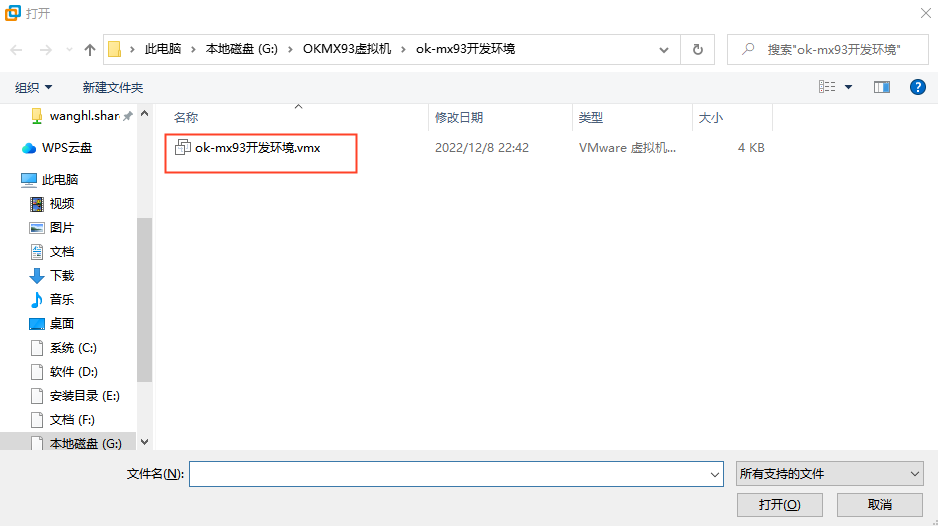
After extraction, locate the file ok-mx93 development environment.vmx inside the “ok-mx93 development environment” folder. This is the file to open in VMware.
Open the installed virtual machine software.
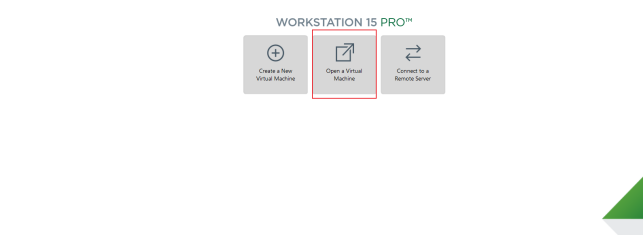
Select the directory containing the “ok-mx93 development environment” virtual machine files that were just extracted, then double-click to open the startup file:
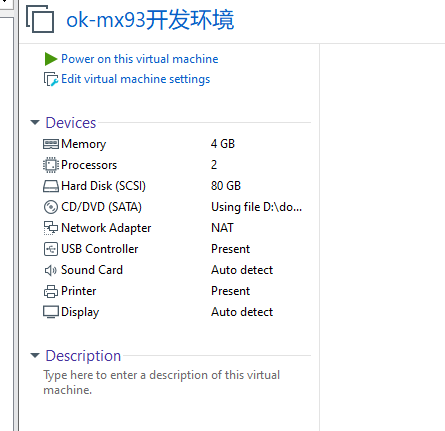
Once loading is complete, click “Start this virtual machine” to run it. Enter the system interface:
Development Environment Account: forlinx; password: forlinx:
You have now successfully entered the development environment provided by Forlinx. You can place the source code from the user data folder into the development environment to begin compilation and other operations. (Refer to 04_Linux Compilation Section for details.)
3. Manually Setting Up the Development Environment
Ubuntu is a Linux operating system distribution primarily focused on desktop applications. Ubuntu offers numerous advantages and has its own strengths compared to other versions of Linux distributions. First, the system installation is very straightforward, requiring minimal setup and fully comparable to Windows desktop systems.
Second, its graphical interface is user-friendly, incorporating commonly used shortcuts similar to those in Windows XP.
Additionally, during program installation and upgrades, the system can automatically install dependent packages over the network, eliminating the need to manually resolve complex dependency issues typical in Linux systems. Considering user habits and learning needs, choose Ubuntu Linux for this environment.
There are many versions of Linux desktop systems. Currently, all Linux experiments and source code operations in this manual are performed on the Ubuntu 22.04 system. Using other versions of Linux desktop systems may lead to issues related to the GCC compiler and library files. If you encounter similar problems, you can consult and search for solutions on the official forums of the Linux system distributor. For users unfamiliar with Linux, it is strongly recommended to use the method introduced by Forlinx.
Why install these components?
Because development work requires a Linux environment. Compiling Kernel source code, Qt applications, U-Boot, etc., cannot be completed in Windows and must be performed in a Linux environment. Considering that most users are accustomed to Windows environment, it is provided by using VMware software to mount Ubuntu virtual machine. Of course, you can also install Linux directly on your computer or server for development purposes.
The following describes the process of building a virtual machine.
Note: It is not recommended for beginners to build the system by themselves. It is recommended to use the existing virtual machine environment. This section can be skipped if there is no need to build the environment.
3.1 Installing an Ubuntu Virtual Machine
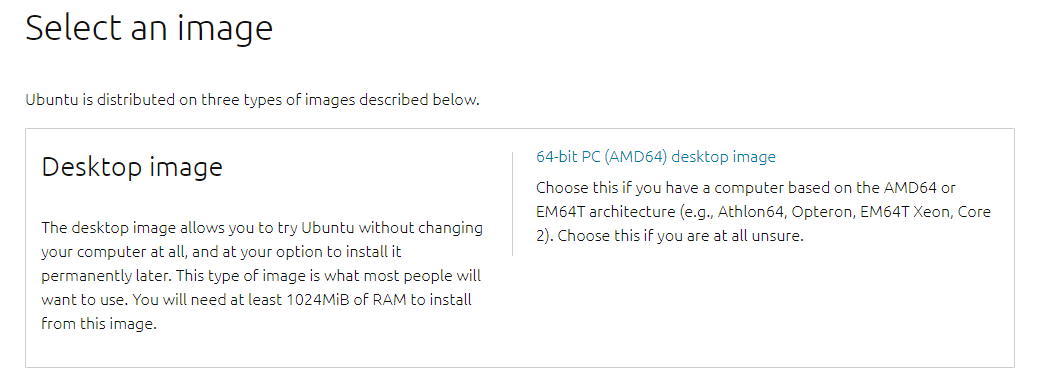
The installed Ubuntu version is 22.04, and all the introductions and development in this manual were carried out on Ubuntu 22.04. First, go to the Ubuntu official website to obtain the Ubuntu 22.04 64-bit image. The download address is: http://releases.ubuntu.com/22.04/
Download the “ubuntu-22.04.1-desktop-amd64.iso” version (the specific version to download can be based on your own needs; here we use version 22.04.1 as an example).
3.1.1 Installing the Ubuntu image on VMware
If you want to learn how to set up a virtual machine themselves, please install a new virtual machine. However, if there is no demand in this respect, it is recommended to download the built virtual machine, which can save time and avoid troublesome problems, because the process of building a virtual machine is cumbersome and troublesome.
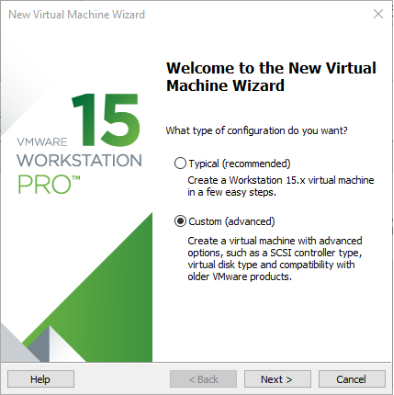
Step 1: Open the VMware software and click “Create a New Virtual Machine”. On the following screen, check “Custom (advanced)” and click “Next”:
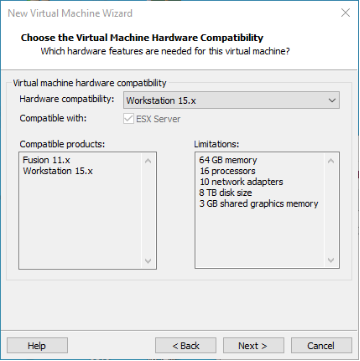
Step 2: Select the compatibility for the corresponding VMware version (you can view the version under Help -> About VMware Workstation). After confirming, click “Next”:
Choose “Installer disc image file (iso)” and click “Next”:

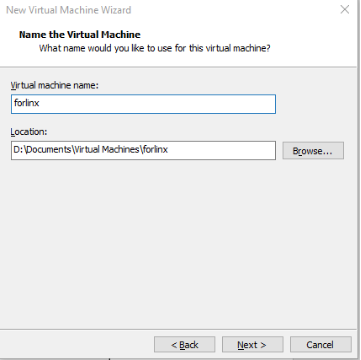
Enter the virtual machine name and configure the installation location, then click “Next”:
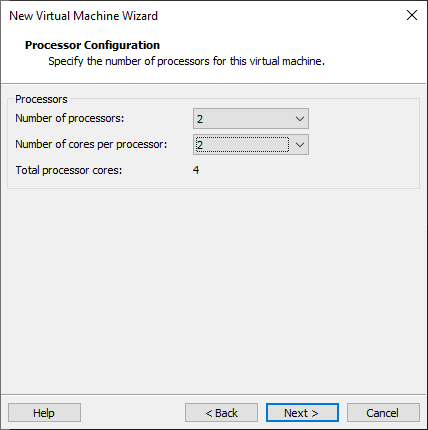
Configure the number of cores, then click “Next”:
Allocate the appropriate amount of memory, then select “Next”:
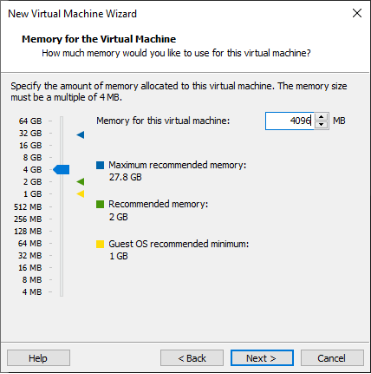
Set the network type, use the default NAT networking, and click “Next”. Subsequent steps remain at their default values until the disk capacity step is specified.
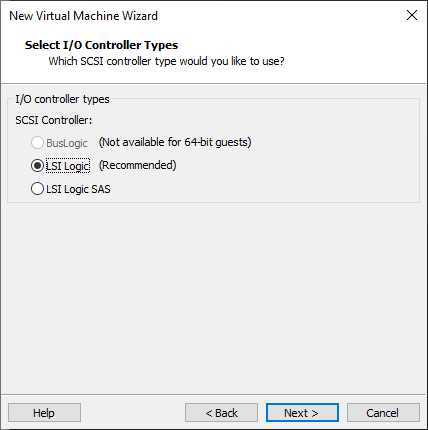
Use the recommended I/O controller and click “Next”:
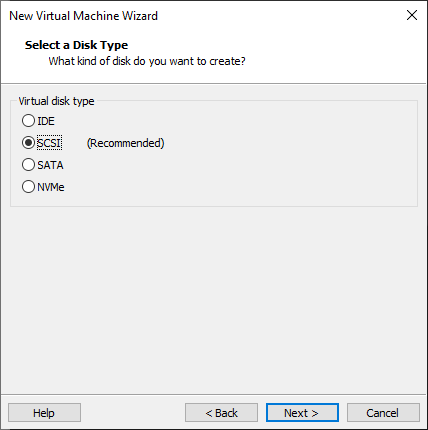
Use the recommended disk type and click “Next”:
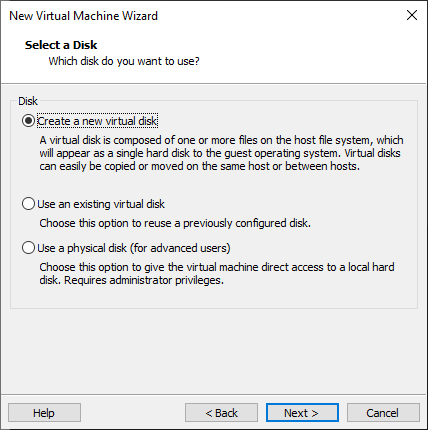
Use the default option, “Create a new virtual disk”, and click “Next”:
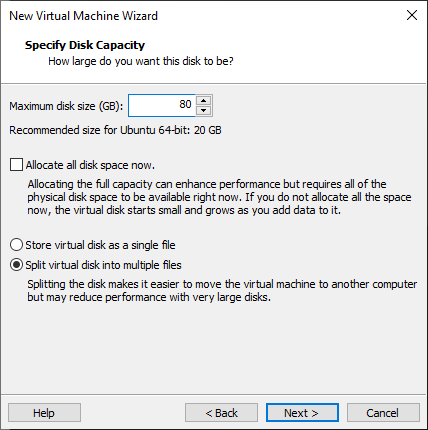
Allocate a disk size of 80GB and choose “Split virtual disk into multiple files”, then click “Next”:
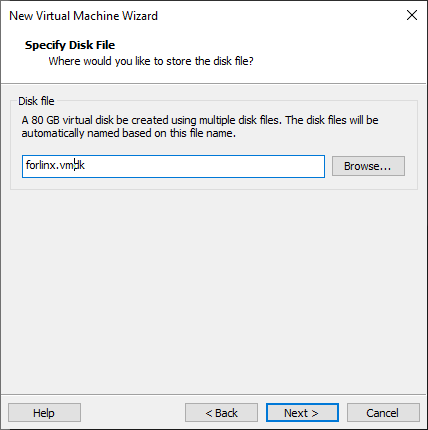
Use the default settings and click “Next”:
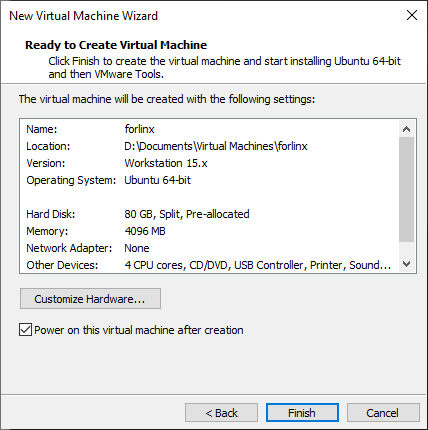
Click “Finish”:
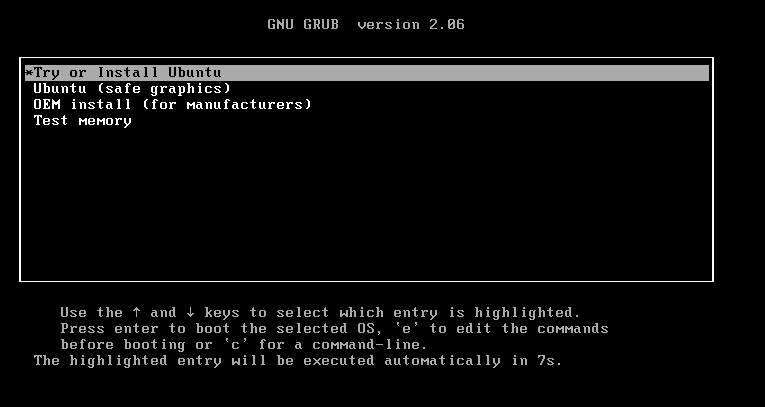
Once the virtual machine has booted up, select “Try to Install Ubuntu”.
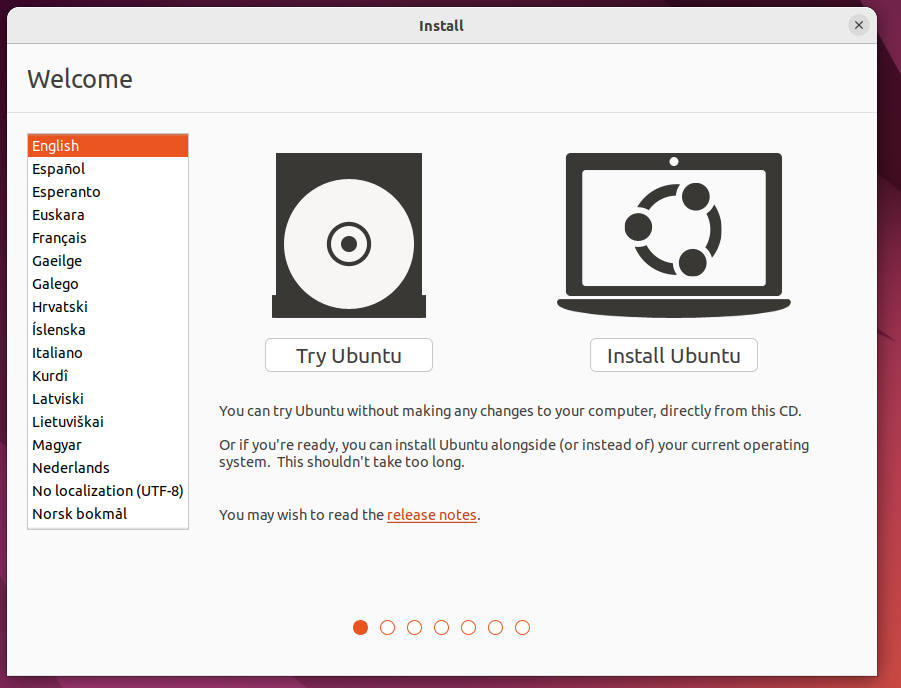
Select a language, then select “Install Ubuntu”.
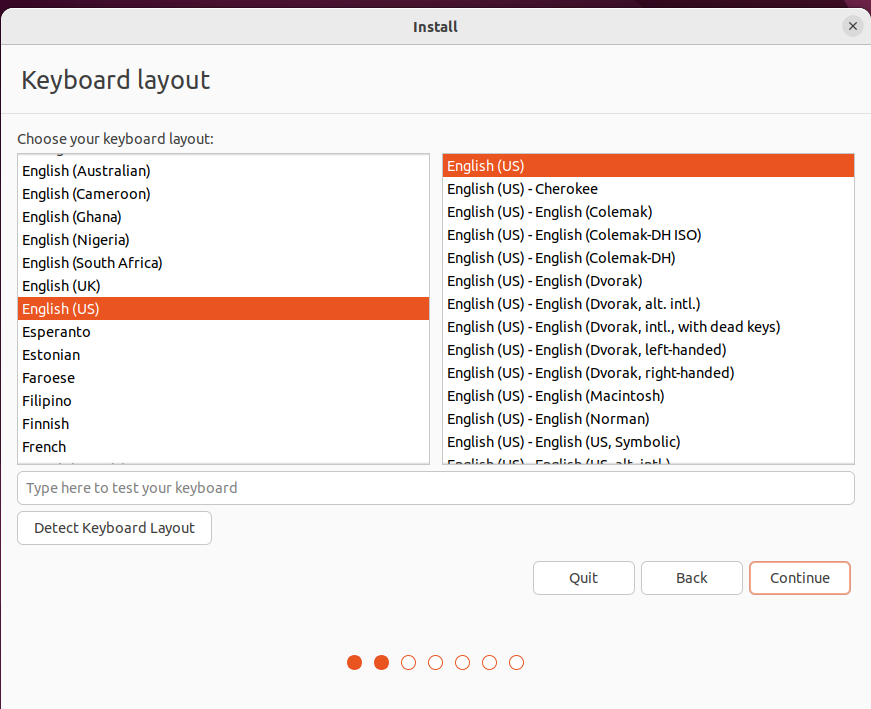
Select a keyboard layout.
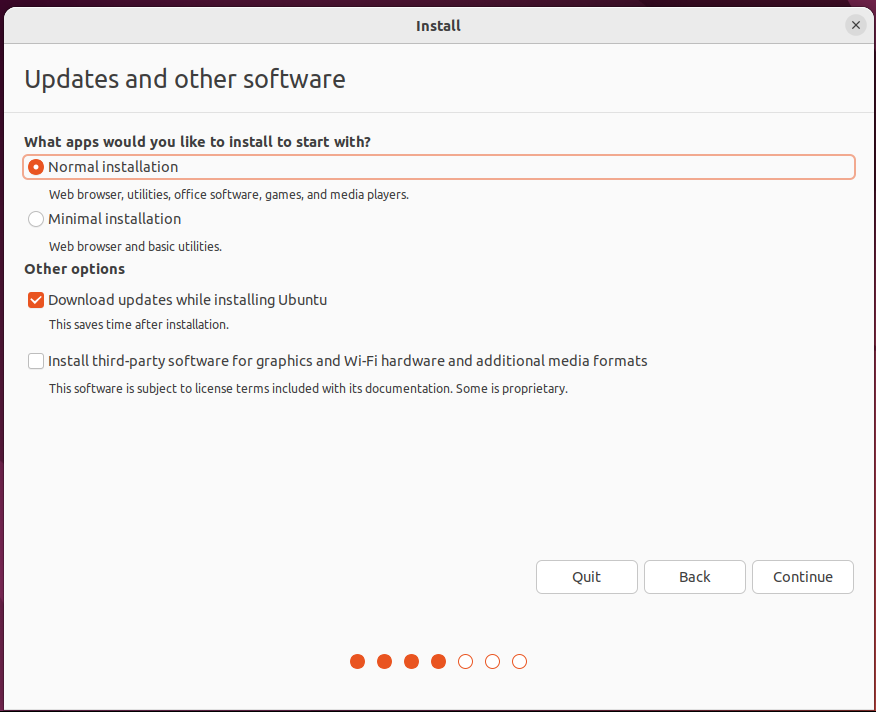
Select “Upgrade and install software”, leave the default settings as they are, then click “Continue”.
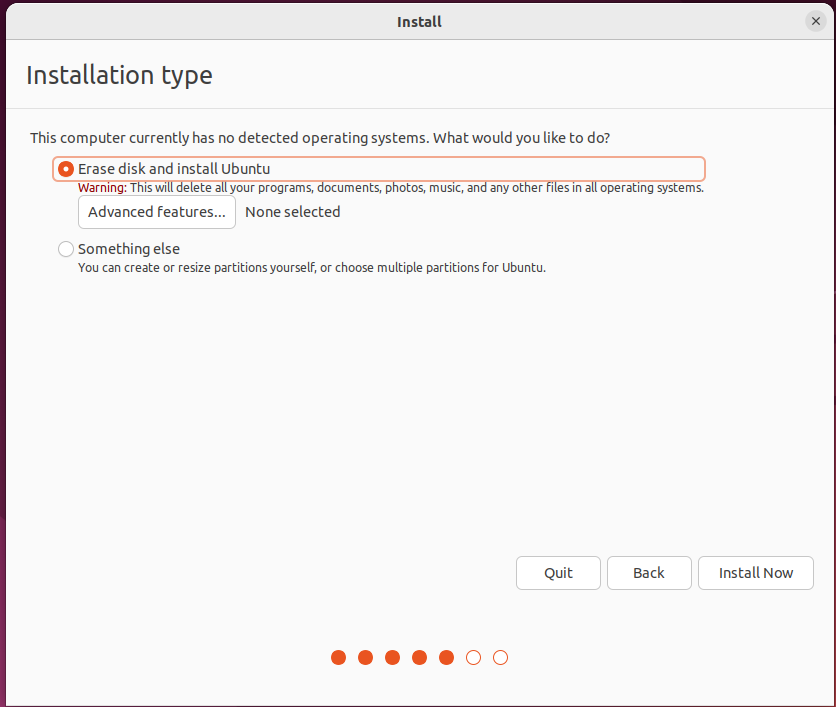
Select the installation method and hard drive partitions; the default settings are fine. Click “Install now” to continue.
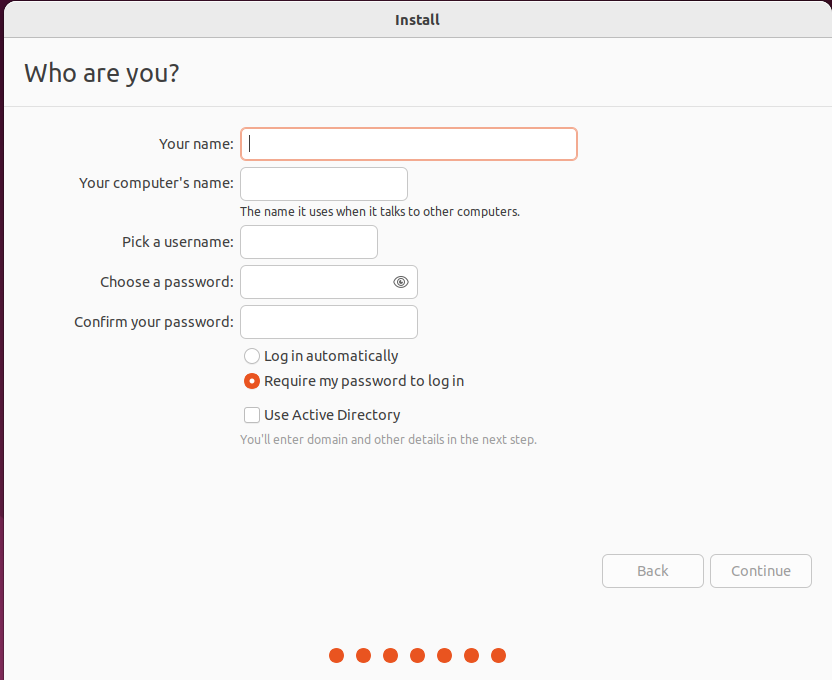
Enter account details.
The virtual machine will then begin installing the image; please wait patiently.
3.1 VMware Error Solutions
Error 1: Unable to connect to MKS: Too many socket connection attempts; giving up.
Solution: Right-click “My Computer”, select “Manage”, then go to “Services and Applications” and enable all services related to VMware. After the services start successfully, restart the virtual machine; or suspend the virtual machine first, then after the services start, resume the suspended virtual machine.
Error 2: Internal Error.
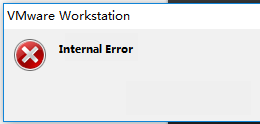
Solution: Refer to Error 1
Error 3: Unable to install the VMware Authorization Service (VMAuthdService)
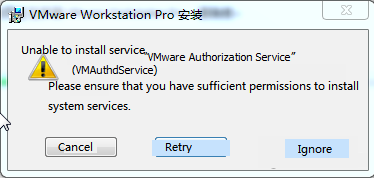
Solution:
win+R
Enter services.msc
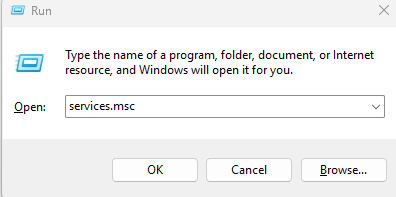
Then find the service and start it because this service is used for authorization and authentication to start and access virtual machines.
The WMI service must be started first
Error 4: Failed to install the hcmon driver
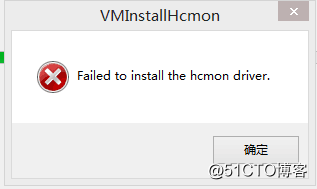
Solution: Delete C:\Windows\System32\drivers\hcmon.sys, then reinstall.
Error 5: Intel VT-x is disabled
Solution:
Enter the BIOS interface during startup (press F2 or F12);
Go to Configuration → Intel Virtual Technology → change “Disabled” to “Enabled” → save settings, exit and restart;
Reopen VMware and start the virtual machine.
If it still doesn’t work, turn off the firewall and restart the virtual machine. (May vary depending on the machine)
Error 6: The virtual machine appears to be in use… Take Ownership (T)
Solution:
Shut down the virtual machine;
Go to the virtual machine’s storage directory and delete the **.lck files (lck stands for lock files);
Open Windows Task Manager and end the VMware process;
Restart the virtual machine.
Error 7: Failed to lock the file
Solution:
Enter the virtual machine’s storage directory;
Delete the following files: .vmem.lck, .vmdk.lck, and *.vmx.lck;
Restart the virtual machine to access it normally.
Error 8: The virtual machine could not be started because there was not enough memory available on the host.
Solution:
The host does not have enough memory to meet the maximum requirements of the virtual machine image. Increase the virtual machine’s memory and restart it.
3.2 Installing Common Software in Ubuntu
3.2.1 Installing the VSCode Tool
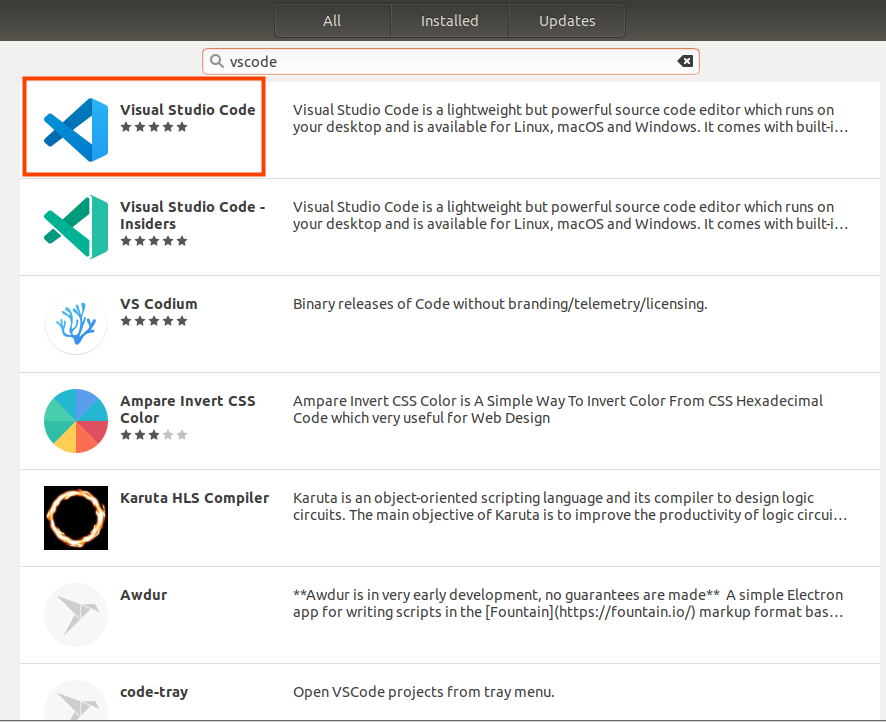
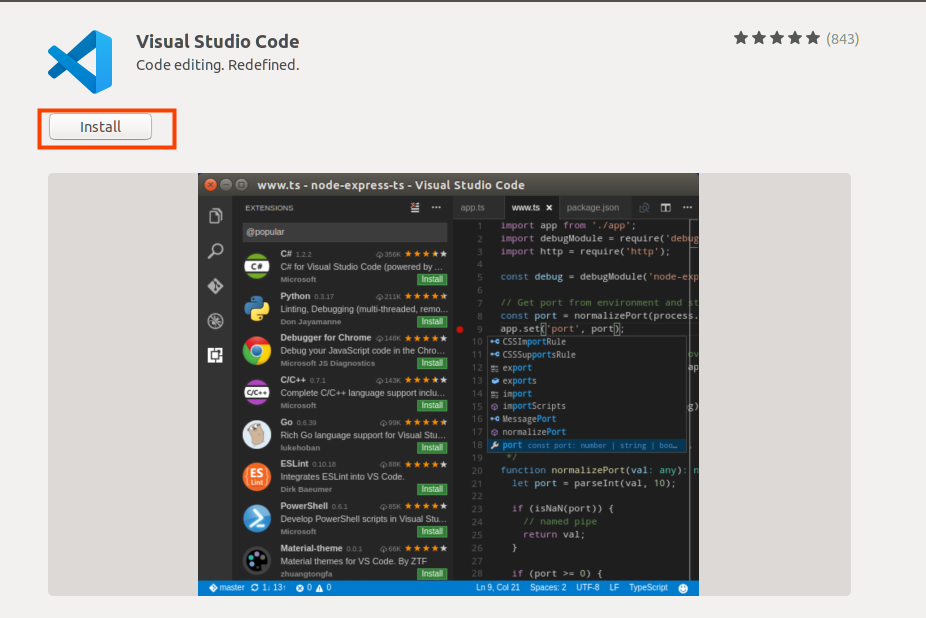
Click on the package-like icon on the left side of the desktop to see some tools. You can also search for the tool you want. For example, download the VSCode tool, which is very convenient for daily code writing.
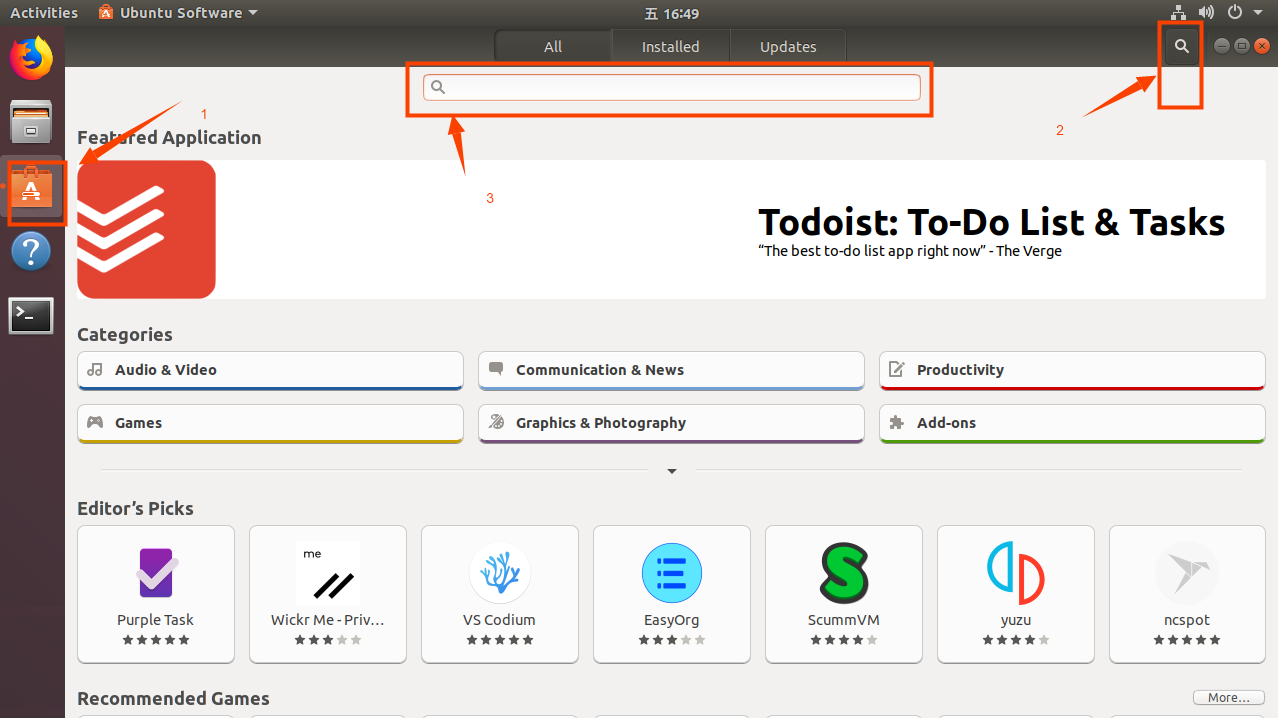
Search for the tool you need, click to view the details, click “Install” to download, wait for the download to complete and install automatically, then click “Launch” to run it.


3.2.2 Specifying a Download Source with the APT Command
The apt command is used to download and manage applications. APT uses a Client/Server (C/S) model, where our PC acts as the client and requests software from the server. Therefore, we need to know the server address, also known as the installation source or update source.
Solution:
The repository configuration file in Ubuntu 22.04 is located at /etc/apt/sources.list. To change the repository mirror, replace the corresponding URLs in this file using root privileges. Here is an example using AliSource:
To be on the safe side, you should back up the files you need to modify. Follow the steps below:
forlinx@ubuntu:~$ cp /etc/apt/sources.list /etc/apt/sources.list.bak
Add the following entry at the beginning of the /etc/apt/sources.list file:
deb http://mirrors.aliyun.com/ubuntu/ bionic main restricted universe multiverse
deb http://mirrors.aliyun.com/ubuntu/ bionic-security main restricted universe multiverse
deb http://mirrors.aliyun.com/ubuntu/ bionic-updates main restricted universe multiverse
deb http://mirrors.aliyun.com/ubuntu/ bionic-proposed main restricted universe multiverse
deb http://mirrors.aliyun.com/ubuntu/ bionic-backports main restricted universe multiverse
deb-src http://mirrors.aliyun.com/ubuntu/ bionic main restricted universe multiverse
deb-src http://mirrors.aliyun.com/ubuntu/ bionic-security main restricted universe multiverse
deb-src http://mirrors.aliyun.com/ubuntu/ bionic-updates main restricted universe multiverse
deb-src http://mirrors.aliyun.com/ubuntu/ bionic-proposed main restricted universe multiverse
deb-src http://mirrors.aliyun.com/ubuntu/ bionic-backports main restricted universe multiverse
Save and exit. Execute the following command in the terminal:
forlinx@ubuntu:~$ sudo apt-get update
forlinx@ubuntu:~$ sudo apt-get upgrade
3.2.3 Installing NFS
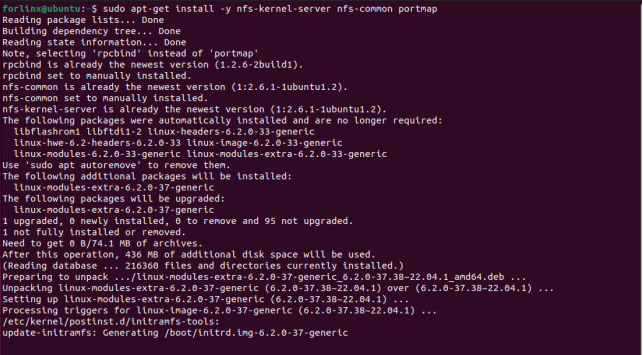
Execute the following command in the terminal:
forlinx@ubuntu:~$ sudo apt-get install -y nfs-kernel-server nfs-common portmap
3.2.4 FTP the Server
Once FTP is installed, you can transfer files between a Windows system and an Ubuntu system. Due to compatibility issues between Ubuntu 22.04 and VMware Tools, this method is used for file transfer.
FTP Installation
forlinx@ubuntu:~$ sudo apt-get install vsftpd
Once the installation is complete, use the vim command to open /etc/vsftpd.conf and enable the following two configuration options
local_enable=YES
write_enable=YES
After saving and exiting, restart the FTP service.
forlinx@ubuntu:~$ sudo /etc/init.d/vsftpd restart
Client Connections on Windows
Path: OK-MX9352-UP4 (Linux) User Data/Tools/FileZilla_3.24.0.0_win64-setup.exe
Note: Please be ensure that the Windows and Ubuntu systems can communicate with each other over the network; otherwise, you will need to configure the virtual machine’s network settings.
Once installation is complete, open the client to see the following screen:
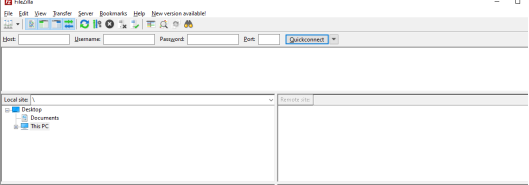
Click “File” – “Site Management”.
Enter the IP address on the host running Ubuntu; username: forlinx, password: forlinx. Click “Connect.”
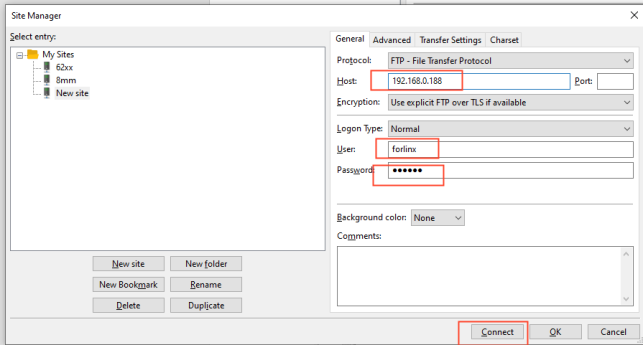
Once connected, Ubuntu’s directory structure will be displayed, allowing file transfers between systems.
3.3 Cross-Compilation Environment Setup
This involves installing the cross-compilation toolchain and configuring environment variables.
3.3.1 Installing the Cross-Compilation Toolchain
Ensure stable internet connectivity during installation.
Step 1: Create a working directory in Ubuntu;
forlinx@ubuntu:~$ mkdir -p /home/forlinx/work
Step 2: Copy the installation script to this directory;
Path: OK-MX9352-UP4 (Linux) user materials/Linux/Source code/In the compressed package OKMX93-linux-sdk.tar.bz2/tools/fsl-imx-xwayland-glibc-x86_64-meta-toolchain-qt6-armv8a-imx93evk-toolchain-6.1-mickledore.sh.
Step 3: Navigate to the /home/forlinx/work directory:
forlinx@ubuntu:~$ cd /home/forlinx/work
Step 4: Install the environment package by executing the following command:
forlinx@ubuntu:~$ ./fsl-imx-xwayland-glibc-x86_64-meta-toolchain-qt6-armv8a-imx93evk-toolchain-6.1-mickledore.sh
NXP i.MX Release Distro SDK installer version 6.1-mickledore ============================================================
Enter target directory for SDK (default: /opt/fsl-imx-xwayland/6.1-mickledore): You are about to install the SDK to "/opt/fsl-imx-xwayland/6.1-mickledore". Proceed [Y/n]? Y
[sudo] forlinx password: forlinx                                            //Enter the password for the "forlinx" user
Extracting
SDK.............................................................................................................................................................................................................................................................................................................................................................................................................done
Setting it up...done
SDK has been successfully set up and is ready to be used.
Each time you wish to use the SDK in a new shell session, you need to source the environment setup script e.g.
 $ . /opt/fsl-imx-xwayland/6.1-mickledore/environment-setup-armv8a-poky-linux
The following printout confirms that the installation was successful:
SDK has been successfully set up and is ready to be used.
Step 5: Modify the parameter settings.
forlinx@ubuntu:~$ sudo vi /opt/fsl-imx-xwayland/6.1-mickledore/sysroots/armv8a-poky-linux/usr/include/
QtGui/qtgui-config.h

Modify to

3.3.2 Setting Environment Variables
Note:
After setting the environment variables, you do not need to reconfigure them for subsequent compilations as long as the same terminal session is used;
However, if a new terminal is opened or the user account is switched, the environment variables must be set again before compilation.
Setting the compilation environment is mainly to specify the target architecture and cross-compilation tool chain, as well as the path of some libraries used in the compilation process. Use the following command to configure (. There is a space behind):
forlinx@ubuntu:~$ . /opt/fsl-imx-xwayland/6.1-mickledore/environment-setup-armv8a-poky-linux
Verify whether the setup was successful with the command:
forlinx@ubuntu:~$  $CC -v
Using built-in specs.
COLLECT_GCC=aarch64-poky-linux-gcc
[…]
Thread model: posix
Supported LTO compression algorithms: zlib zstd
gcc version 12.3.0 (GCC)                           //Check the GCC version information to confirm that the configuration was successful
3.4 QT Environment Setup and Usage
Qt Creator is a cross‑platform Integrated Development Environment (IDE) for the QT application framework, offering advanced C++ code editing, project management, and build tools. Qt Creator 8.0.2 is selected for this installation.
The SDK provided by Forlinx includes a complete Qt 6.3.2 development environment (including Qt Quick).
3.4.1 Qt Creator Environment Setup
Before compilation, execute the following commands to install the necessary toolkits.
forlinx@ubuntu:~$ sudo apt-get update
forlinx@ubuntu:~$ sudo apt-get upgrade
forlinx@ubuntu:~$ sudo apt-get install openssh-server vim git fakeroot make automake autoconf libtool libssl-dev bc dosfstools mtools parted iproute2 gcc kmod flex bison libxcb-xinerama0 gawk
Path: OK-MX9352-UP4 (Linux) User Data\Tools\qt-creator-opensource-linux-x86_64-8.0.2.run Copy qt-creator-opensource-linux-x86_64-8.0.2.run to any directory within the current user’s home directory, then run:
forlinx@ubuntu:~/ok-mx93$ chmod 777 ./qt-creator-opensource-linux-x86_64-8.0.2.run
forlinx@ubuntu:~/ok-mx93$ ./qt-creator-opensource-linux-x86_64-8.0.2.run
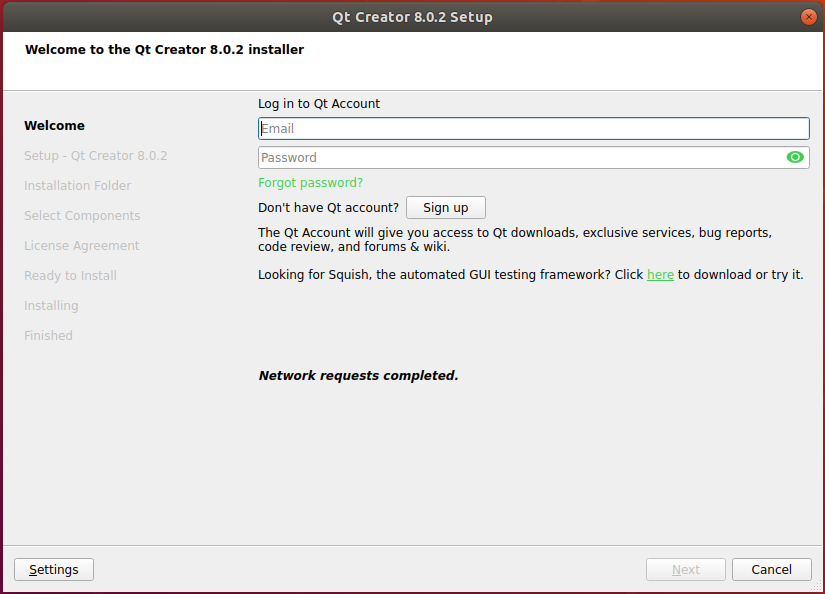
The following screen will appear. Enter your Qt account details and click “Next” to proceed to the next step:
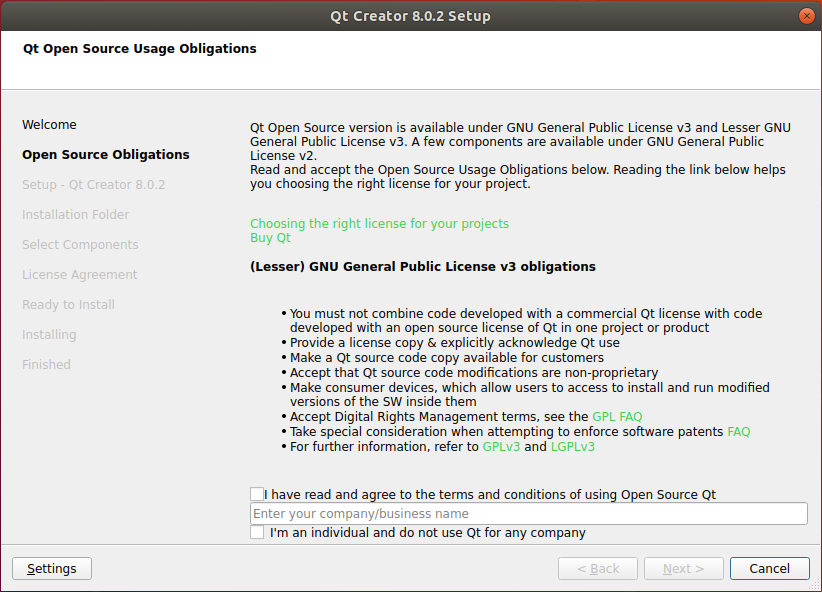
Agree to the terms, then click “Next” to proceed to the next step:
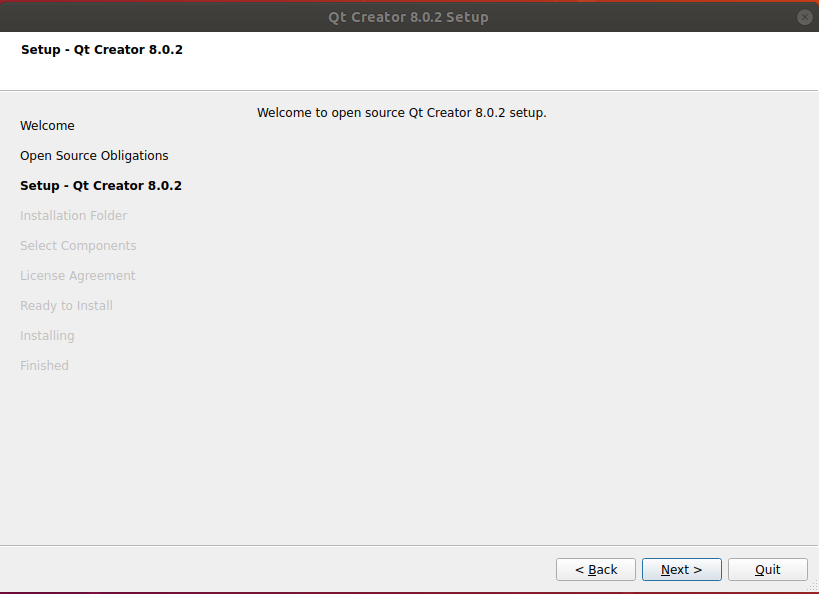
Click “Next”:
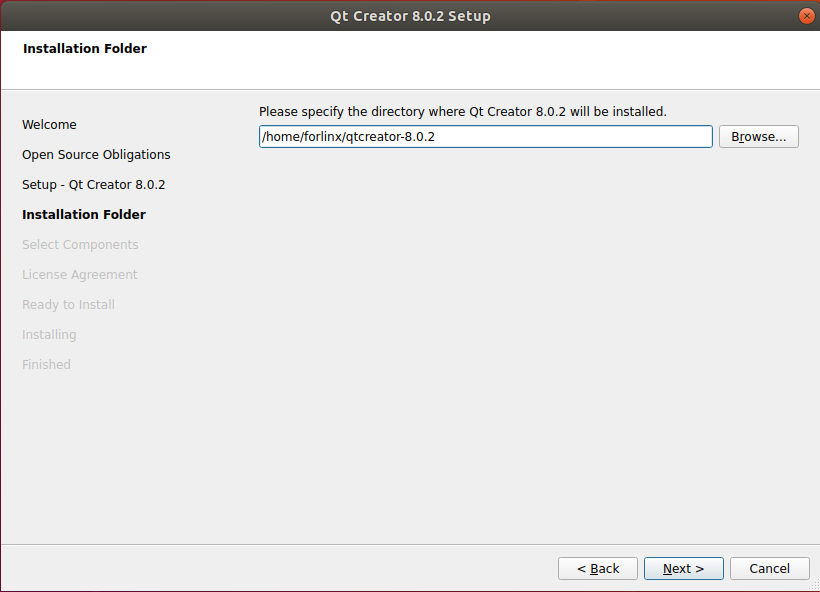
In the following screen, click “Browse …” Select the installation path of Qtcreator, and then click “Next” to enter the next step:
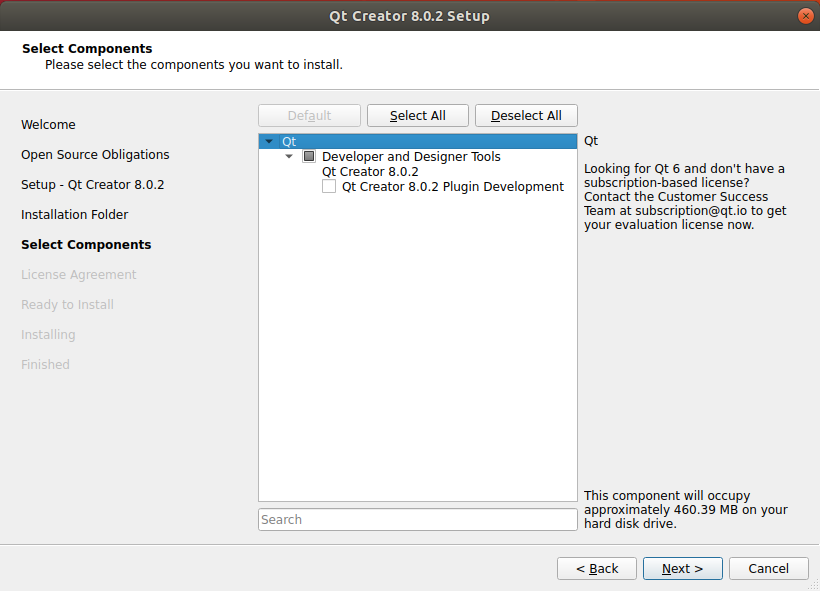
Click “Next”:
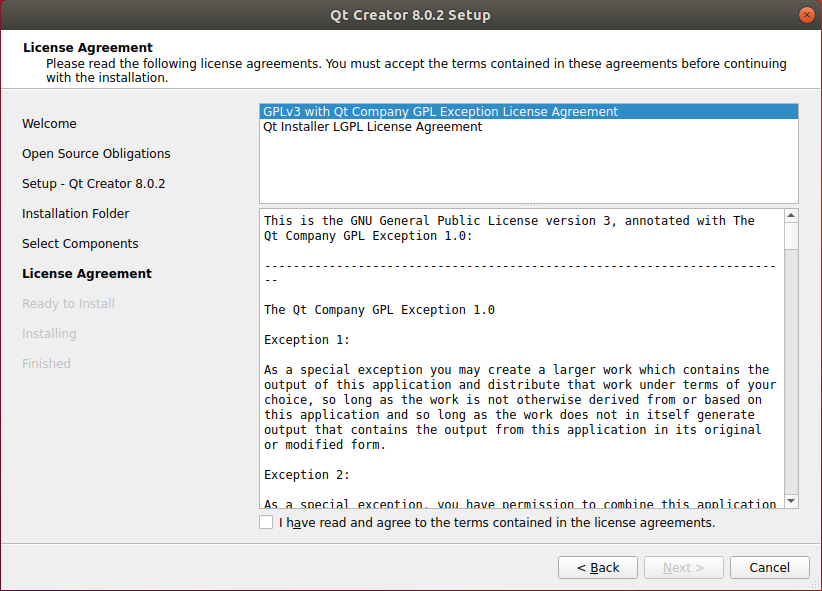
Agree to the license agreement and click “Next”:
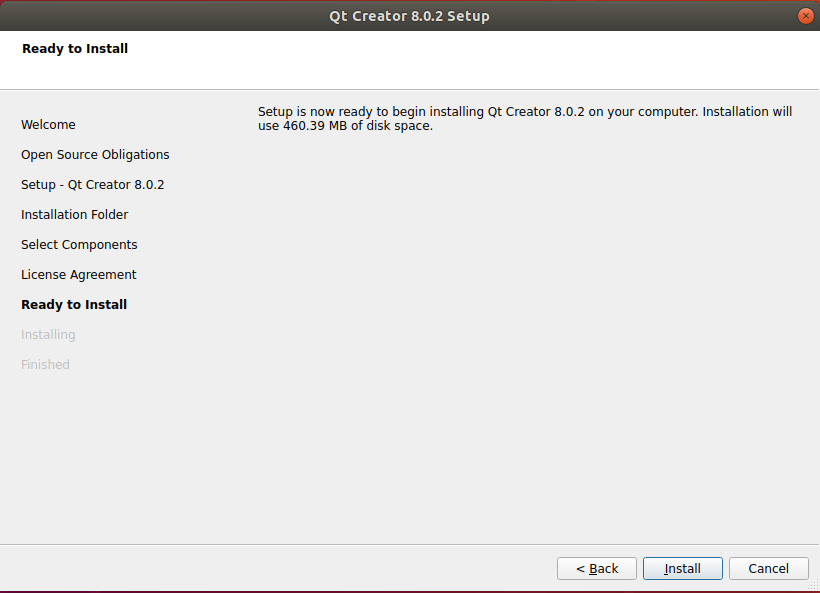
Click “Install”:
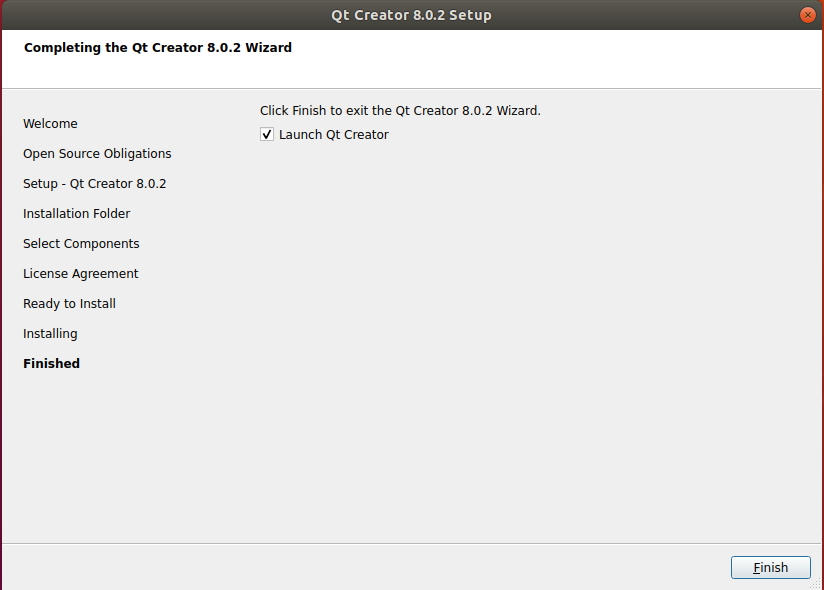
After the installation is completed, the following interface will be displayed. Uncheck the option “Launch Qt Creator” “and click “ Finish” to complete the installation of Qt Creator:
Navigate to the actual installation directory of Qt Creator:
/home/forlinx/qtcreator-8.0.2/Tools/QtCreator/bin/
forlinx@ubuntu:~$ cd /home/forlinx/qtcreator-8.0.2//bin/
Start Qt Creator:
forlinx@ubuntu: ~/qtcreator-8.0.2/bin $ sudo ./qtcreator
[sudo] password for forlinx: forlinx                         //Enter the password for the "forlinx" user; no display
QStandardPaths: XDG_RUNTIME_DIR not set, defaulting to '/tmp/runtime-root'
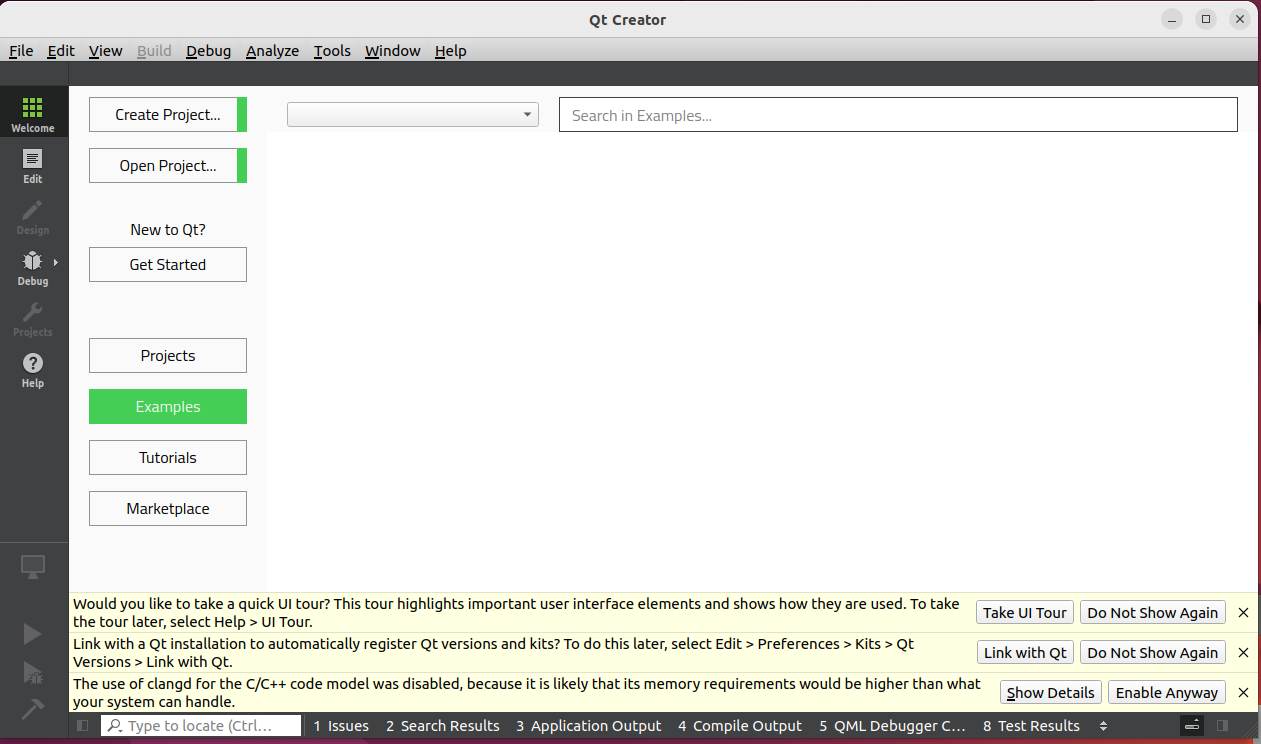
The Qt Creator tool interface will appear. Qt Creator installation is now complete.
3.4.2 Environment Configuration
Note:
You must first configure the environment variables (see “3.3.2 Setting Environment Variables”) before using the command to open Qt Creator;
Open Qt Creator from the path where you have actually installed it.
Qt is a cross-platform graphics development library that supports multiple operating systems. Before compilation, you need to configure the Qt Creator environment for cross-compilation.
3.4.2.1 Configuring the Cross-compiler
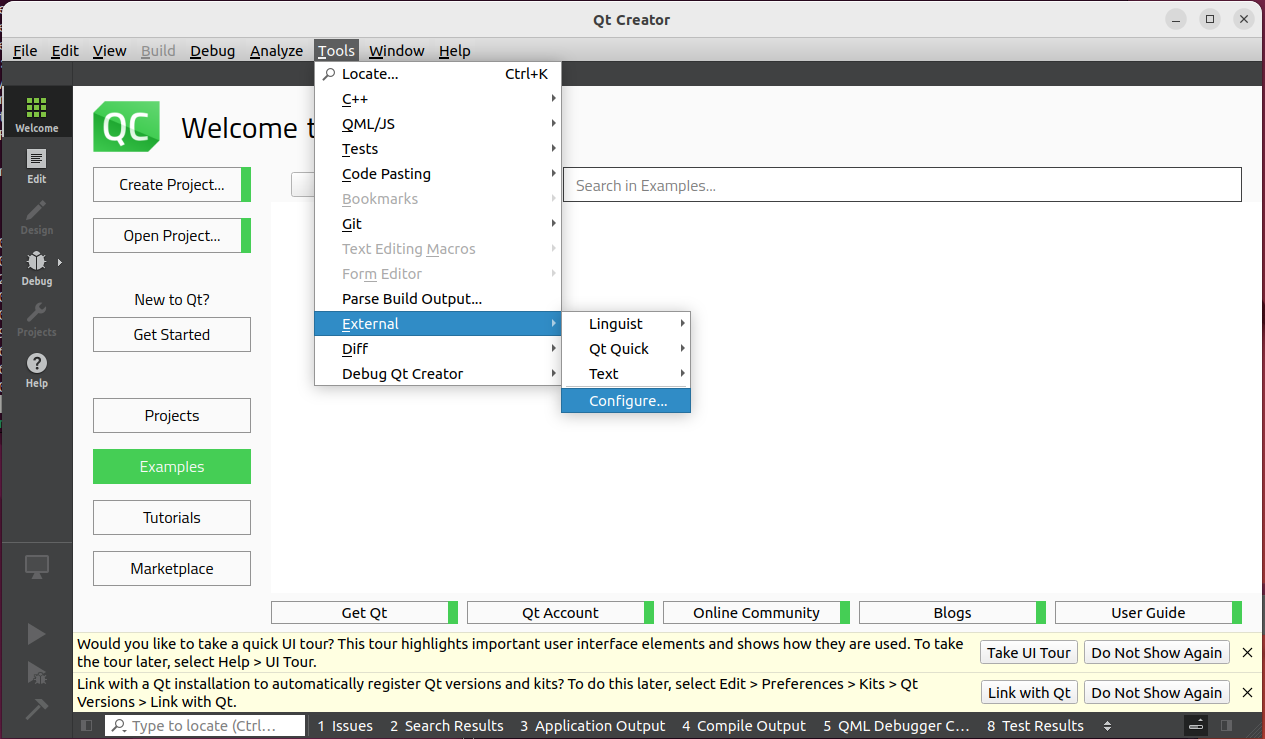
Launch Qt Creator; the Qt development interface will appear. Click Tools → External → Configure:
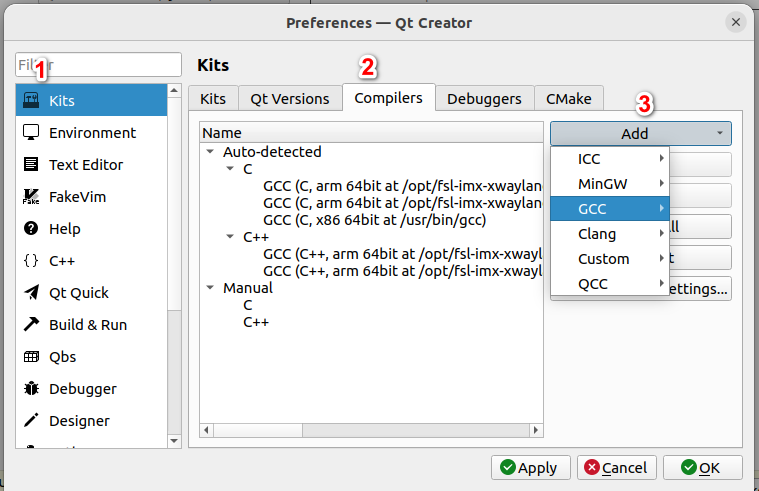
Go to the Preferences screen, click “Kits” on the left, then click the “Compilers” tab at the top centre, and click “Add → GCC → C++” on the right, as shown in the figure:
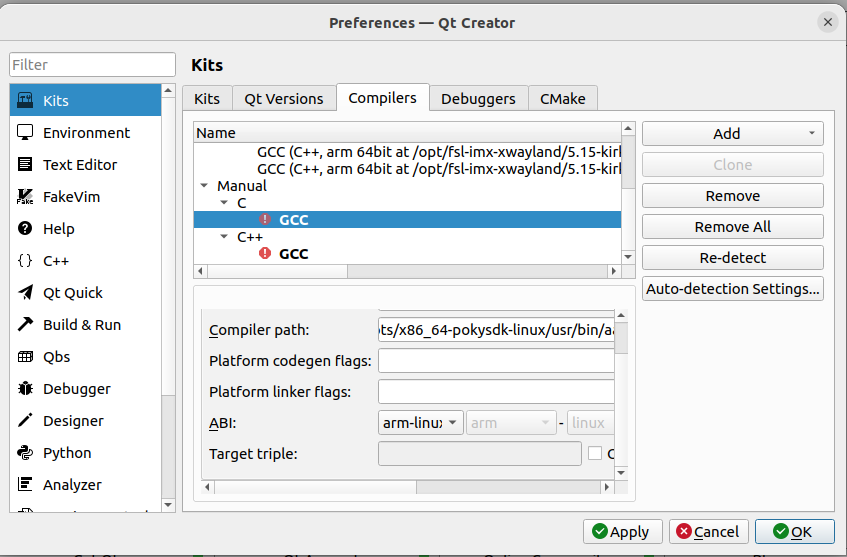
The following window will pop up. For the “Compiler path” option, click “Browser,” navigate to the SDK package and locate aarch64-poky-linux-g++ in /opt/fsl-imx-xwayland/6.1-mickledore/sysroots/x86_64-pokysdk-linux/usr/bin/aarch64-poky-linux/. Select it, click “Open,” and change the “Name” to “G++”.
Similarly, add the GCC compiler by clicking “Add -> GCC -> C” on the right, as shown in the figure:
In the SDK package, locate aarch64-poky-linux-gcc in /opt/fsl-imx-xwayland/6.1-mickledore/sysroots/x86_64-pokysdk-linux/usr/bin/aarch64-poky-linux/, select it, click “Open,” and set the “Name” to “GCC”.
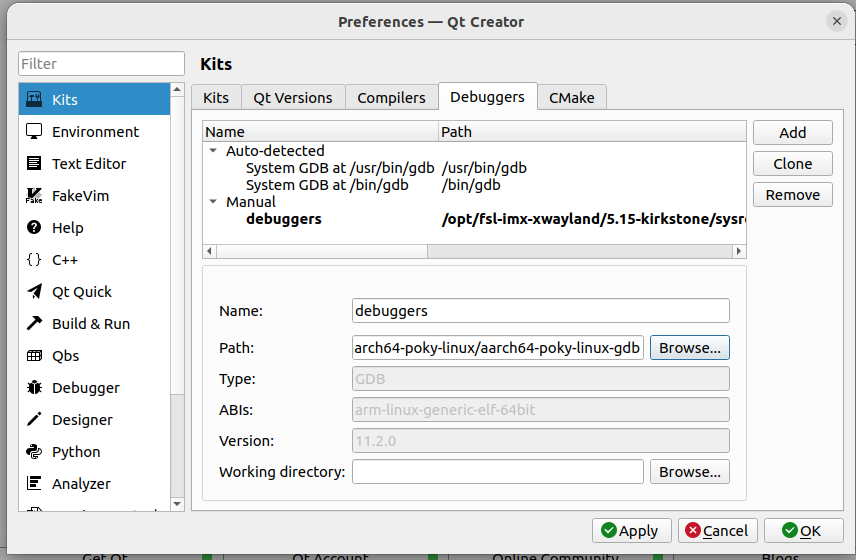
3.4.2.2 Debugger Configuration
Click the “Debuggers” tab to open the following interface, then click “Add”:
In the pop-up window, navigate to the SDK package and find aarch64-poky-linux-gdb in /opt/fsl-imx-xwayland/6.1-mickledore/sysroots/x86_64-pokysdk-linux/usr/bin/aarch64-poky-linux/. Select it, click “Open,” and rename the “Name” to “debuggers”.
3.4.2.3 Qt Version Configuration
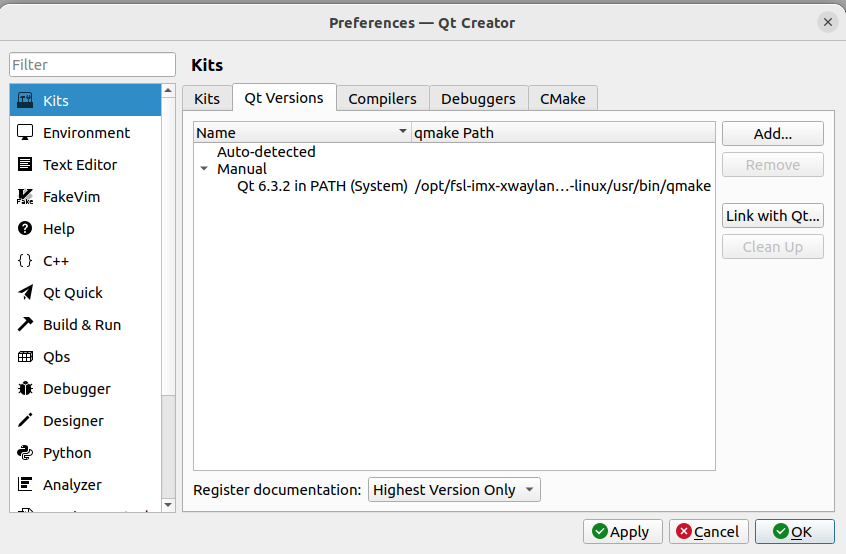
Click the “Qt Versions” tab and then click “Add”:
Find qmake in the directory /opt/fsl-imx-xwayland/6.1-mickledore/sysroots/x86_64-pokysdk-linux/usr/bin, select it, and click “Open”. After adding, the following interface will be displayed. Click “Apply”.
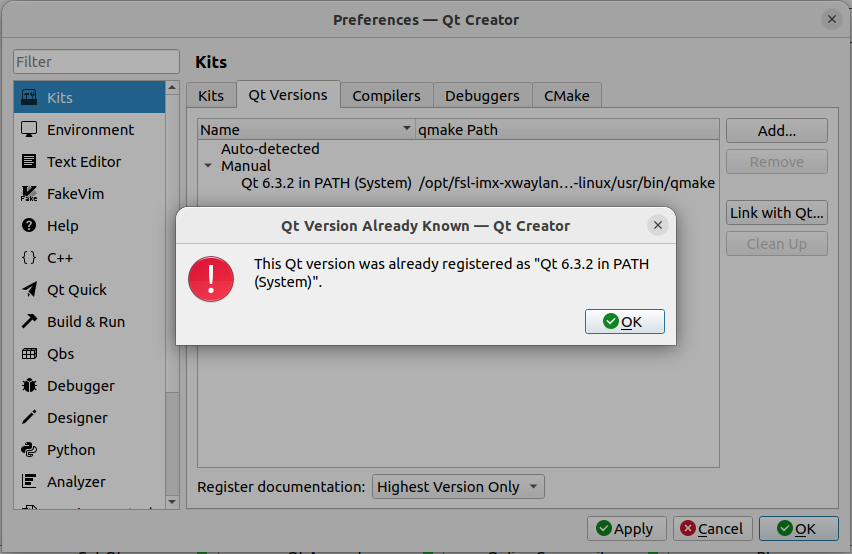
If the environment variables are correctly configured, they will appear as configured, as shown below:
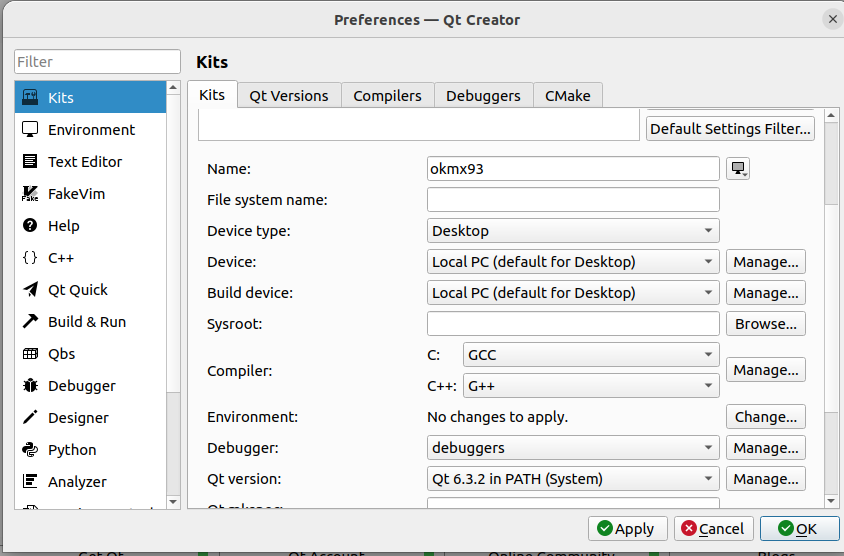
3.4.2.4 Kits Configuration
Click the “Kits” tab, click “Add” on the right to add a new Kit. Modify the contents according to the figure below and click “Apply”
4. Linux Compilation
Note: The development environment provided by Forlinx by default already includes the cross-compilation toolchain and Qt Creator desktop application. Reinstallation is usually unnecessary.
Version Specifications:
Recommended Development OS: Ubuntu 22.04 64-bit
Cross-toolchain: aarch64-poky-linux-gcc 12.3.0
Bootloader Version for Development Board: u-boot2023.04
Kernel Version for Development Board: Linux 6.1.36
Qt version ported to the development board: Qt 6.5.0
4.1 Preparation Before Compilation
The Forlinx OK-MX93-linux-sdk includes the cross-compilation toolchain, Linux kernel source code, filesystem, test program source code, and various tools.
Before compilation, execute the following commands to install the necessary toolkits.
forlinx@ubuntu:~$ sudo apt-get update
forlinx@ubuntu:~$ sudo apt-get upgrade
forlinx@ubuntu:~$ sudo apt-get install openssh-server vim git fakeroot make automake autoconf libtool libssl-dev bc dosfstools mtools parted iproute2 gcc kmod flex bison libxcb-xinerama0 gawk
4.2 Installing the Source Package
Note: Due to compatibility issues between Ubuntu 22.04 and VMware, files cannot be directly copied from Windows to the Ubuntu system. It is recommended to use FTP (refer to Section 3.2.4 FTP Server) or shared folders.
Path: OK-MX9352-UP4 (Linux) User Materials\Linux\Source Code\OKMX93-linux-sdk.tar.bz2
The source package contains all the source code required for the Forlinx OK-MX9352-UP4 platform, including Linux kernel source code, test program source code, filesystem, etc., on which secondary development can be performed.
Create a Working Directory in Ubuntu:
forlinx@ubuntu:~$ mkdir -p /home/forlinx/ok-mx93
Copy OKMX93-linux-sdk.tar.bz2 to the virtual machine directory /home/forlinx/ok-mx93/ and extract it:
Due to compatibility issues between Ubuntu 22.04 and VMware, direct file copying from Windows to Ubuntu is not recommended. Please use FTP or shared folders instead.
forlinx@ubuntu:~/ok-mx93$ md5sum OKMX93-linux-sdk.tar.bz
e8505d7aa1cff443f46989fe72454872  OKMX93-linux-sdk.tar.bz
// Due to differences in versions and packaging times, the MD5 value of the SDK package may vary. Please determine whether the SDK package is complete based on the MD5 value in the sdk_md5sum.txt file in the SDK you received.
forlinx@ubuntu:~/ok-mx93$ tar -xvf OKMX93-linux-sdk.tar.bz2
forlinx@ubuntu:~/ok-mx93 $ ls
OKMX93-linux-sdk  OKMX93-linux-sdk.tar.bz         // The file was successfully extracted.
4.3 Compilation Test
Note:
After extracting the SDK source code for the first time, a full compilation of the source code is required;
Once the full compilation is complete, separate compilation can be performed as needed.
4.3.1 QT Configuration
This step is used to modify the qtgui-config.h file.
Step 1: Navigate to the /home/forlinx/ok-mx93/OKMX93-linux-sdk/ directory:
forlinx@ubuntu:~$ cd /home/forlinx/ok-mx93/OKMX93-linux-sdk
Step 2: Configuring QT:
forlinx@ubuntu:~/ok-mx93/OKMX93-linux-sdk$ sudo ./environment-setup-aarch64-toolchain
4.3.2 Setting Environment Variables
Note:
After setting the environment variables, you do not need to reconfigure them for subsequent compilations as long as the same terminal session is used;
However, if a new terminal is opened or the user account is switched, the environment variables must be set again before compilation.
Setting environment variables is mainly to specify the target architecture and cross-compilation tool chain, as well as the path of some libraries used in the compilation process. Use the following command to configure (. There is a space behind):
forlinx@ubuntu:~/ok-mx93/OKMX93-linux-sdk $ . environment-setup-aarch64-toolchain
Enter the following command to check whether the installation was successful:
forlinx@ubuntu:~/ok-mx93/OKMX93-linux-sdk $ $CC -v
Using built-in specs.
COLLECT_GCC=aarch64-poky-linux-gcc
[…]
Thread model: posix
Supported LTO compression algorithms: zlib zstd
gcc version 12.3.0 (GCC)                           //Check the gcc version information to confirm that the installation was successful
If the above message appears, this indicates that the installation was successful.
4.3.3 Full Compilation Test
Note:
Environment variables need to be re-executed whenever you restart the virtual machine or open a new shell window;
If the file system size exceeds the preset capacity after adding files to the file system and the compilation reports an error, you can increase the preset capacity.
Execute the following commands to enter the SDK directory and set the environment variables:
forlinx@ubuntu:~/ok-mx93$ cd OKMX93-linux-sdk
forlinx@ubuntu:~/ok-mx93/OKMX93-linux-sdk$  . environment-setup-aarch64-toolchain
Display the commands supported by the compilation tool:
forlinx@ubuntu:~/ok-mx93/OKMX93-linux-sdk $./build.sh help
Usage:
    ./build.sh all              - build all
    ./build.sh uboot            - only build uboot
    ./build.sh kernel           - only build kernel
    ./build.sh extra            - only build extra
    ./build.sh ramdisk          - only build ramdisk
    ./build.sh mkfs             - only build mkfs
    ./build.sh apps             - only build apps
    ./build.sh clean            - clean all
    ./build.sh clean_uboot      - clean uboot
    ./build.sh clean_kernel     - clean kernel
    ./build.sh clean_apps       - clean apps
    ./build.sh help             - print usage
    . environment-setup-aarch64-toolchain                  - set env
Execute the full compilation command:
forlinx@ubuntu:~/ok-mx93/OKMX93-linux-sdk $ ./build.sh all
Once compilation is complete, image files will be generated in the “images” directory:
forlinx@ubuntu:~/ok-mx93/OKMX93-linux-sdk/images$ tree
├── Image
├── ok-mx93-linux-fs.sdcard.aa
├── ok-mx93-linux-fs.sdcard.ab
├── OK-MX93-S.dtb
├── ok-mx93-uboot.bin
├── ramdisk.img.gz
└── uboot
    ├── bl31.bin
    ├── fw_printenv
    ├── u-boot.bin
    └── u-boot-spl.bin

1 directory, 10 files
The following is an explanation of the files in the images directory:
File |
Description |
|---|---|
Image |
Kernel image. |
OK-MX93-C.dtb |
Kernel device tree. |
ok-mx93-linux-fs.sdcard.a* |
File system package. |
ramdisk.img.gz |
Virtual file system for burning. |
ok-mx93-uboot.bin |
uboot image |
uboot* |
Intermediate files generated by U-Boot compilation |
4.3.4 Compiling the Kernel Separately
The kernel source code for OK-MX9352-UP4 is located in the OKMX93-linux-sdk/OKMX93-linux-kernel directory.
Execute the following commands to enter the SDK directory and set the environment variables:
forlinx@ubuntu:~/ok-mx93$ cd OKMX93-linux-sdk/
forlinx@ubuntu:~/ok-mx93/OKMX93-linux-sdk$ . environment-setup-aarch64-toolchain
Execute the command to compile the kernel separately:
forlinx@ubuntu:~/ok-mx93/OKMX93-linux-sdk$./build.sh kernel
Note: During compilation, if there is no .config file in the kernel root directory, the system will automatically copy the configuration file arch/arm64/configs/OK-MX93-S_defconfig, rename it to .config, and place it in the kernel root directory.
After compiling the kernel, a new Image and multiple device tree files will be generated in the images directory.
Execute the command to clean up the compilation, which is used to clean up the files generated by compiling the Linux kernel:
forlinx@ubuntu:~/ok-mx93/OKMX93-linux-sdk$ ./build.sh clean_kernel
If the following information appears, it indicates that the cleanup is completed:
Note: The kernel image and device tree in the images directory will not be cleaned up by this command.
  CLEAN   arch/arm64/crypto
  CLEAN   arch/arm64/kernel/vdso
  CLEAN   arch/arm64/kernel
  CLEAN   certs
  CLEAN   drivers/firmware/efi/libstub
  CLEAN   drivers/scsi
  CLEAN   drivers/tty/vt
  CLEAN   drivers/video/logo
  CLEAN   kernel
  CLEAN   lib/raid6
  CLEAN   lib
  CLEAN   net/wireless
  CLEAN   usr
  CLEAN   arch/arm64/boot
  CLEAN   vmlinux.symvers modules-only.symvers modules.builtin modules.builtin.modinfo
  CLEAN   scripts/basic
  CLEAN   scripts/dtc
  CLEAN   scripts/genksyms
  CLEAN   scripts/kconfig
  CLEAN   scripts/mod
  CLEAN   scripts
  CLEAN   include/config include/generated arch/arm64/include/generated .config .version Module.symvers
/home/forlinx/ok-mx93/OK-MX93-linux-sdk
4.3.5 Compiling the Ramdisk
Execute the following commands to enter the SDK directory and set the environment variables:
forlinx@ubuntu:~/ok-mx93$ cd OKMX93-linux-sdk/
forlinx@ubuntu:~/ok-mx93/OKMX93-linux-sdk$ . environment-setup-aarch64-toolchain
Execute the following command to compile the ramdisk:
forlinx@ubuntu:~/ok-mx93/OKMX93-linux-sdk$ ./build.sh ramdisk
After compilation is completed, the ramdisk.img.gz file will be generated in the OK-MX93-linux-sdk/image directory.
The source code for the ramdisk is located at OK-MX93-linux-sdk/tools/ramdisk. If you need to add, delete or modify files in the ramdisk, you can do so in this directory.
4.3.6 Compiling Command-Line and Qt Test Programs
The command-line and Qt test programs are stored in the OKMX93-linux-sdk/appsrc/forlinx-cmd directory and the OK-MX93-linux-sdk/appsrc/forlinx-qt directory.
Execute the following commands to enter the SDK directory and set the environment variables:
forlinx@ubuntu:~/ok-mx93$ cd OKMX93-linux-sdk/
forlinx@ubuntu:~/ok-mx93/OKMX93-linux-sdk$ . environment-setup-aarch64-toolchain
Execute the following command to compile the command-line test programme:
forlinx@ubuntu:~/ok-mx93/OKMX93-linux-sdk$ ./build.sh apps
After executing the compilation command, the command-line and Qt test programs will be installed in the OKMX93-linux-sdk/OKMX93-linux-fs/rootfs/usr/bin/ directory.
You can use the following command to check if the timestamp is new:
forlinx@ubuntu:~/ok-mx93/OKMX93-linux-sdk/OKMX93-linux-fs/rootfs$ ls -la usr/bin/ |grep fltest*
-rwxr-xr-x  1 root root      678 Nov 21 12:06 fltest_hostapd.sh
-rwxr-xr-x  1 root root      477 Nov 21 12:10 fltest_memory_bandwidth.sh
-rwxr-xr-x  1 root root    39160 Dec  1 12:41 fltest_qt_4g
-rwxr-xr-x  1 root root    80792 Dec  1 12:41 fltest_qt_audiorecorder
-rwxr-xr-x  1 root root    31080 Dec  1 12:41 fltest_qt_backlight
-rwxr-xr-x  1 root root    76472 Dec  1 12:41 fltest_qt_camera
-rwxr-xr-x  1 root root   180552 Dec  1 12:41 fltest_qt_musicplayer
-rwxr-xr-x  1 root root    84664 Dec  1 12:41 fltest_qt_network
-rwxr-xr-x  1 root root    39160 Dec  1 12:41 fltest_qt_pingtest
-rwxr-xr-x  1 root root    35064 Dec  1 12:41 fltest_qt_rtc
-rwxr-xr-x  1 root root   170792 Dec  1 12:41 fltest_qt_terminal
-rwxr-xr-x  1 root root    39272 Dec  1 12:41 fltest_qt_ubootmenu
-rwxr-xr-x  1 root root    30968 Dec  1 12:41 fltest_qt_watchdog
-rwxr-xr-x  1 root root    47352 Dec  1 12:41 fltest_qt_wifi
-rwxr-xr-x  1 root root      552 Dec  1 12:41 fltest_quectel.sh
-rwxr-xr-x  1 root root    27592 Dec  1 12:41 fltest_uarttest
-rwxr-xr-x  1 root root    26048 Dec  1 12:41 fltest_watchdog
-rwxr-xr-x  1 root root     1612 Nov 21 12:06 fltest_wifi.sh
4.3.7 Compiling the File System
After adding the environment variables, execute the following command to generate the file system.
forlinx@ubuntu:~/ok-mx93/OKMX93-linux-sdk$ ./build.sh mkfs
The compiled file system will be stored in the OKMX93-linux-sdk/image directory, named ok-mx93-linux-fs.sdcard.a*, and can be flashed to the eMMC.
If you need to modify the contents of the file system, you can edit the source files for the file system in the OKMX93-linux-sdk/OKMX93-linux-fs/rootfs directory.
4.3.8 Uninstalling the SDK
Execute the command to clean up the compilation, which is used to clean up all the files generated by compiling the SDK.
Note: As U-Boot is not open source, this command will not delete the U-Boot image files (ok-mx93-uboot.bin, uboot\) in the images directory.
forlinx@ubuntu:~/ok-mx93/OKMX93-linux-sdk$ ./build.sh clean
4.4 Application Compilation and Running
4.4.1 Command-Line Applications Compilation and Operation
Note: The following operations assume that the cross-compiler has been installed via the SDK package and the environment variables have been set up properly.
This section uses the watchdog test program. By default, the program is copied to the /home/forlinx/ok-mx93 directory.
Execute the environment variables and use the cd command to enter the watchdog application source directory.
forlinx@ubuntu:~$ cd ok-mx93/OKMX93-linux-sdk
forlinx@ubuntu:~/ok-mx93/OKMX93-linux-sdk $ . environment-setup-aarch64-toolchain
forlinx@ubuntu:~$ cd /home/forlinx/ok-mx93/OKMX93-linux-sdk/appsrc/forlinx-cmd/watchdog
Cross-compile using $CC. After setting the environment variables, $CC points to the GCC cross-compiler. You can check the configuration in the environment variable setup script.
forlinx@ubuntu:~/ok-mx93/OKMX93-linux-sdk/appsrc/forlinx-cmd/watchdog# make
forlinx@ubuntu:~/ok-mx93/OKMX93-linux-sdk/appsrc/forlinx-cmd/watchdog# ls
fltest_watchdog  Makefile  watchdog.c watchdog.o
Use the file command to check the generated file information.
forlinx@ubuntu:~/ok-mx93/OKMX93-linux-sdk/appsrc/forlinx-cmd/watchdog# file fltest_watchdog
Results:
fltest_watchdog: ELF 64-bit LSB pie executable, ARM aarch64, version 1 (SYSV), dynamically linked, interpreter /lib/ld-linux-aarch64.so.1, BuildID[sha1]=1e1c1bce33a17d00eafa65954e371eab681f62bb, for GNU/Linux 3.14.0, with debug_info, not stripped
The result will show that a 64-bit ARM file is generated.
Copy the compiled fltest_watchdog binary to the board via a USB drive, for example, to the /usr/bin path, and then run the test.
Use the cd command to navigate to the /usr/bin/ directory on the development board.
root@ok-mx93:~# cd /usr/bin/
Copy the compiled fltest_watchdog program from the USB drive’s mount path to the current directory.
root@ok-mx93:/usr/bin/# cp /run/media/sda1/fltest_watchdog ./
Grant execute permissions to the program and run it.
root@ok-mx93:/usr/bin/# chmod 777 fltest_watchdog	       //Set executable permissions for the programme
root@ok-mx93:/usr/bin/# ./fltest_watchdog		                           //Run the programme
Refer to the “Watchdog Test” chapter in the software user manual for testing instructions.
4.4.2 QT Applications Compilation and Operation
Note: The following operations assume the cross-compiler is installed and environment variables are set.
4.4.2.1 Manually Compiling Qt Applications
Method 1: Compile using qmake via command line.
Set the compilation environment variables.
forlinx@ubuntu:~$ . ok-mx93/OKMX93-linux-sdk/environment-setup-aarch64-toolchain
Using Folinx provided Qt official serial port test program as an example to demonstrate command-line Qt program compilation:
forlinx@ubuntu:~$ cd /home/forlinx/ok-mx93/OKMX93-linux-sdk/appsrc/forlinx-qt/fltest_qt_watchdog
forlinx@ubuntu:~/ok-mx93/OKMX93-linux-sdk/appsrc/forlinx-qt/fltest_qt_watchdog$ qmake
forlinx@ubuntu:~/ok-mx93/OKMX93-linux-sdk/appsrc/forlinx-qt/fltest_qt_watchdog$ make
Method 2: Compile using qmake invoked by Qt Creator.
For how to use Qt Creator, see section 4.4.2.2. Navigate to the /home/forlinx/ok-mx93/qtcreator-8.0.2/Tools/QtCreator/bin directory:
forlinx@ubuntu:~$ cd /home/forlinx/ok-mx93/qtcreator-8.0.2/bin
Start Qt Creator:
forlinx@ubuntu: ~/ok-mx93/qtcreator-8.0.2//bin $ sudo ./qtcreator
[sudo] password for forlinx:                               //Enter the password for the "forlinx" user; no characters will be displayed as you type.
Click on File -> Open File or Project in Qt Creator. A window will pop up. Select /home/forlinx/ok-mx93/OKMX93-linux-sdk/appsrc/forlinx-qt/fltest_qt_backlight/fltest_qt_backlight.pro, then click Open. The Configure Project window will appear. Select the previously configured okmx93 kit as shown below:
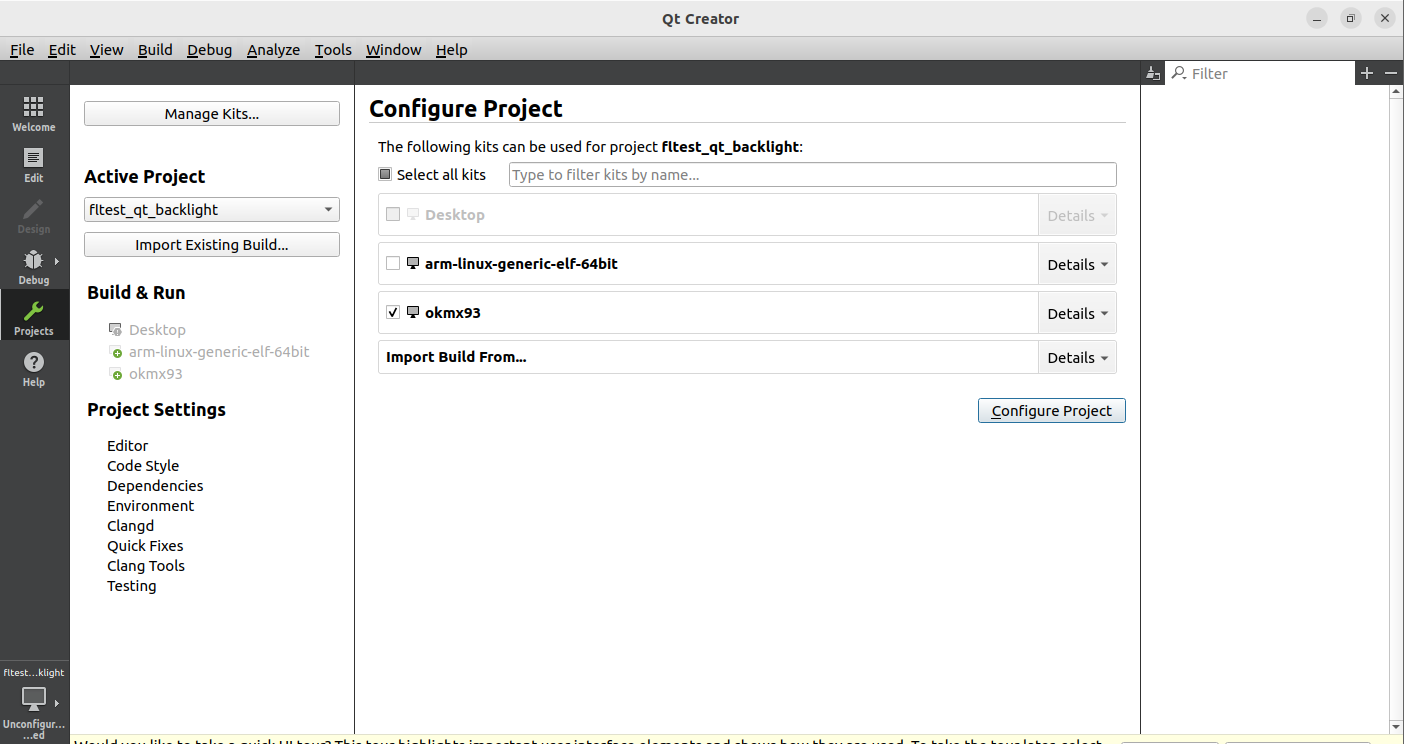
Then click Configure Project. The interface will then appear as follows:
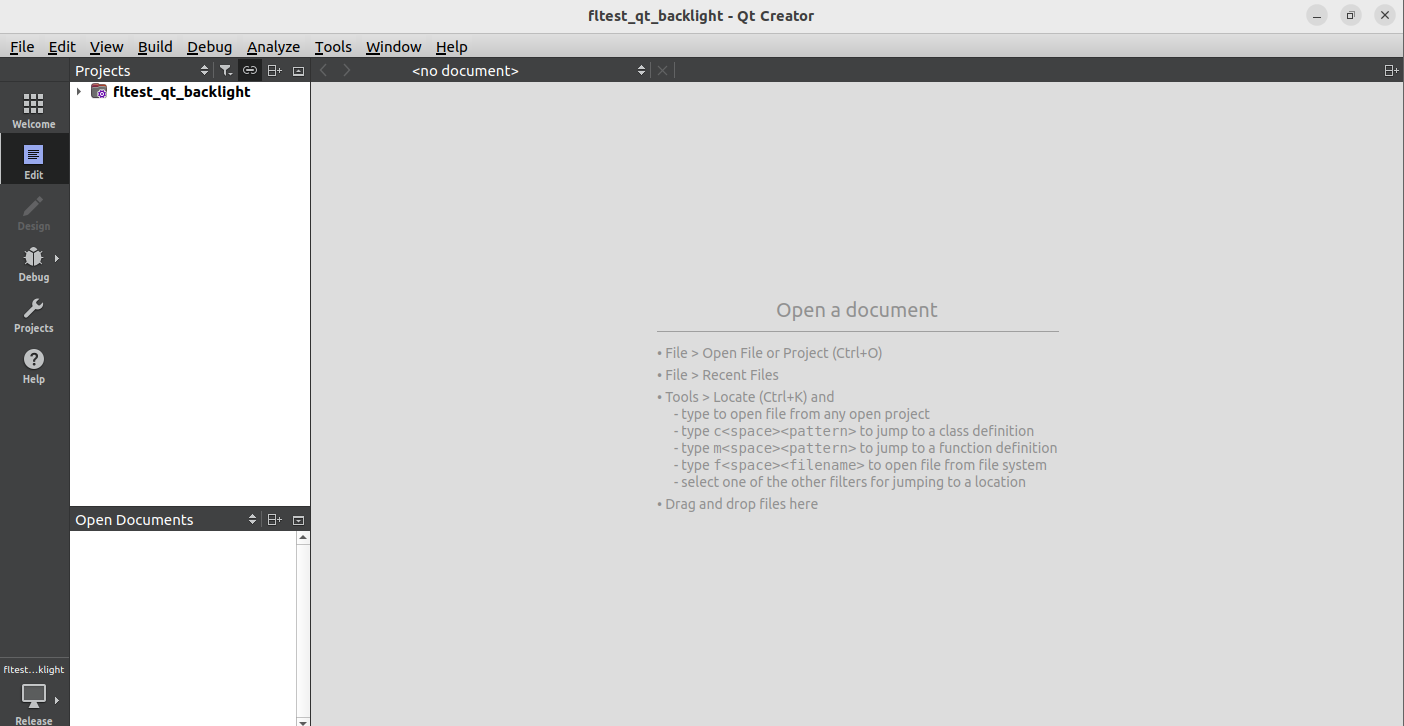
Right-click on fltest_qt_backlight and select Clean to perform a clean build. When the Clean progress bar in the bottom-right corner turns green, it indicates the clean is complete.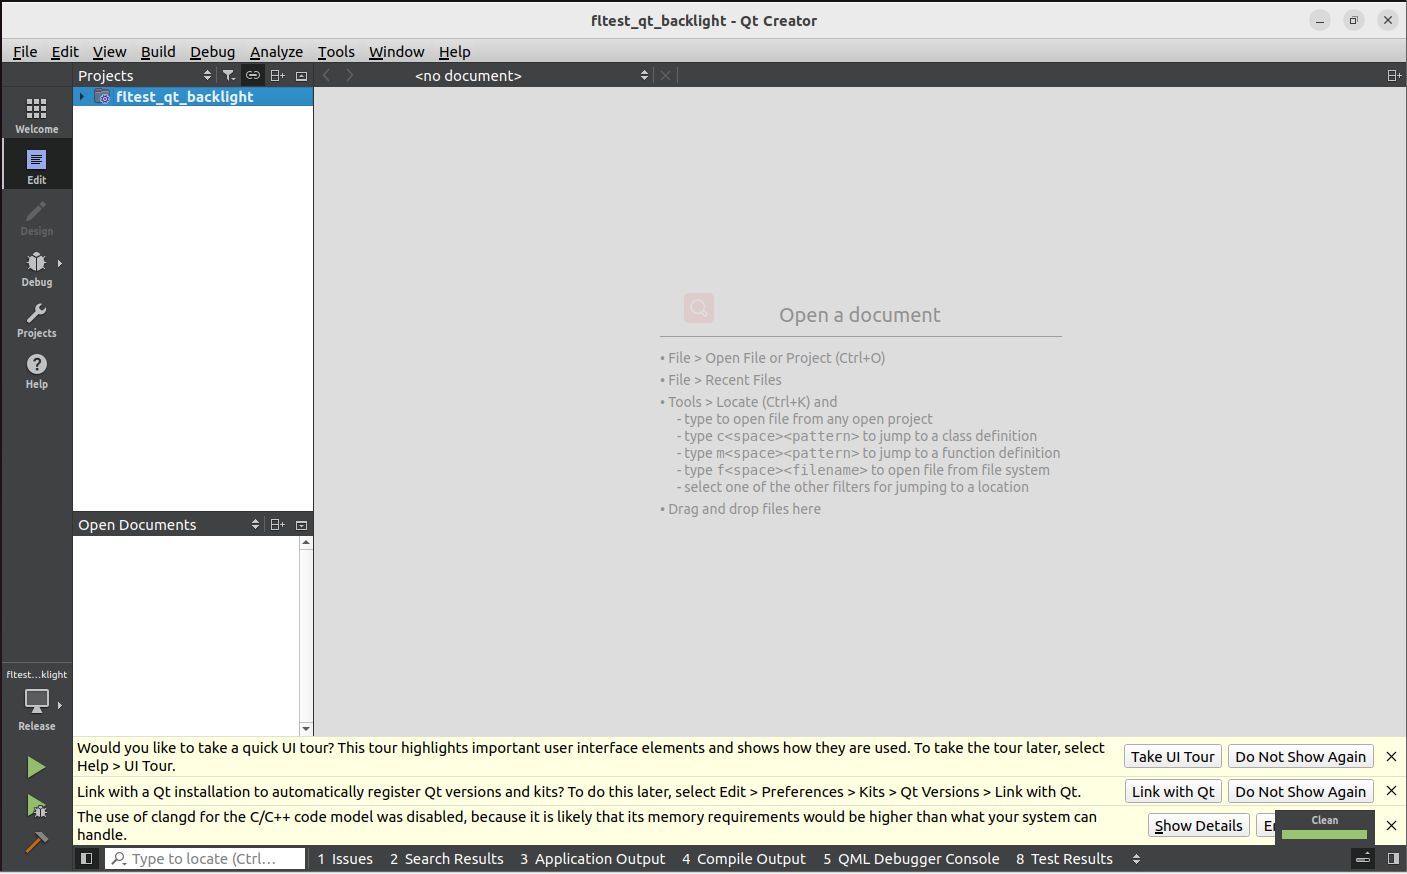
Right-click on fltest_qt_backlight and select Build to compile it.
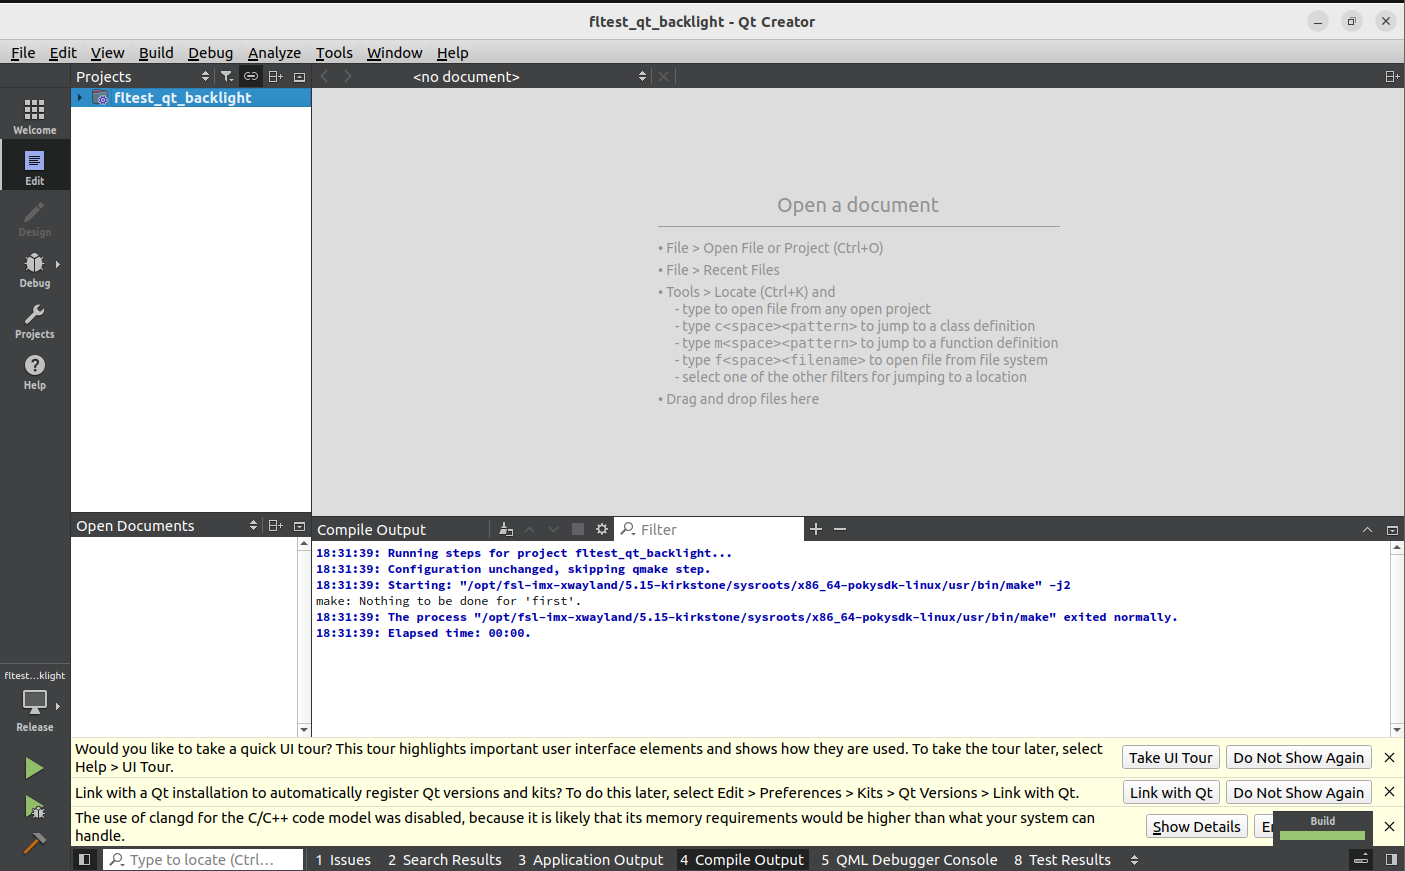
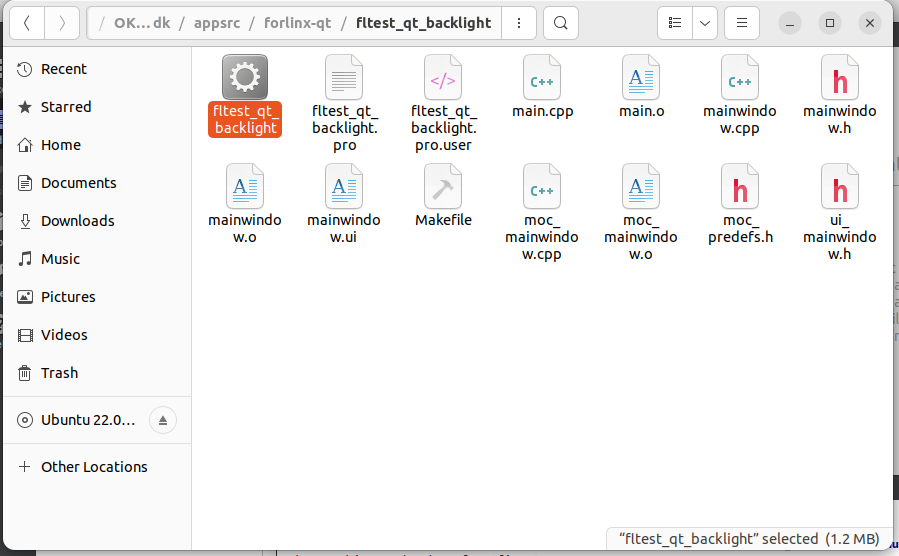
When the Build progress bar in the bottom-right corner completes, the compilation is finished. At this point, you will see the newly generated binary file fltest_qt_backlight in the directory /home/forlinx/ok-mx93/OKMX93-linux-sdk/appsrc/forlinx-qt/fltest_qt_backlight/, as shown below:
Method to replace an existing Qt program running on the desktop:
Flash the board and boot into the Qt system.
Copy the generated fltest_qt_backlight executable to a USB drive, then plug the USB drive into the development board.
Execute the following commands to copy fltest_qt_backlight to the appropriate directory, replacing the original fltest_qt_backlight application. Grant execute permissions to the program, sync the files, and reboot the board.
Use the cd command to enter the default path for Qt programs on the development board’s desktop system.
root@OK-MX93:~# cd /usr/bin/
Use the mv command to rename and backup the original fltest_qt_backlight file.
root@ok-mx93:/usr/bin# mv fltest_qt_backlight fltest_qt_backlight-old
Copy the fltest_qt_backlight program from the USB drive to the current directory.
root@ok-mx93:/usr/bin# cp /run/media/sda1/fltest_qt_backlight ./
Grant execute permissions, save, and reboot the development board.
root@ok-mx93:/usr/bin# chmod 777 fltest_qt_backlight       // Grant executable permissions to all groups
root@ok-mx93:/usr/bin# sync                                  // Synchronize files
root@ok-mx93:/usr/bin# reboot                                // Restart the development board
After the board reboots, the fltest_qt_backlight application on the Qt interface will be the latest version. If executing fltest_qt_backlight successfully opens the window, it indicates the newly compiled Qt application is functional and the Qt application development environment configuration is successful.
Method for standalone Qt program testing:
Copy the generated fltest_qt_backlight executable to a USB drive, then plug the USB drive into the development board, and copy the program to the /home path;
Grant execute permissions to the program;
Test the Qt program.
Copy the fltest_qt_backlight file from the USB drive’s mount path to the /home path on the development board.
root@ok-mx93:~# cp /run/media/sda1/fltest_qt_backlight /home
Use the cd command to enter the /home directory and grant execute permissions to fltest_qt_backlight.
root@ok-mx93:~# cd /home
root@ok-mx93:/home# chmod 777 fltest_qt_backlight
Run the backlight application.
root@ok-mx93:/home#./fltest_qt_backlight
4.4.2.2 Qt Creator Development Example
Execute the cross-compiler environment variables:
forlinx@ubuntu:~$ . /home/forlinx/ok-mx93/OKMX93-linux-sdk/environment-setup-aarch64-toolchain
Navigate to the /home/forlinx/qtcreator-8.0.2/bin directory:
forlinx@ubuntu:~$ cd /home/forlinx/qtcreator-8.0.2/bin/
Start Qt Creator:
forlinx@ubuntu:~ /qtcreator-8.0.2/bin $ sudo ./qtcreator
[sudo] password for forlinx:                                //Enter the password for the "forlinx" user; no display.
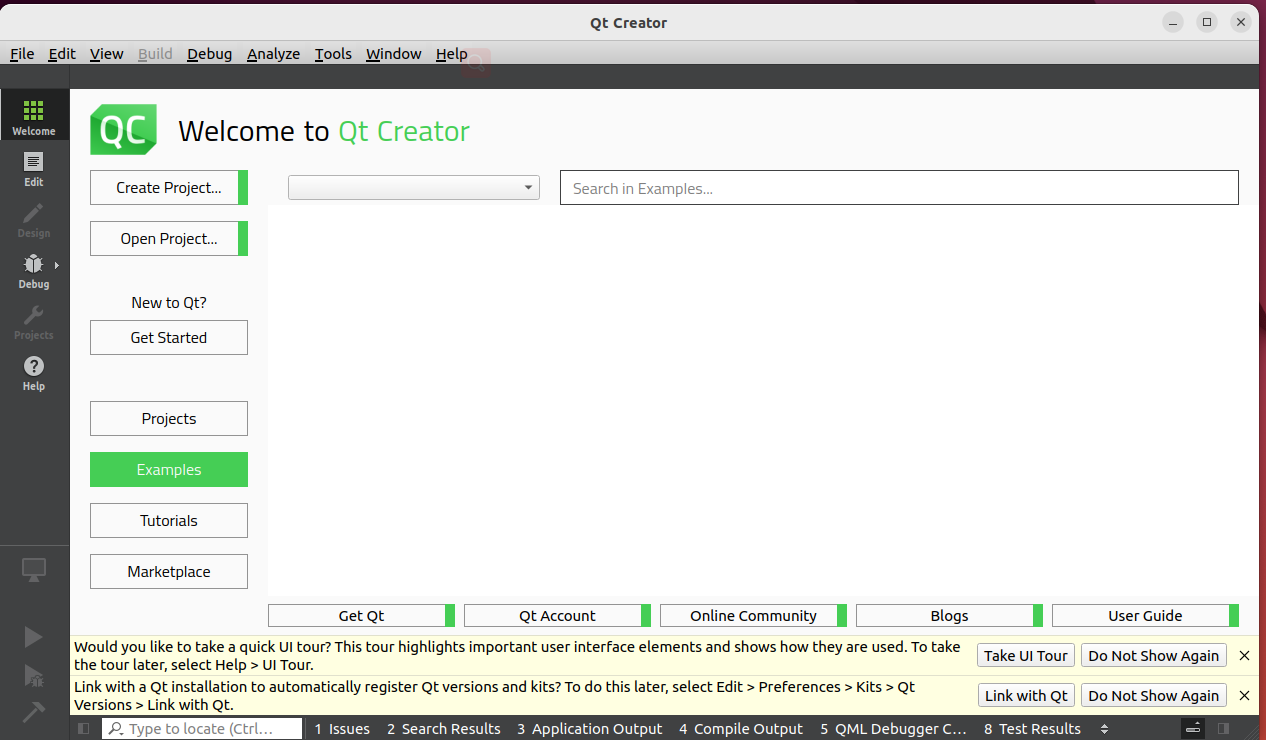
Launch the Qt Creator program and enter the Qt Creator interface. Click “Create Project” to create a new project.
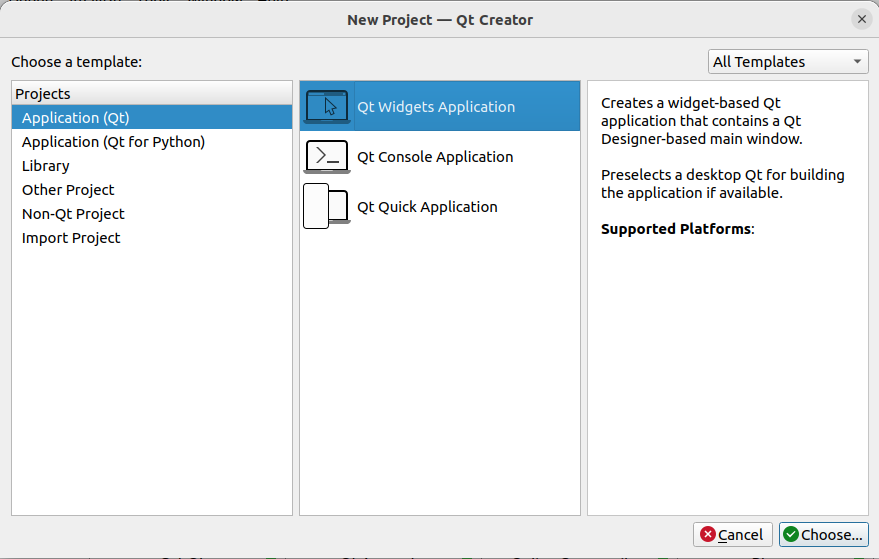
Select “Application” -> “Qt Widgets Application”, then click “Choose” in the bottom-right corner:
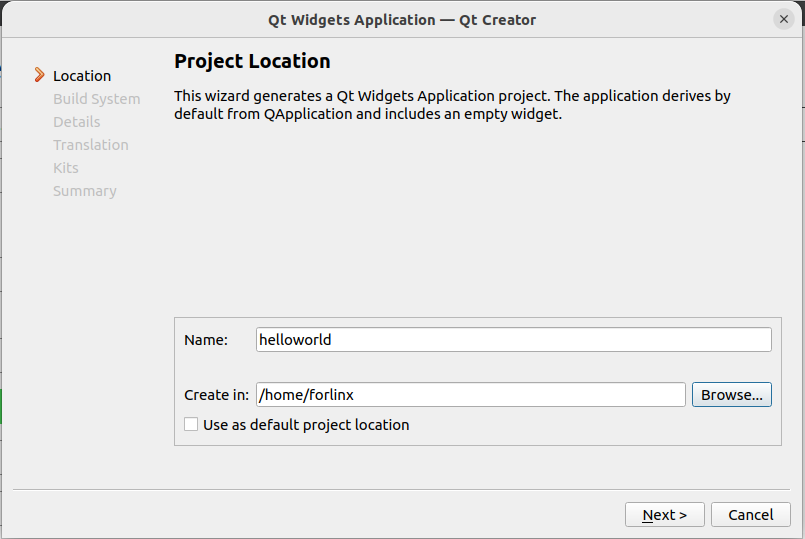
In the following interface, set the project name to “helloworld”. Set the installation path to /home/forlinx, then click “Next”.
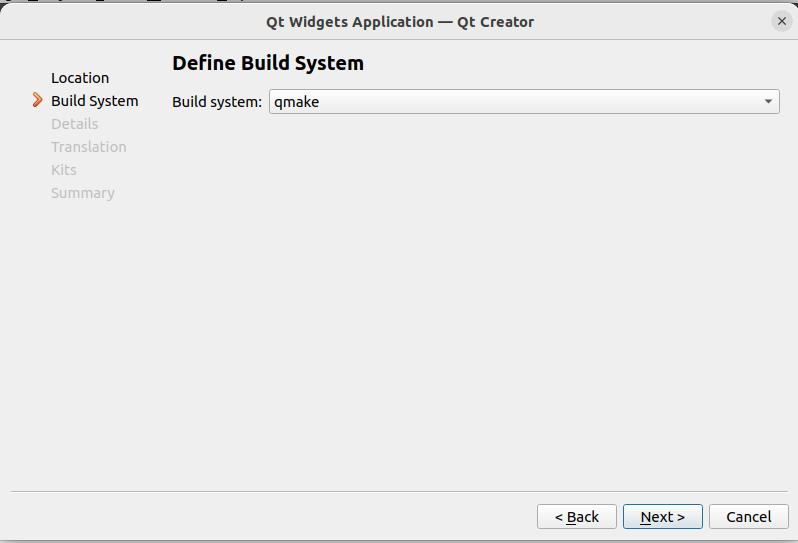
Select “qmake” and click “Next” to continue.
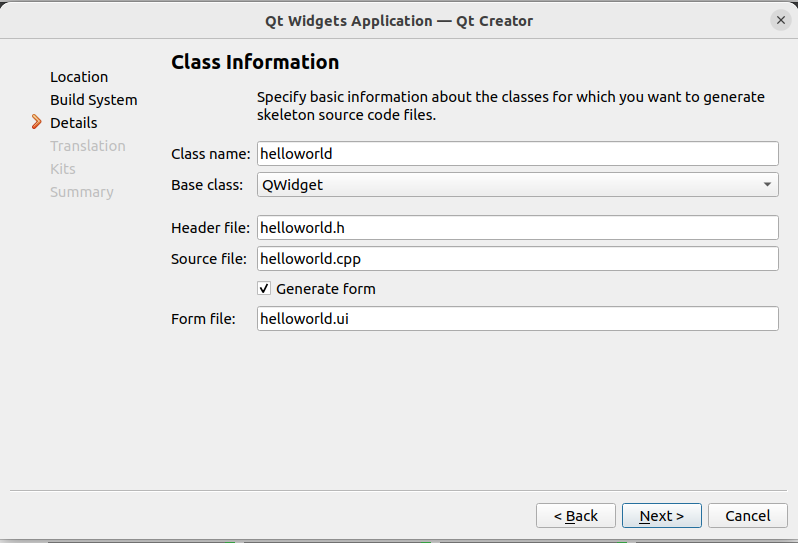
In the following interface, change the “Class name” to “helloworld”, select “QWidget” as the “Base class”, and then click “Next”:
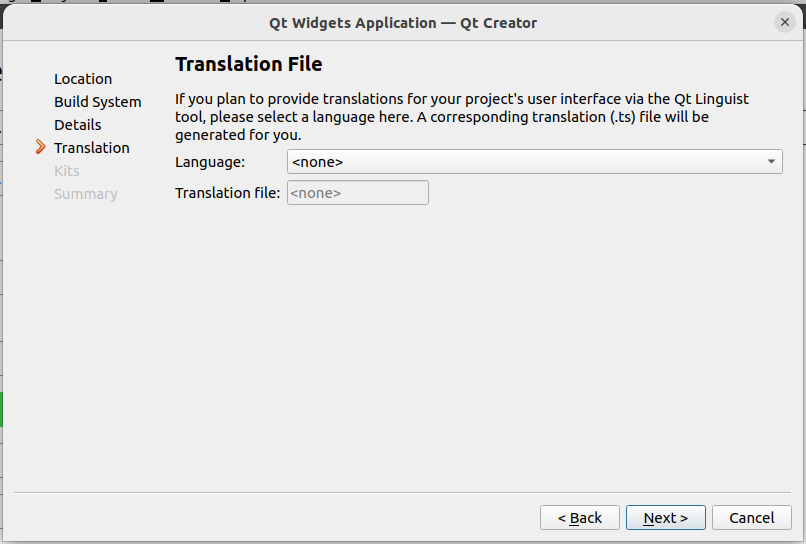
The following interface does not need to be configured. Click “Next” directly:
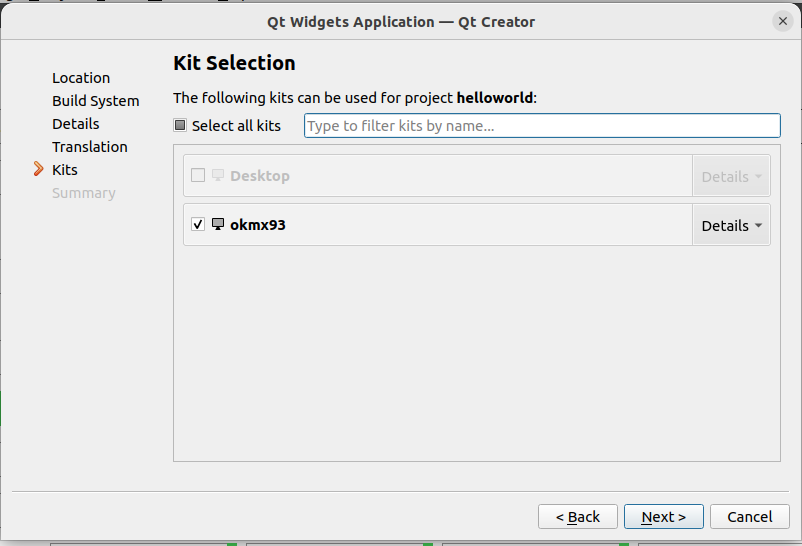
In the following interface, select the previously added “okmx93” as the kit for the current project, then click “Next”
In the following interface, click “Finish” to complete the project creation.
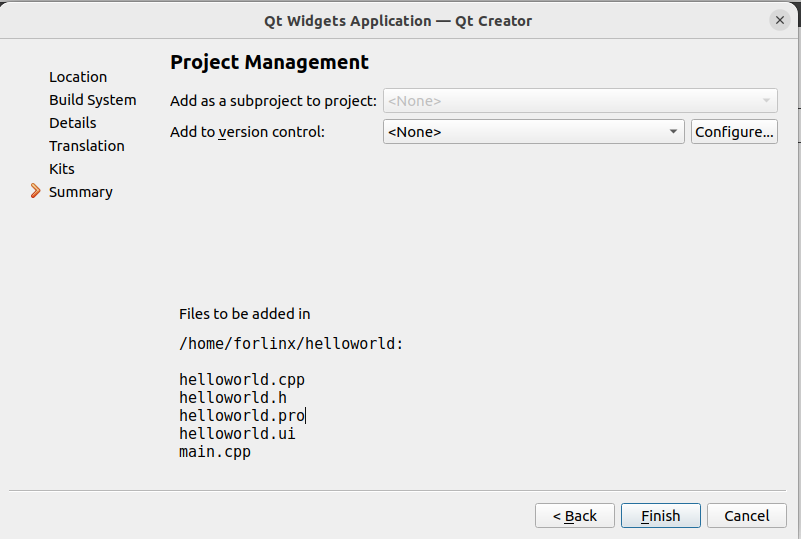
Once the project is created, the following window will appear:
Project created successfully.
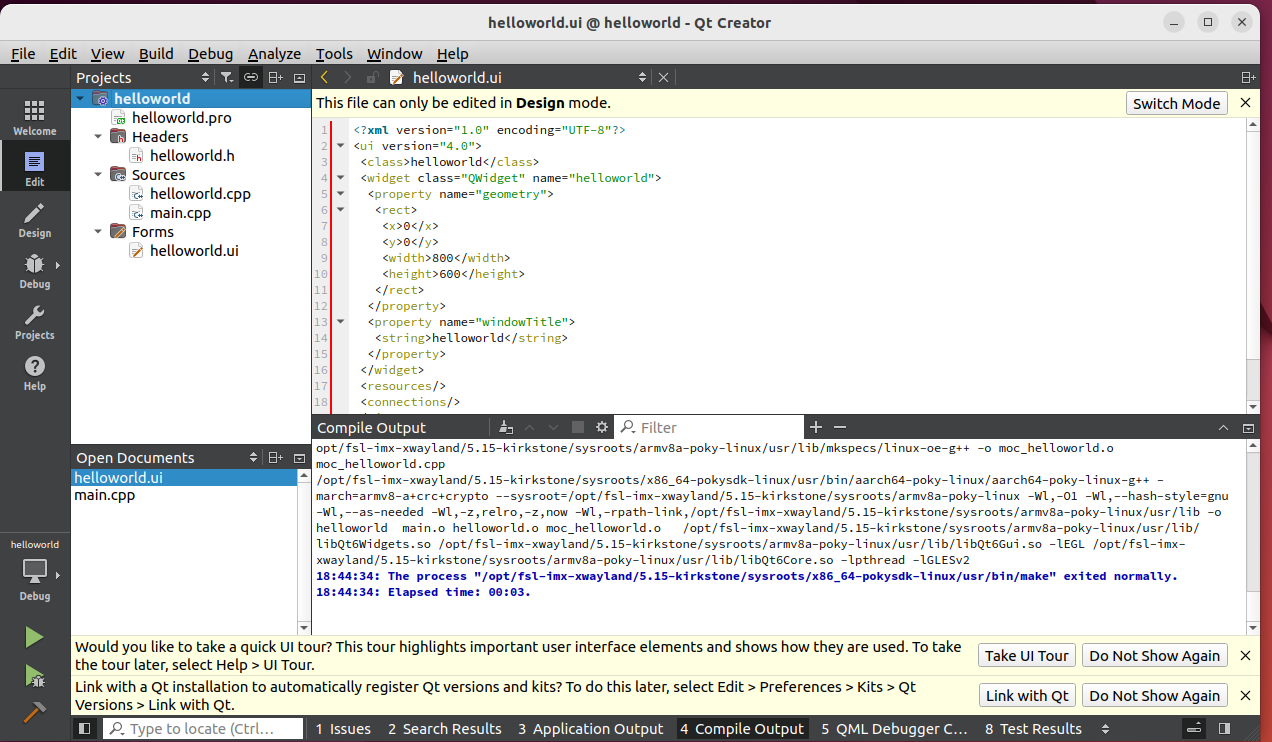
Once the programme has been written, click on the hammer icon in the bottom left-hand corner to perform a cross-compilation. Copy the compiled executable file “helloworld” to the development board, and you can then test the application.
The test method is the same as that for Qt applications described in 4.4.2.1.
5. System Flashing
The OK-MX9352-UP4 development board currently supports TF card flashing and UUU flashing. This section explains how to flash the system to the eMMC.
5.1 Flashing TF card Making and Testing
5.1.1 Creating a TF Flashing Card
The OK-MX9352-UP4 platform supports TF card flashing. You will first need to prepare a TF card for flashing; please use a TF card with a capacity of 8 GB or more but less than 16 GB for testing.
Copy the file \Linux\Flash Tool\TF Card\createSdcard.tar.bz2 from the user’s data to the PC virtual machine, and extract it.
Connect the TF card to a PC virtual machine via a card reader. Once the virtual machine has recognised the TF card, navigate to the “createSdcard” directory and run “mksdboot.sh”. Follow the on-screen prompts to format the TF card.
Start creating a customised TF card.
$sudo ./mksdboot.sh
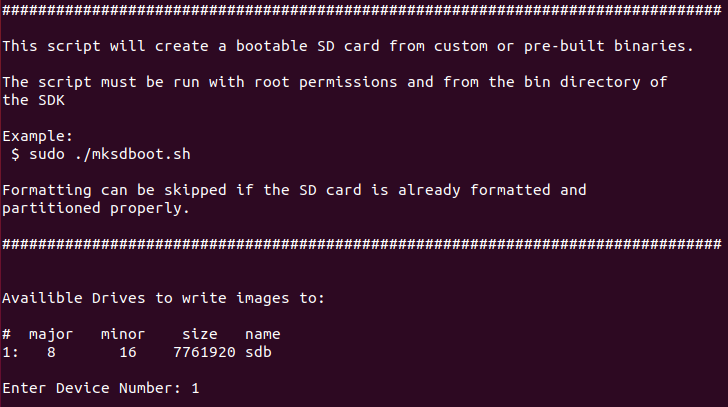
Select the TF card device; in this example, we’ll use 1. Enter 1 to select the sdb device.
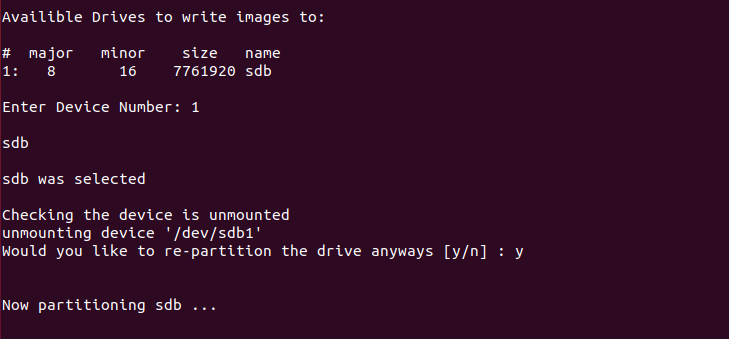
Type “y” to confirm, allowing the TF card to be repartitioned and formatted.
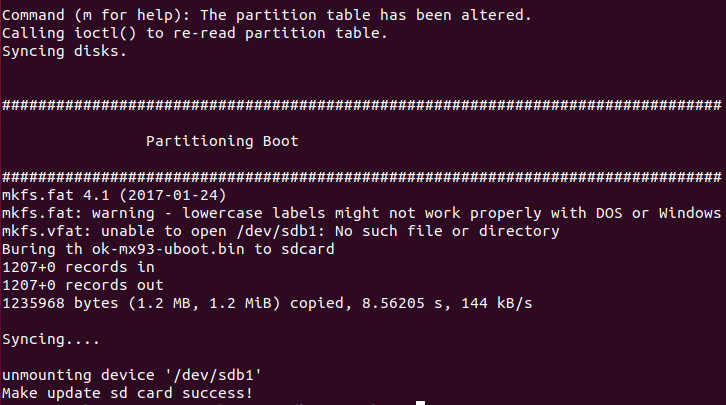
Production complete.
Copy the “Image”, “ramdisk.img.gz”, “OK-MX93-S.dtb”, “ok-mx93-uboot.bin” and “ok-mx93-linux-fs.sdcard.a*” files from the “User Data\Linux\Images” directory of the OK-MX9352-UP4 (Linux) to the TF card.
The above image may also be replaced with an image of the same name compiled by the customer, located in the OKMX93-linux-sdk/images directory.
5.1.2 TF Card Flashing Test
Set the OK-MX9352-UP4 DIP switch to SD card boot mode (1 OFF, 2 ON), insert the programmed TF card, and power on the device;
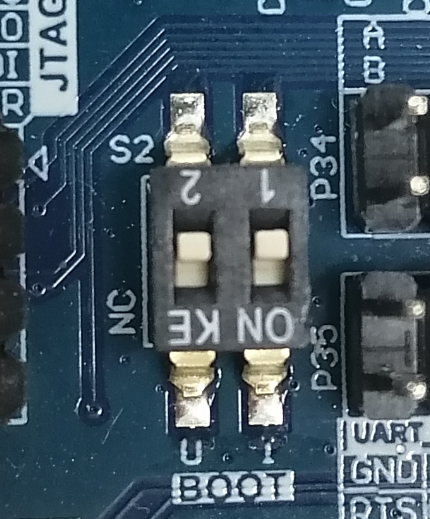
When a TF card is inserted, the system will, by default, load the “ramdisk.img.gz” file and the kernel image from the TF card, and boot via a virtual file system; Once the ramdisk it booted, it will automatically write the file system “ok-mx93-linux-fs.sdcard.a*” to the eMMC. If the script is not run automatically, you will need to run /update.sh manually.
During the flashing process, the LED on the SoM will change from a heartbeat indicator to a constant on state. After flashing is complete, the LED will revert to heartbeat mode.
Once the flashing process is complete, the following message will be displayed.
Command (m for help): The partition table has been altered.
Calling ioctl() to re-read partition table
[   46.018978]  mmcblk0: p1 p2
[Done] 42s
update successfully, please remove sd card and reboot
Power off the device and remove the SD card. Set the OK-MX9352-UP4 DIP switch to eMMC boot mode. The system will then boot from eMMC when power is reapplied.
5.2 Using UUU for Flashing
UUU is a command-line tool for flashing images onto the OK-MX9352-UP4 development board, available on both Linux and Windows 10. Below are the usage instructions for Linux and Windows 10 respectively.
Note: Flashing with UUU is highly dependent on the computer environment. If USB connection issues occur, it is recommended to use TF card flashing instead.
5.2.1 Using UUU on Linux
Path: OK-MX9352-UP4 (Linux) user materials\Tools\uuu
Step 1: Copy the UUU flashing tool to the board.
Copy the executable file uuu from the downloaded disc materials to the /usr/bin/ directory and add executable permissions;
forlinx@ubuntu:~/ cd /usr/bin                              //Go to the /usr/bin directory
forlinx@ubuntu:/usr/bin$ sudo chmod 777 uuu               //Grant uuu execute permissions
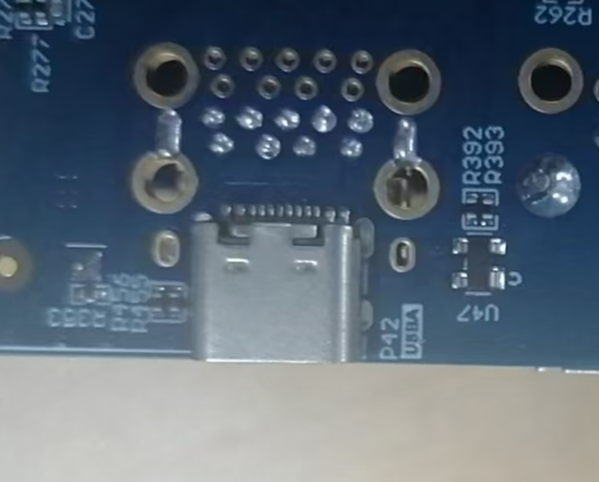
Step 2: Connect the OTG cable to the USB port of the Linux host; Set the DIP switch to OTG boot mode, and set OTG DIP switch S3 to slave mode. Then, power on the development board. DIP switch settings are shown below:
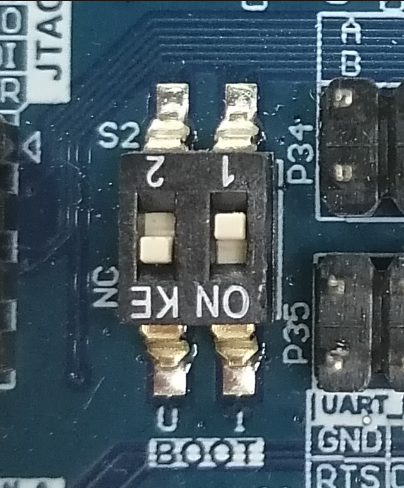
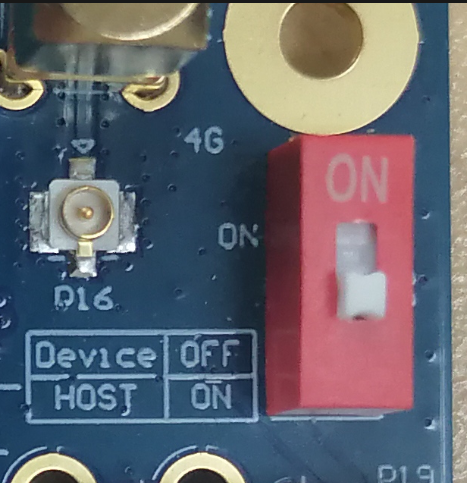
OTG port location is shown below:
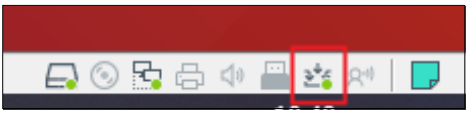
Power on the development board and mount it to the development environment.
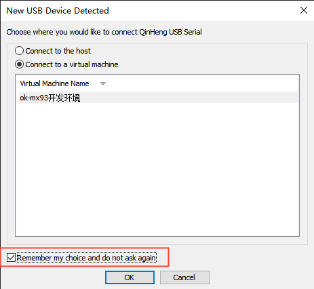
It is recommended to check “Remember my choice, do not ask again in the future.”
Step 3: Enter the flashing command in the Linux host.
Switch to the images directory. Depending on your needs, select different flashing commands corresponding to different flashing methods and images. If you are unsure of the differences, it is recommended to choose the first method:
Flash the system (u-boot, kernel, and filesystem) to eMMC.
forlinx@ubuntu:~/OKMX93-linux-image$ cat ok-mx93-linux-fs.sdcard.a* > rootfs.bin
forlinx@ubuntu:~/OKMX93-linux-image$ sudo uuu -b emmc_all ok-mx93-uboot.bin rootfs.bin
Successful flashing example is shown below:
Flash u-boot to eMMC.
forlinx@ubuntu:~/OKMX93-linux-image$ sudo uuu -b emmc ok-mx93-uboot.bin
Successful flashing example is shown below:

5.2.2 Using UUU on Windows
Step 1: Copy the files;
Path: OK-MX9352-UP4 (Linux) user materials\Linux\Flashing tools\uuu tool\uuu.exe
Copy uuu.exe from the disc materials to the D:\uuu directory.
Step 2: Connect the computer’s USB port to the development board’s OTG port using a Type-C data cable. Set the DIP switch to OTG boot mode, and set OTG DIP switch S3 to slave mode. Then, power on the development board; DIP switch settings are shown below:
OTG port location is shown below:
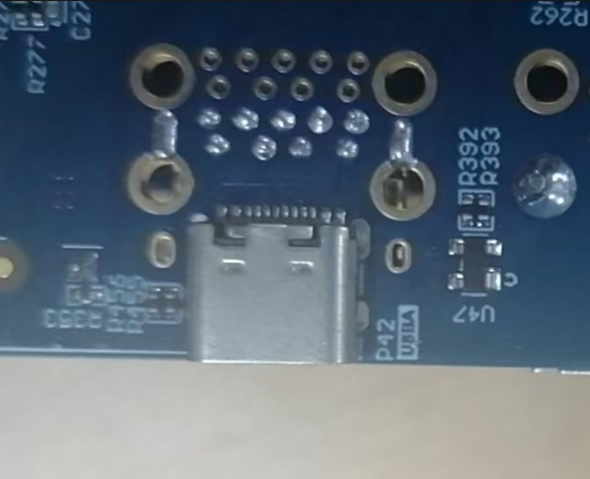
Step 3: Copy the images;
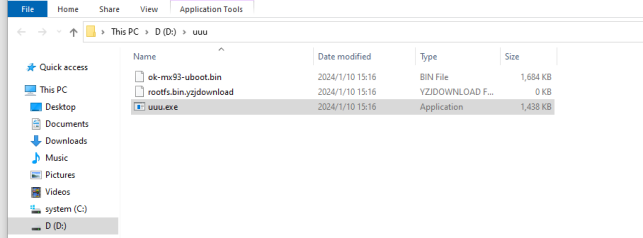
Copy the images to the D:\uuu directory. Run the cmd program with administrator privileges in Windows and navigate to the directory where the image files are stored. Depending on your needs, select different flashing commands corresponding to different flashing methods and images. If you are unsure of the differences, it is recommended to choose the first method:
On Linux, package the filesystem into a single file, and copy the generated rootfs.bin and u-boot image (ok-mx93-uboot.bin) to the UUU directory.
forlinx@ubuntu:~/OKMX93-linux-image$ cat ok-mx93-linux-fs.sdcard.a* > rootfs.bin
After copying, the files in the UUU directory should look like this:
Flash u-boot, kernel, and filesystem to eMMC:
Microsoft Windows [Version 10.0.19045.2604]
(c) Microsoft Corporation. All rights reserved.

C:\Users\Administrator>D:                                                  // Switch to D: drive
D:\>cd uuu                                                          // Enter the uuu folder
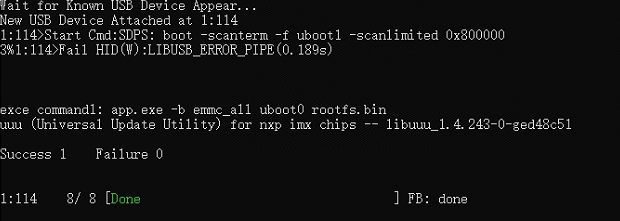
D:\uuu>uuu.exe -b emmc_all ok-mx93-uboot.bin rootfs.bin
Successful flashing example is shown below:
Successful flashing example is shown below:
Microsoft Windows [Version 10.0.19045.2604]
(c) Microsoft Corporation. All rights reserved.

C:\Users\Administrator>D:                                                  // Switch to D: drive
D:\>cd uuu                                                          // Enter the uuu folder
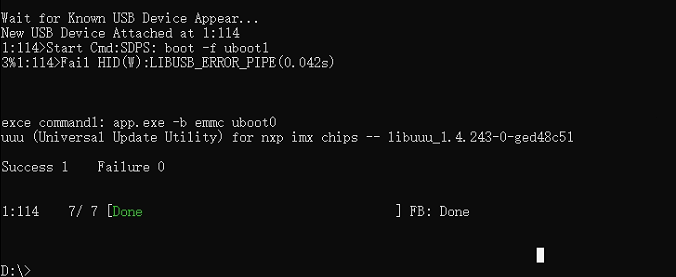
D:\uuu>uuu.exe -b emmc ok-mx93-uboot.bin
Successful flashing example is shown below:
5.3 Updating Images Separately
After system startup, place the device tree image and Image files to be replaced into a USB drive and insert it into the development board. Enter the following command in the terminal (note the USB drive’s mounting path, which should be modified according to the actual situation):
root@ok-mx93:~# cd /run/media/Boot-mmcblk0p1/
root@ok-mx93:/run/media/Boot-mmcblk0p1# ls
Image  OK-MX93-S.dtb
root@ok-mx93:/run/media/Boot-mmcblk0p1# cp /run/media/boot-sda1/OK-MX93-S.dtb ./
                                                         // Copy the device tree image to the current directory
root@ok-mx93:/run/media/Boot-mmcblk0p1# cp /run/media/boot-sda1/Image ./
                                                         // Copy the kernel image to the current directory
root@ok-mx93:/run/media/Boot-mmcblk0p1# sync            // Synchronize and save
5.4 Updating the Logo Separately
First, create a PNG format image with a resolution of 1280x800 and rename it to logo2-1280x800.png.
root@ok-mx93:~# cd /usr/share/weston
root@ok-mx93:/usr/share/weston# cp /run/media/boot-sda1/logo2-1280x800.png ./
                                                         // Copy the logo to the current directory
root@ok-mx93:/usr/share/weston# sync                     // Synchronize and save