Linux 6.1.141_User’s Compilation Manual_V1.0
Document classification: □ Top secret □ Secret □ Internal information ■ Open
Copyright
The copyright of this manual belongs to Baoding Folinx Embedded Technology Co., Ltd. Without the written permission of our company, no organizations or individuals have the right to copy, distribute, or reproduce any part of this manual in any form, and violators will be held legally responsible.
Forlinx adheres to copyrights of all graphics and texts used in all publications in original or license-free forms.
The drivers and utilities used for the components are subject to the copyrights of the respective manufacturers. The license conditions of the respective manufacturer are to be adhered to. Related license expenses for the operating system and applications should be calculated/declared separately by the related party or its representatives.
Overview
This manual is designed to help you quickly understand the compilation process and become the compilation methods. Applications need to be cross-compiled on an Ubuntu host before they can run on the development board. By following the methods in this compilation manual and through hands-on practice, you can successfully compile your own software code.
The manual will explain the environment setup process. Some unpredictable issues may arise during environment setup, so it is recommended that beginners directly use the pre-configured development environment Forlinx provide to get started quickly and reduce development time.
There are there installation methods: dual-boot on a physical machine, single-boot on a physical machine, or in a virtual machine. Each installation method has its advantages and disadvantages. This manual only provides a method for setting up Ubuntu in a virtual machine. Hardware requirements: It is recommended to have at least 16 GB of RAM or more. This ensures that after allocating memory for the virtual machine (it is recommended to allocate over 10 GB for the virtual machine), you can still perform other operations on Windows without significant lag.
There are total 4 chapters:
Chapter 1. covers the installation of virtual machine software, briefly introducing the download and installation of VMware;
Chapter 2. covers loading the Ubuntu system Forlinx provide;
Chapter 3. covers setting up and configuring the Ubuntu system, installing necessary tools, and addressing common issues with the development environment;
Chapter 4. covers materials required for compiling the product’s source code, compilation methods, configuration of the Qt compilation environment, and methods for compiling the programme.
Additionally, the manual includes explanations of some symbols and formats.
Format |
Meaning |
|---|---|
// |
Explanation of input commands or output information: |
Username@Hostname |
root@forlinx: Development board login account information; |
Example: When copying the source code, view the source code file through the ls command:
forlinx@ubuntu:~$ ls /mnt/hgfs/share/                                //View files in a shared directory
OKT527-linux-sdk.tar.bz2
Forlinx @ Ubuntu: The user name is forlinx and the host name is Ubuntu, which means that the forlinx user is used to operate on the development environment Ubuntu.
// : Explanation for the operation ls /run/media, no need to input.
Application Scope
This software manual applies to Forlinx OK527-UP4 and OK527N-UP4 development boards (version 1.3 and above), and the FET527-UP4 and FET527N-UP4 SoMs (version 1.2 and above) running the Linux 5.15.147 operating system. In the manual, the product is referred to collectively as FET527-UP4 or OK527-UP4.
Revision History
Date |
Version |
Revision History |
|---|---|---|
02/03/2026 |
V1.0 |
User’s Compilation Manual Initial Version |
1. VMware Virtual Machine Software Installation
This chapter mainly introduces the installation of the VMware virtual machine, using VMware Workstation 15 Pro v15.5.6 as an example to demonstrate the operating system installation and configuration process.
1.1 Downloading and Purchasing VMware Software
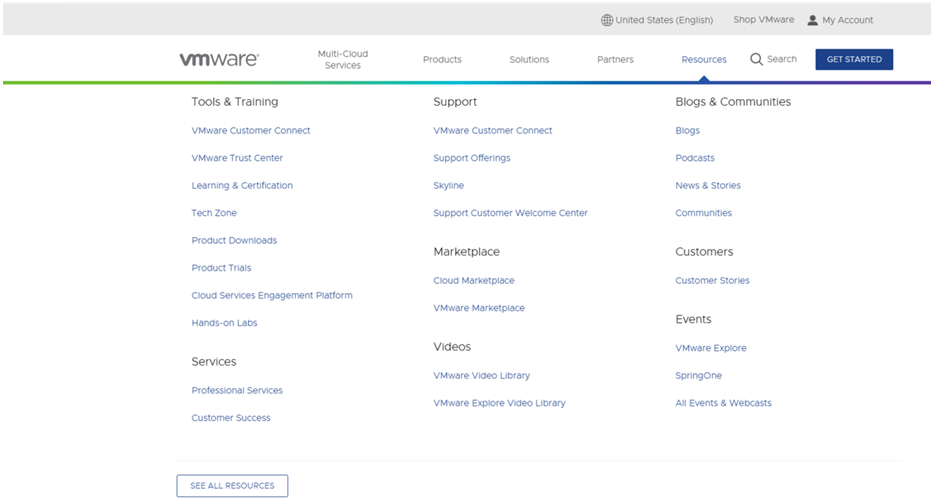
Visit the VMware official website at https://www.vmware.com/cn.html to download Workstation Pro and obtain the product key. VMware is paid software that requires individual purchase, or you can choose to use a trial version.
After the download is complete, double-click the setup file to launch the installer.
1.2 VMware Software Installation
Double-click the setup file to enter the installation wizard.
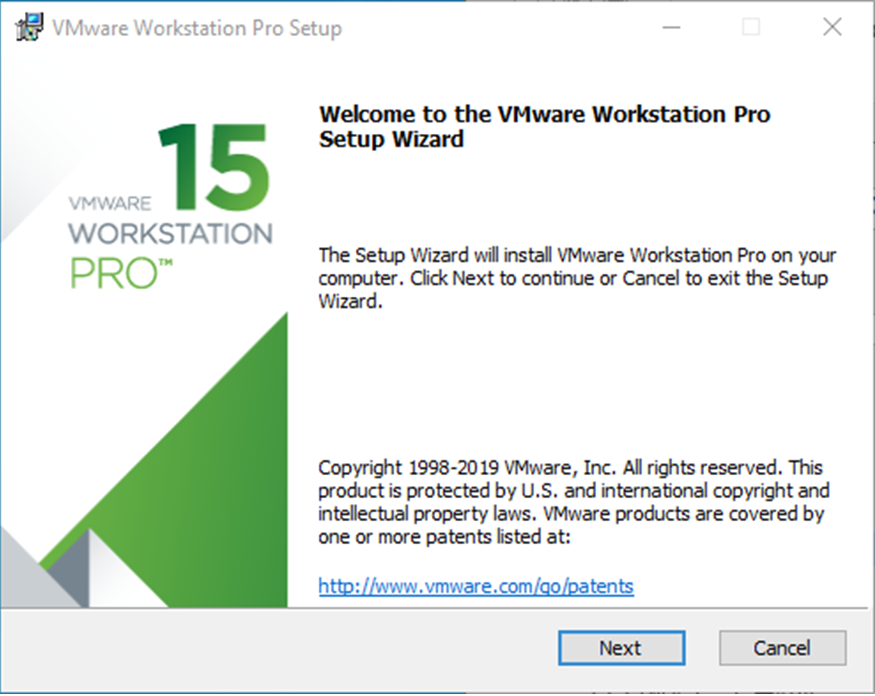
Click “Next.”
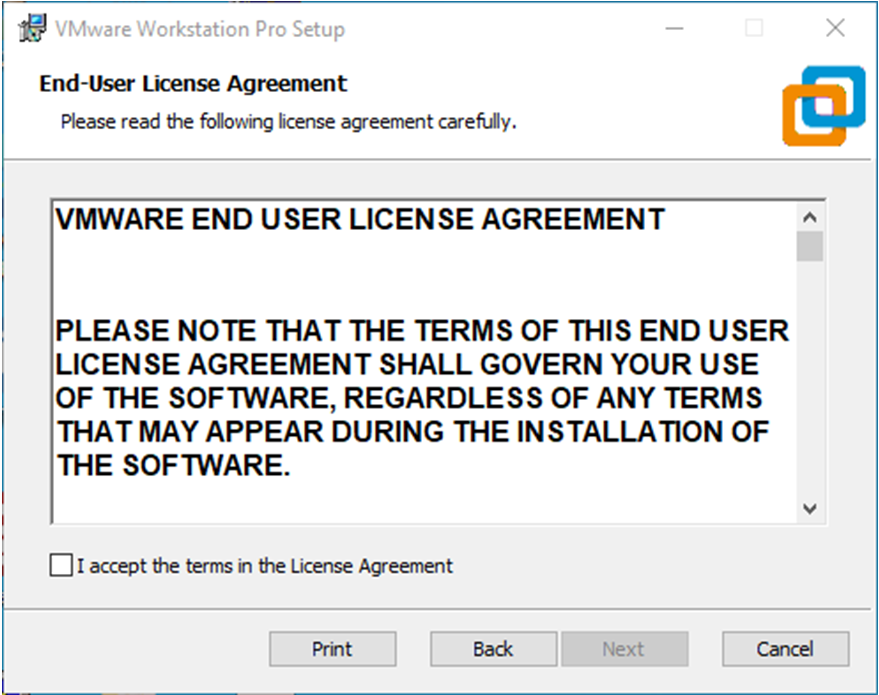
Check “I accept the terms in the license agreement” and click “Next.”
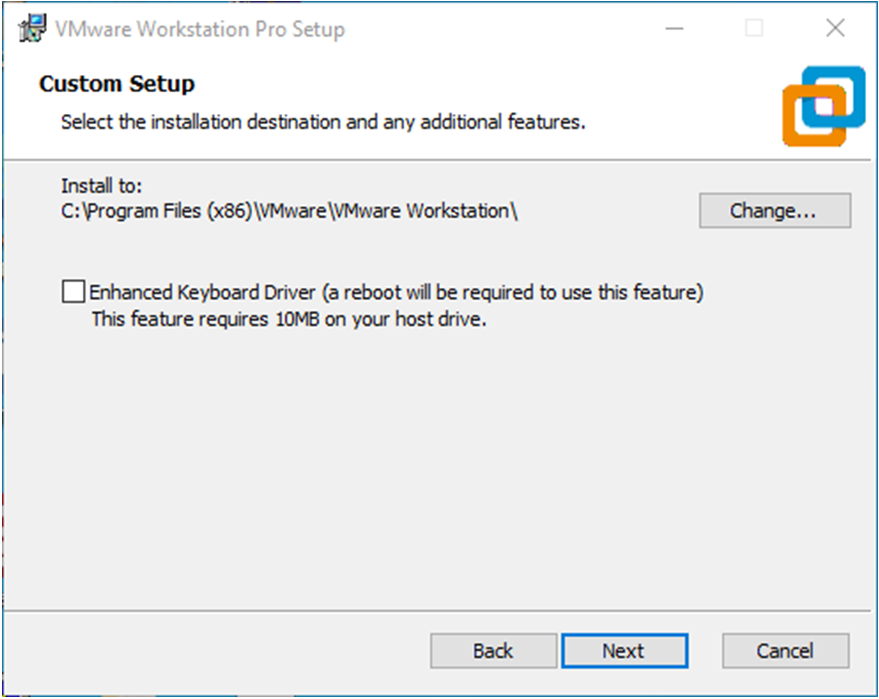
Modify the installation location to the partition on your computer where software is typically installed, then click “Next.”
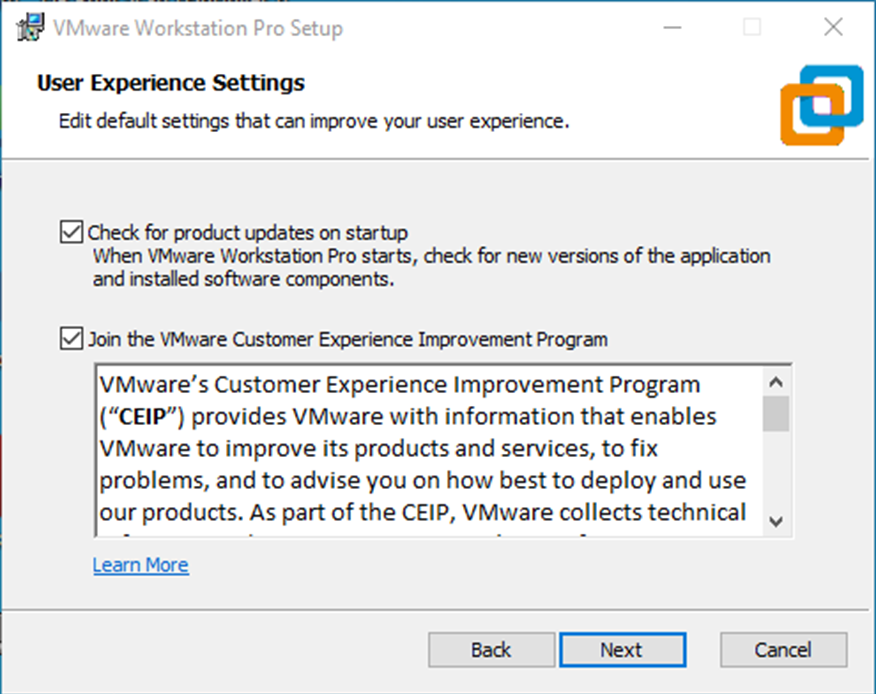
Check, then click “Next.”
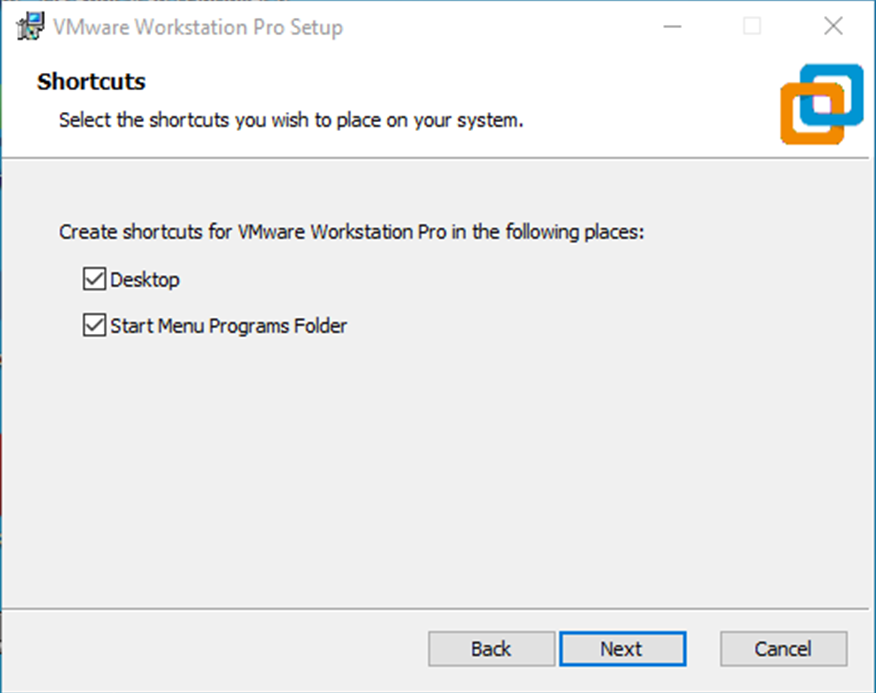
Check “Add shortcuts” and click “Next.”
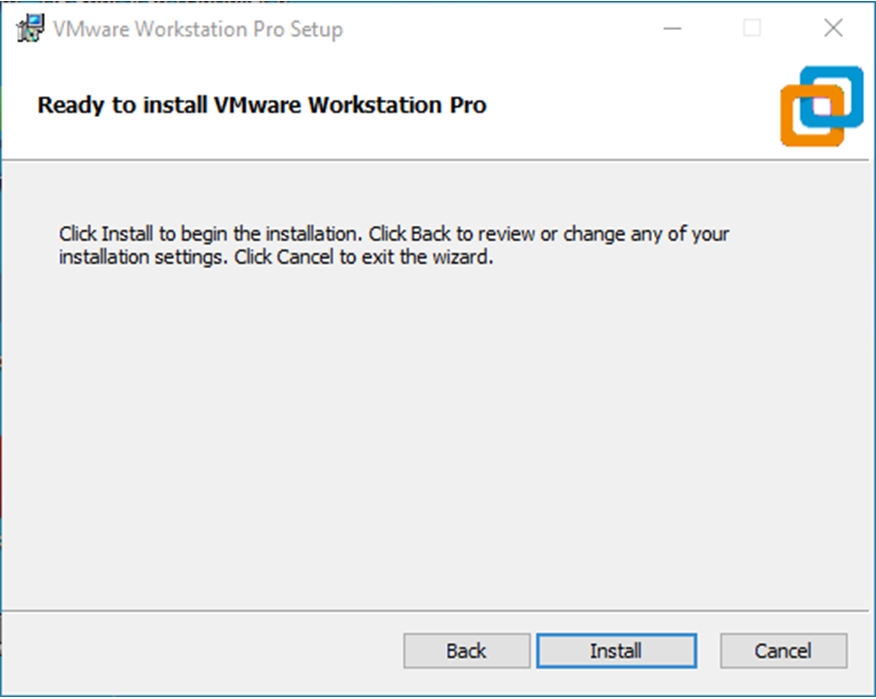
Click “Install.”
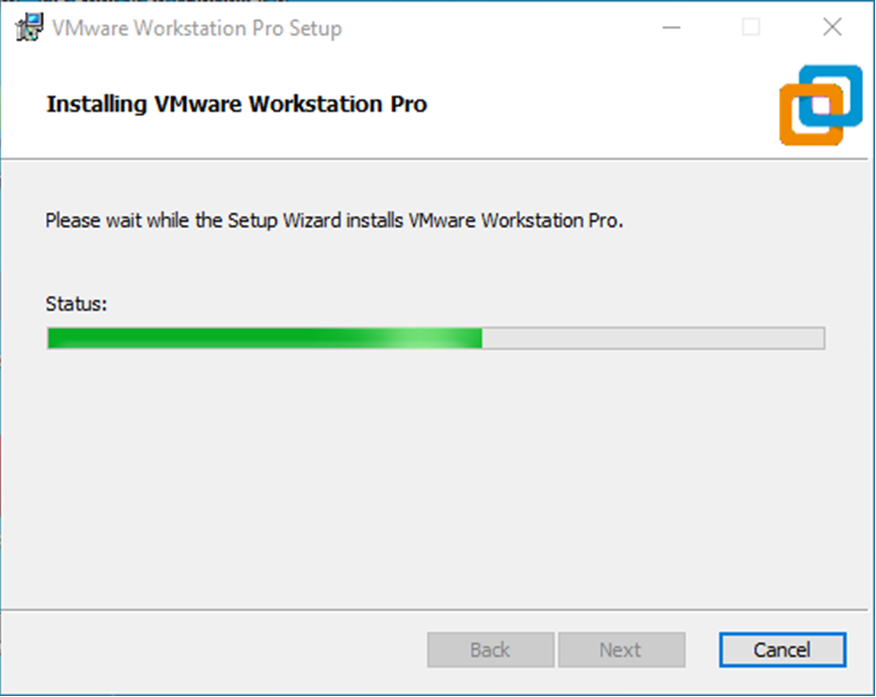
Wait for the installation to complete.
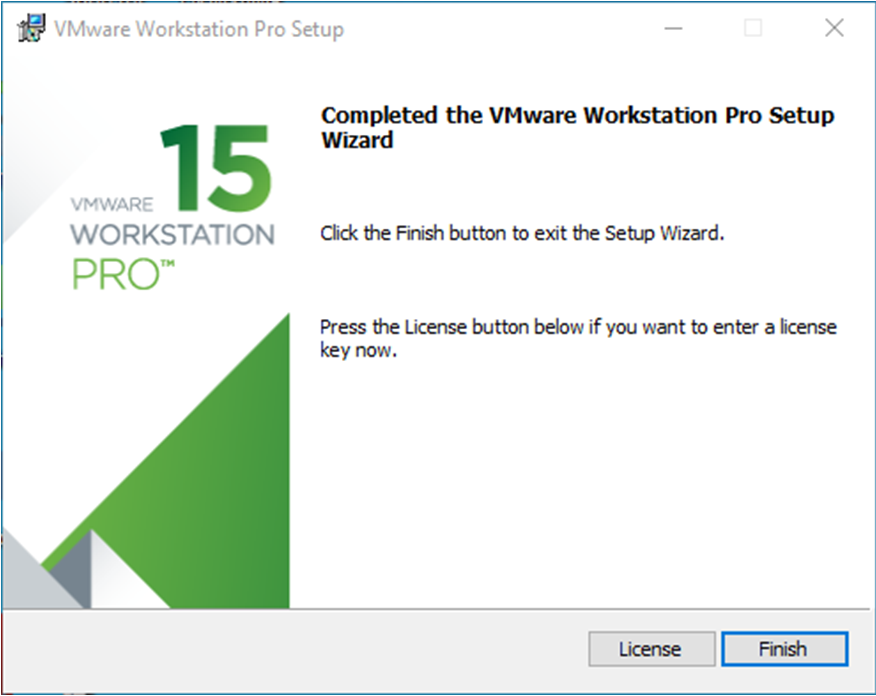
After clicking “Finish,” you can start the trial. For long-term use, please purchase from the official website and enter the license key.
2. Loading an Existing Ubuntu Development Environment
Note:
It is recommended that beginners directly use the virtual machine environment pre-configured by Forlinx, which already has the cross-compiler and Qt environment installed. After reviewing this chapter, you can skip directly to the compilation chapters;
The provided development environment has a regular user account: forlinx, with password: forlinx. The superuser account is: root, with password: root.
You can access software and hardware documentation, source code, and the development environment via the cloud storage link provided by Forlinx. Please ask your sales representative for the download link.
There are two ways to use the virtual machine environment in VMware: one is to directly load an existing environment, and the other is to create a new environment. First explain how to load an existing environment.
First, download the development environment provided by Forlinx. The development environment materials include an MD5 checksum file. After downloading the materials, please first perform an MD5 checksum on the development environment archive (located in 3-Tools\md5sums-1.2.zip) to verify if the checksum matches the one in the checksum file. If they match, the download is successful; if not, the file may be corrupted and needs to be re-downloaded.

Select OK527-VM15.5.6-ubuntu20.04, right-click, and extract it to the current folder or your desired directory:
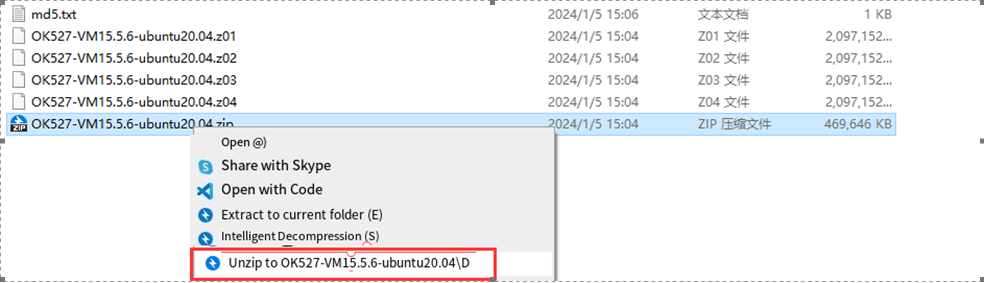
After extraction, you will obtain the development environment folder OK527-VM15.5.6-ubuntu20.04.
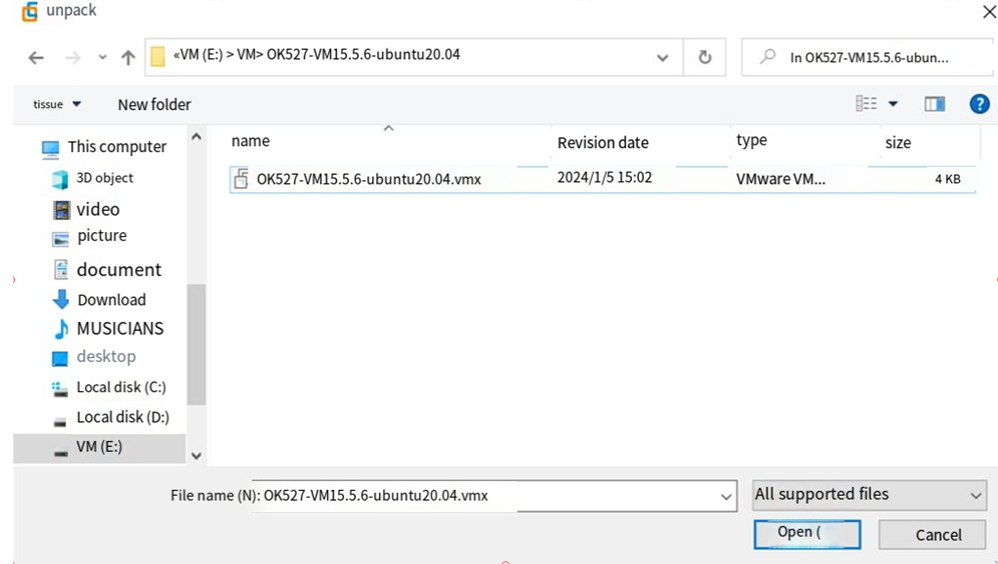
The file OK527-VM15.5.6-ubuntu20.04.vmx inside the OK527-VM15.5.6-ubuntu20.04 folder is the file to be opened by the virtual machine.
Open the installed virtual machine software.
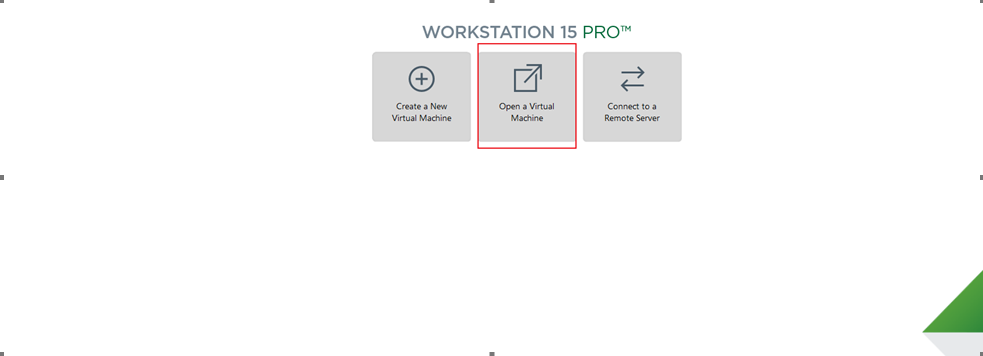
Select the directory where the newly extracted OK527-VM15.5.6-ubuntu20.04 virtual machine file is located, and double-click the startup file to open it.
Once it has finished loading, click to start the virtual machine, and you will be able to run it and enter the system interface.
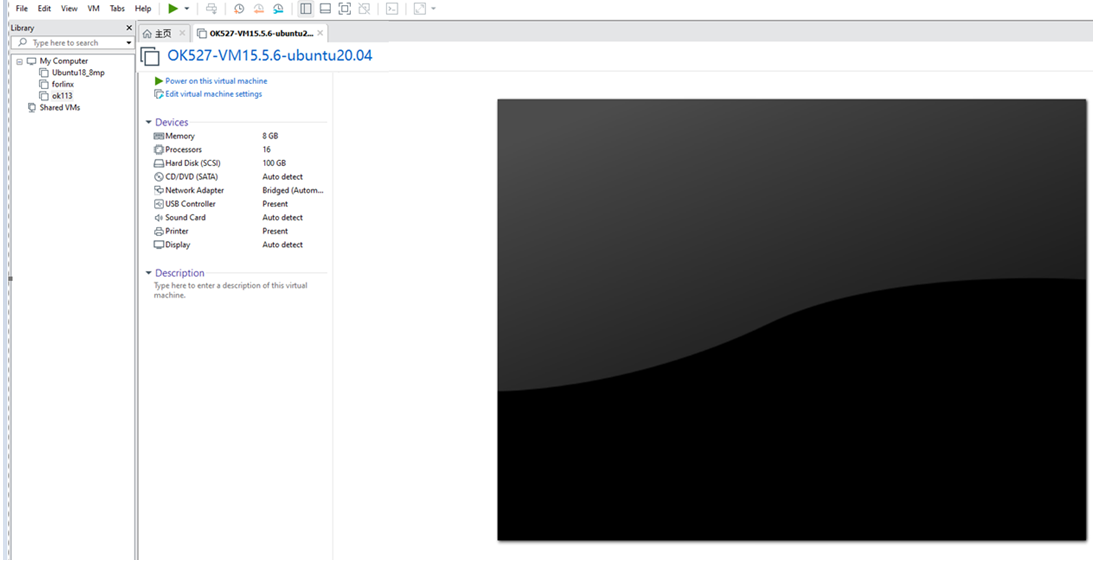
The provided development environment is set to automatically log in to the account forlinx on startup by default.
3. Setting Up a New Ubuntu Development Environment
Note: It is not recommended for beginners to build the system by themselves. It is recommended to use the existing virtual machine environment. This section can be skipped if there is no need to build the environment.
This chapter mainly explains the setup process of the Ubuntu system and the installation of Qt Creator. If QT is not used, the installation of Qt Creator can be ignored.
3.1 Ubuntu System Setup
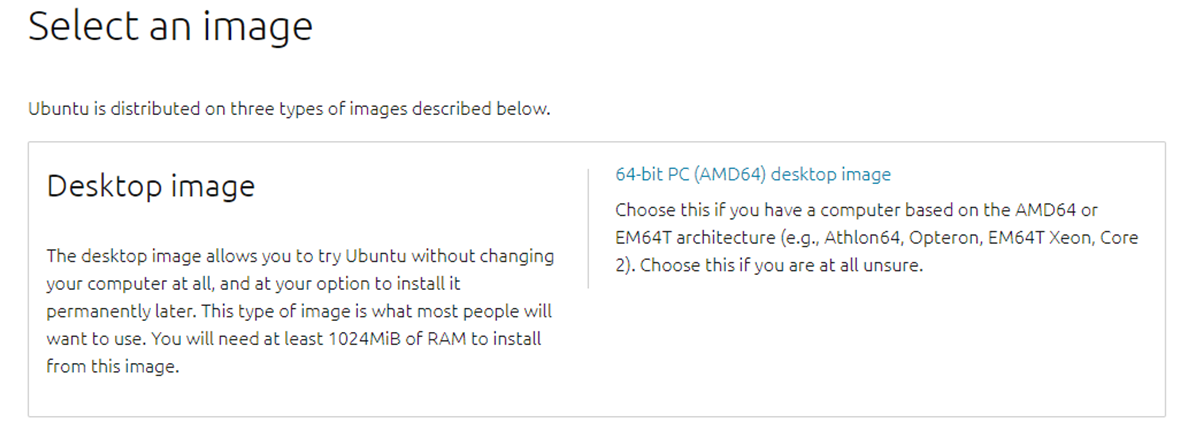
The Ubuntu version to install is 20.04. The descriptions and development in this document are all based on Ubuntu 20.04. First, go to the Ubuntu official website to obtain the Ubuntu 20.04 64-bit image. The download address is: http://releases.ubuntu.com/20.04/
Download the “ubuntu-20.04.6-desktop-amd64.iso” version (the specific version to download can be based on your own needs; here we use version 20.04.6 as an example).
3.1.1 Creating an Ubuntu Virtual Machine
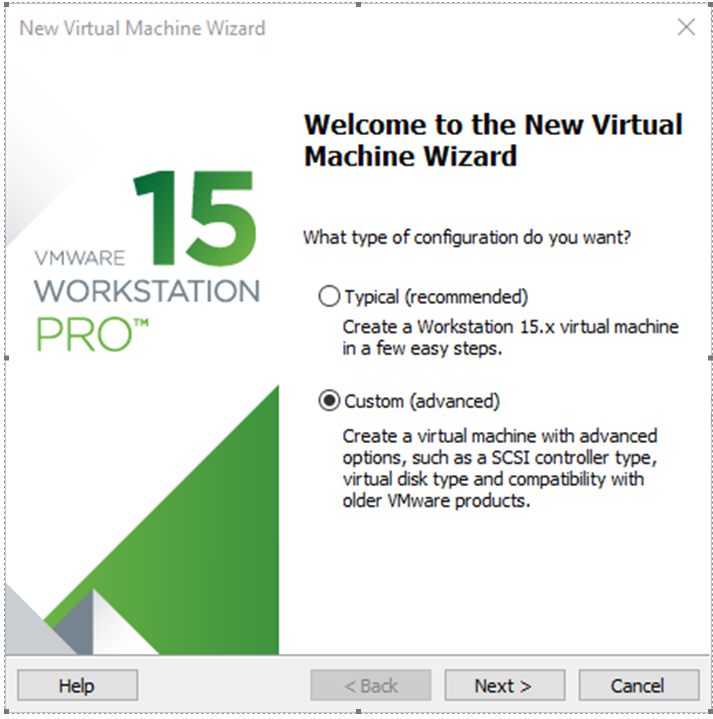
Step 1: Open the VMware software and click “Create a New Virtual Machine”. On the following screen, check “Custom (advanced)” and click “Next”:
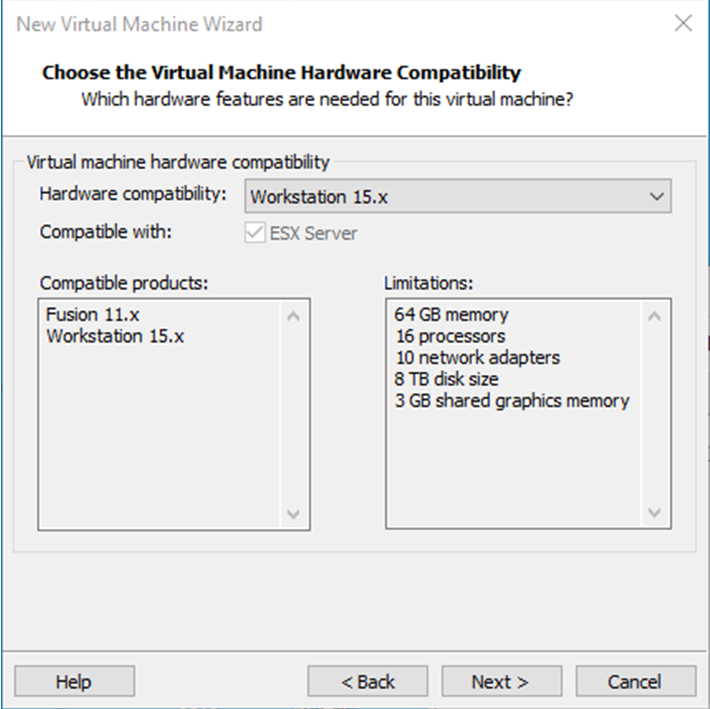
Step 2: Select the compatibility for the corresponding VMware version (you can view the version under Help -> About VMware Workstation). After confirming, click “Next”:
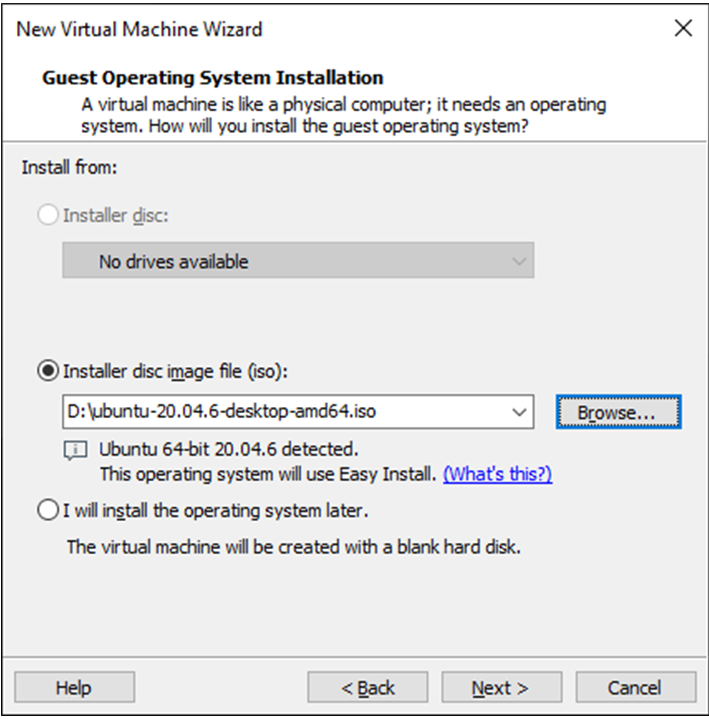
Choose “Installer disc image file (iso)” and click “Next”:
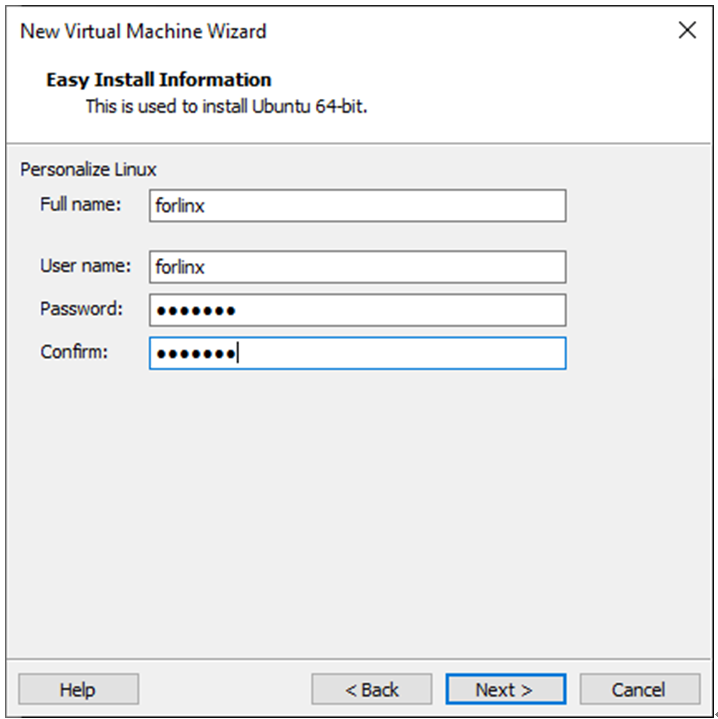
Enter the full name, username, and password, then click “Next”:
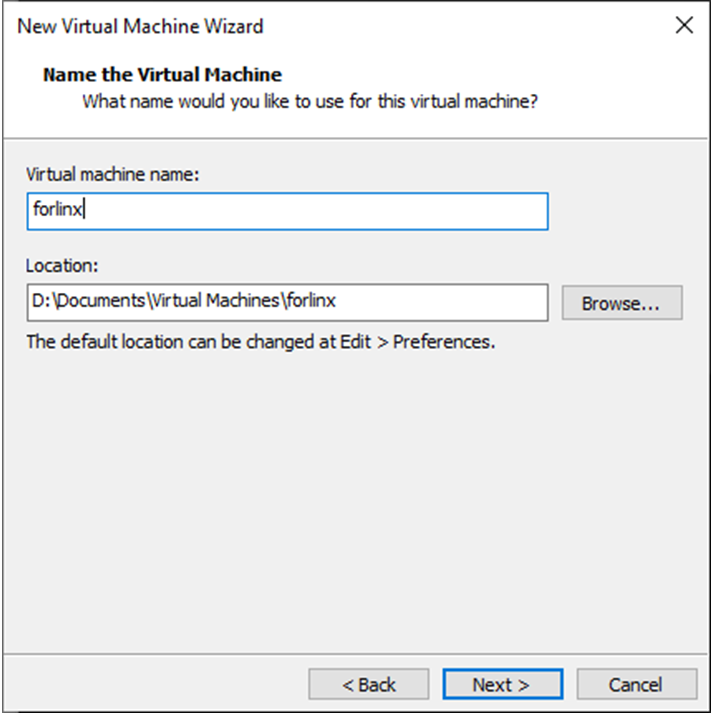
Enter the virtual machine name and configure the installation location, then click “Next”:
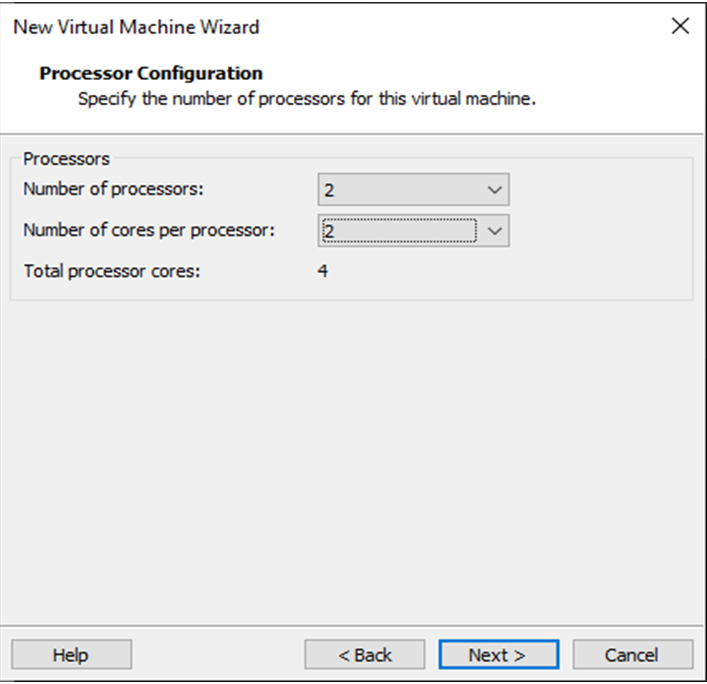
Configure the number of cores, then click “Next”:
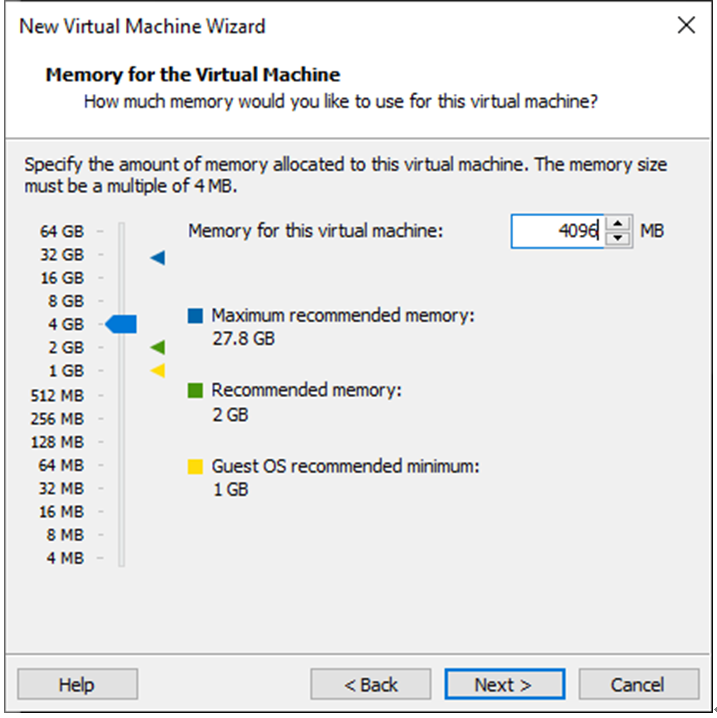
Configure at least 8GB of memory and select “Next”:
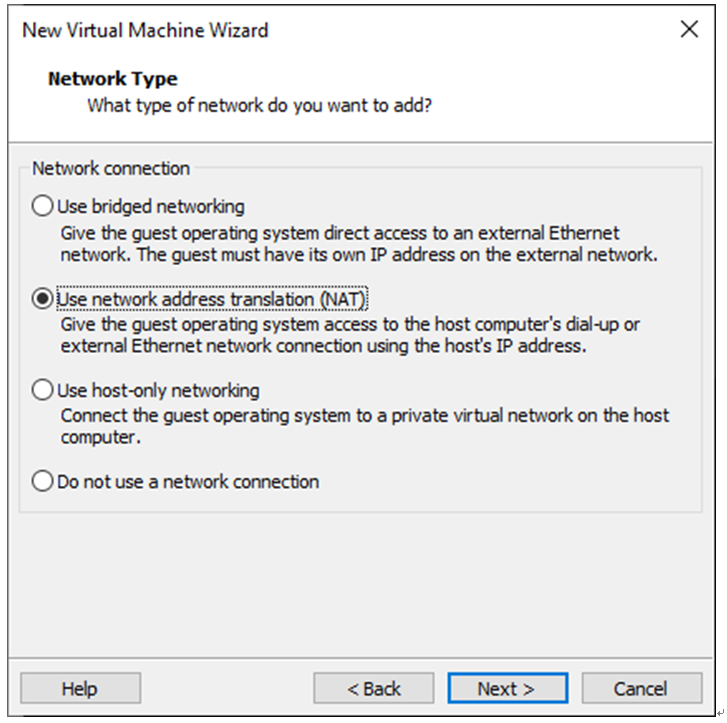
Set the network type, use the default NAT networking, and click “Next”. Subsequent steps remain at their default values until the disk capacity step is specified.
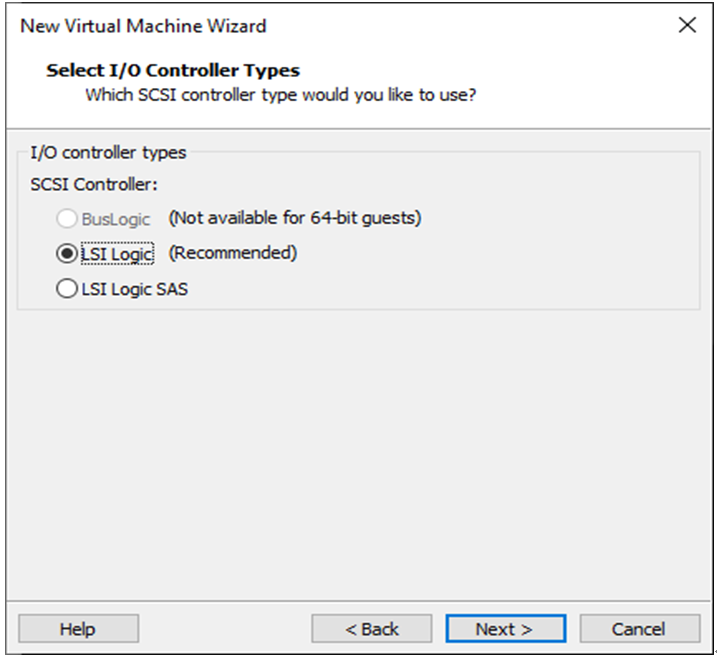
Use the recommended I/O controller and click “Next”:
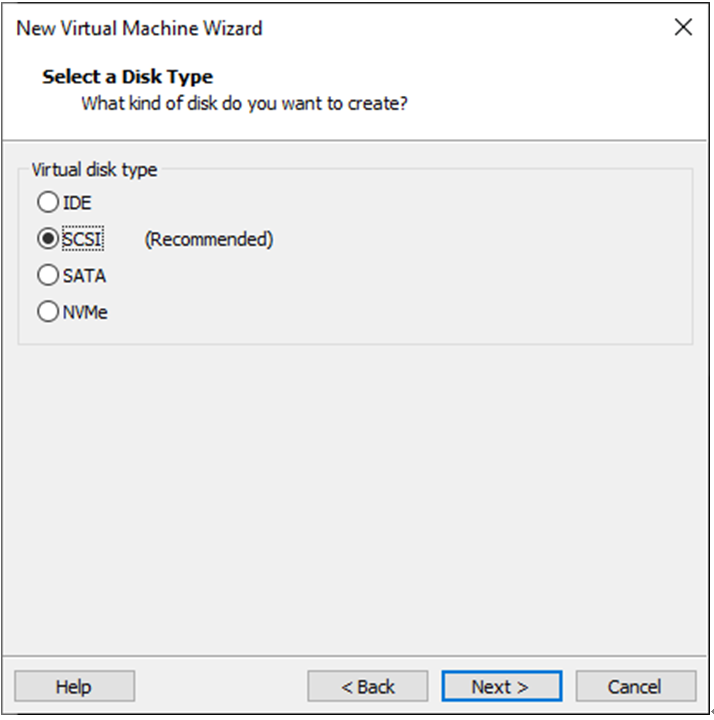
Use the recommended disk type and click “Next”:
Use the default option, “Create a new virtual disk”, and click “Next”:
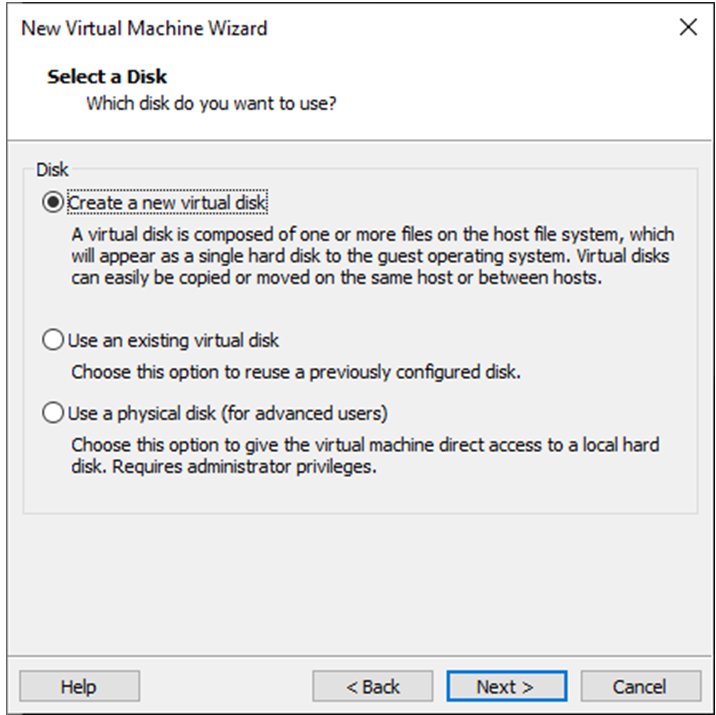
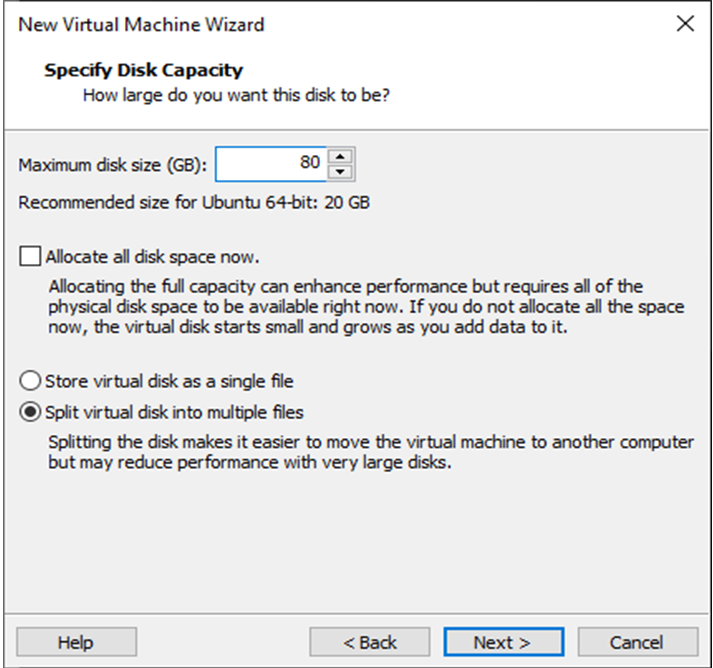
Allocate a disk size of 80GB and choose “Split virtual disk into multiple files”, then click “Next”:
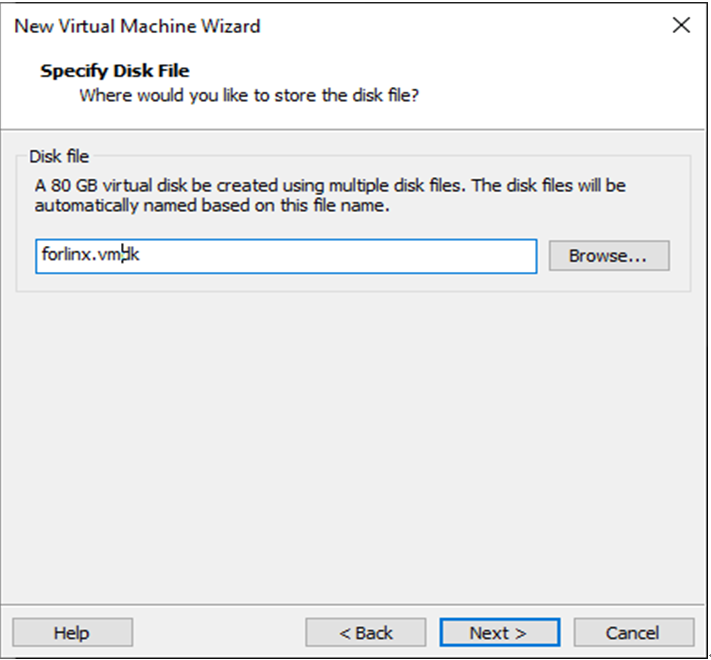
Use the default settings and click “Next”:
Click “Finish”:
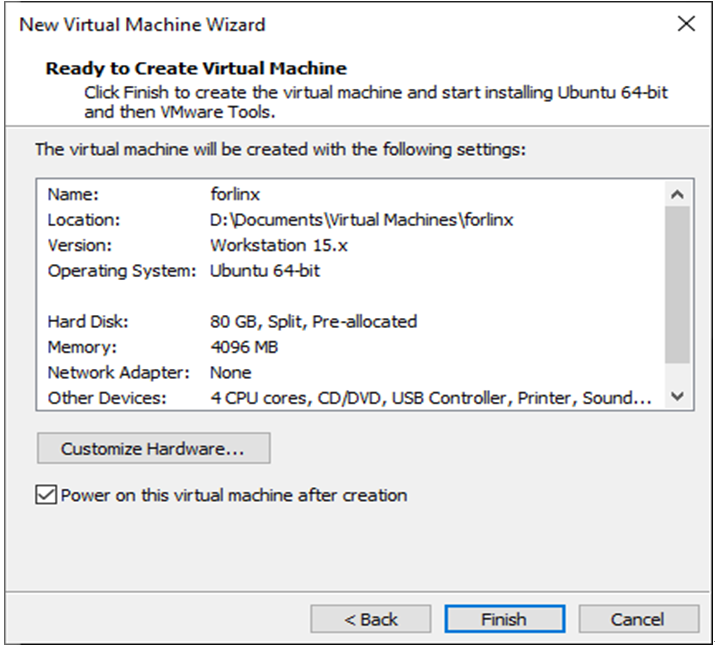
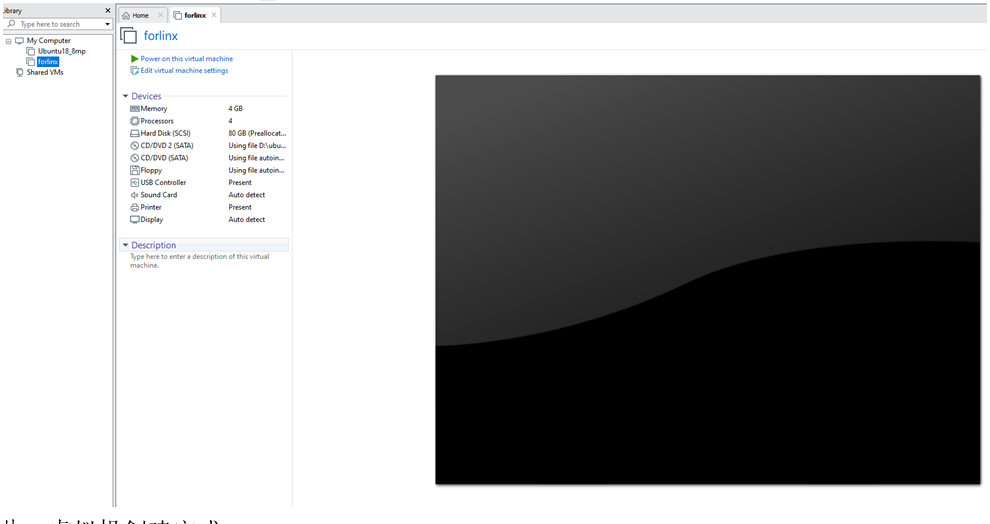
At this point, the virtual machine creation is complete.
Afterward, click “Power on this virtual machine” to start installing the image. Please wait patiently.
With the above, the Ubuntu system installation is complete.
3.1.2 Basic Configuration of Ubuntu
3.1.2.1 VMware Tools Installation
VMware Tools should be installed automatically after creating the virtual machine. If it is not successful, install it according to the following steps.
Without this tool, copy-paste and file drag-and-drop between the Windows host and the virtual machine will not work.
First, click “Virtual Machine” on the VMware navigation bar, then click “Install VMware Tools” in the dropdown menu.
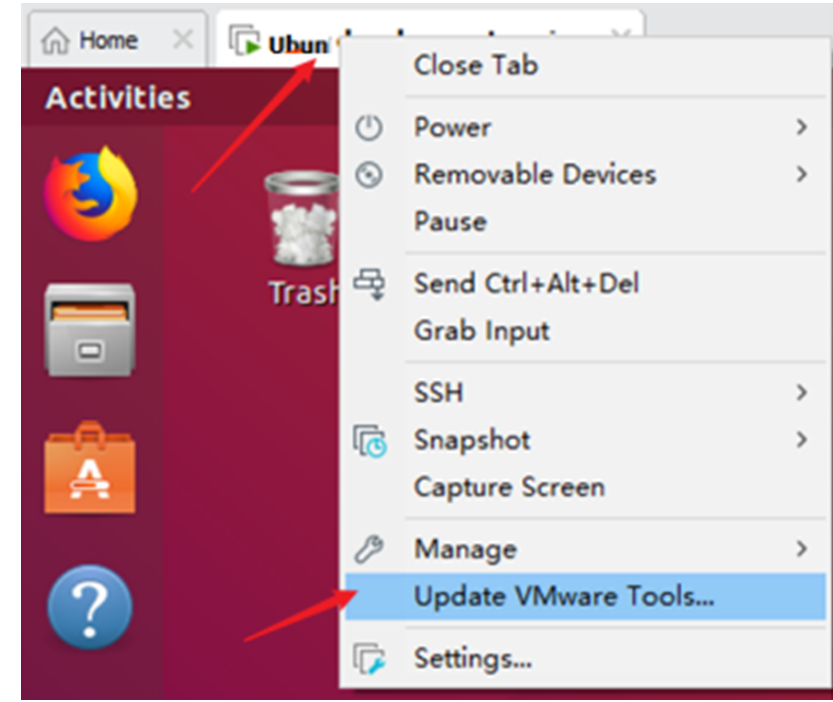
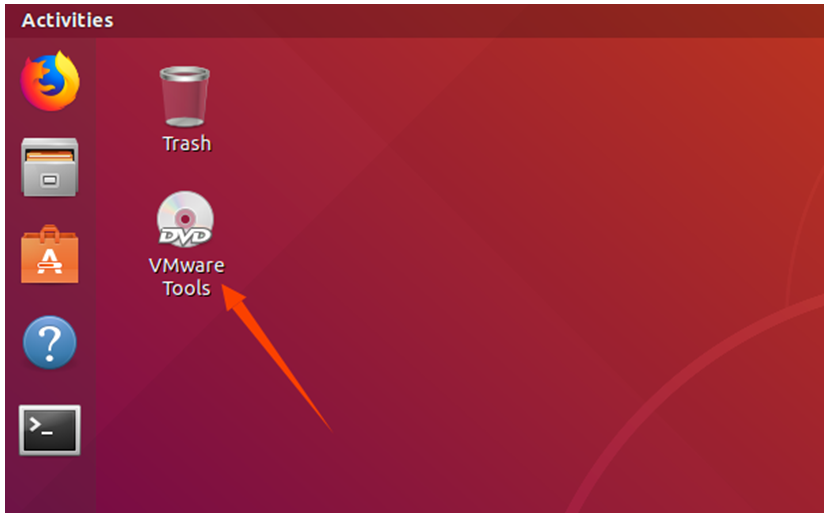
After completion, enter Ubuntu. A VMware Tools CD will appear on the desktop; click to enter it.
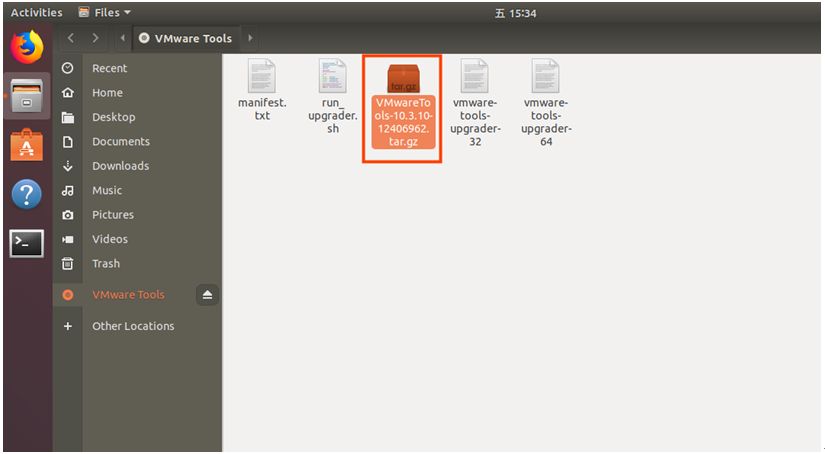
After entering, you will see a compressed file VMware Tools-10.3.10-12406962. tar. gz (different virtual machine versions may be different), and copy the file to the home directory (that is, the directory of the home personal user name).
Press [Ctrl+Alt+T] to bring up the terminal command interface and enter the command to extract it:
forlinx@ubuntu:~$ sudo tar xvf VMwareTools-10.3.10-12406962.tar.gz

After extraction completes, a folder named “vmware-tools-distrib” will appear.
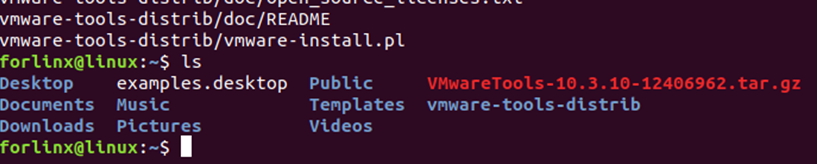
Return to the terminal and enter:
cd vmware-tools-distrib
to navigate into that directory.
Then enter:
sudo ./vmware-install.pl
Press Enter, enter your password, and the installation will begin. When prompted, enter “yes”; for other prompts, press Enter to accept the default installation.

After VMware Tools installation is complete, file copy-paste between Windows and Ubuntu will be enabled.
3.1.2.2 Virtual Machine Full-Screen Display
If the virtual machine cannot display in full screen, you can click on “View”, select “Auto-Adjust Size”, and then click “Autofit Guest” to resolve the full-screen issue.

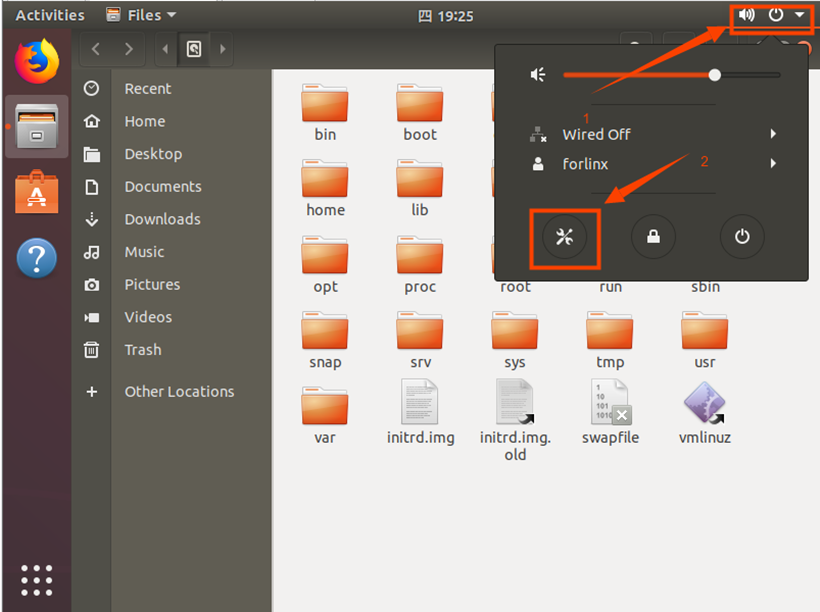
Most system settings can be configured in the location shown in the figure. Many settings requirements on Ubuntu can be completed here.
3.1.2.3 Virtual Machine Sleep Settings
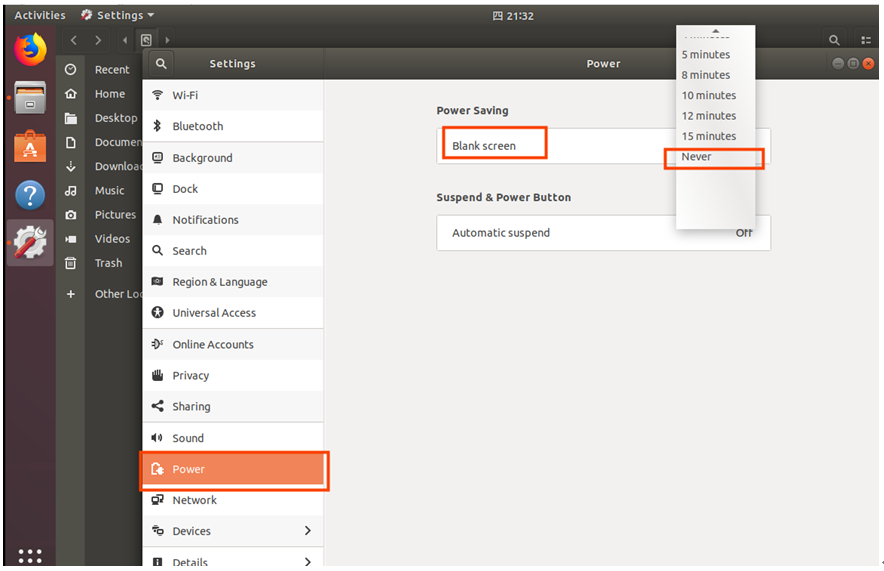
Additionally, the default sleep setting is 5 minutes. If you do not want the system to go to sleep, go to Settings -> Power -> Blank Screen and set it to “Never”.
3.1.3 Virtual Machine Swapfile Configuration
When creating the virtual machine, 8GB of memory was allocated. If 8GB of memory is insufficient during compilation, you need to modify the size of the swapfile.
forlinx@ubuntu:~$ sudo swapoff /swapfile
forlinx@ubuntu:~$ sudo dd if=/dev/zero of=/swapfile bs=1M count=16384
forlinx@ubuntu:~$ sudo mkswap /swapfile
forlinx@ubuntu:~$ sudo swapon /swapfile
3.1.4 Virtual Machine Network Configuration
3.1.4.1 NAT Connection Mode
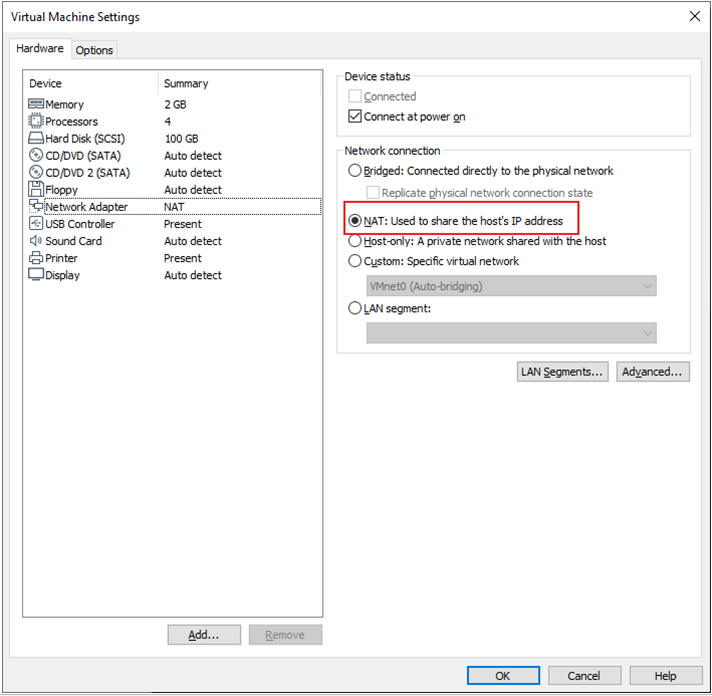
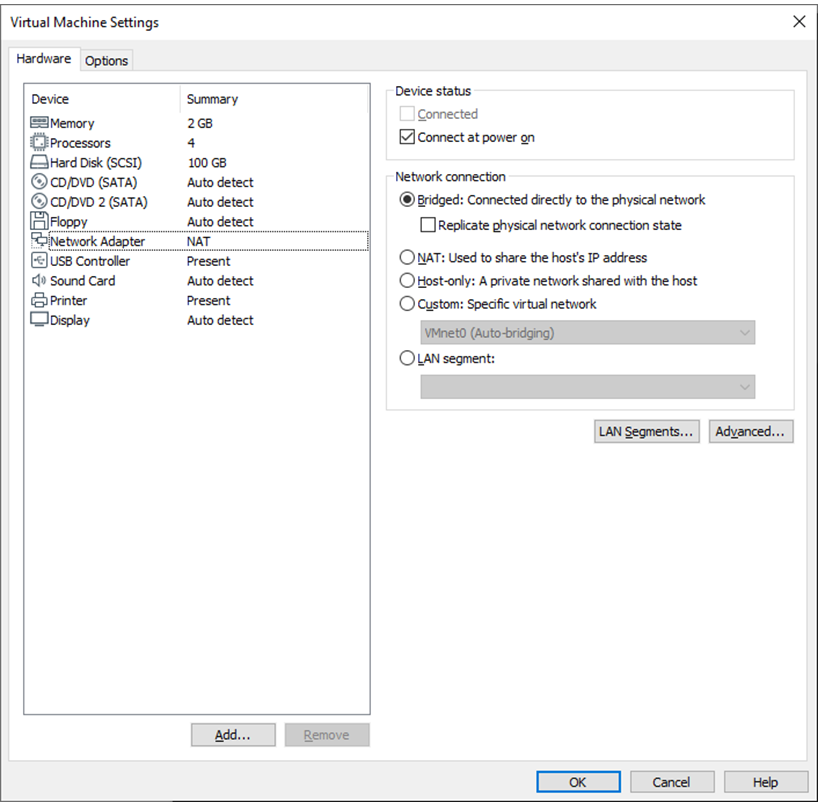
By default, after the virtual machine installation is complete, the network connection mode is set to NAT, as shown in the figure below, sharing an IP address with the host machine. This setting does not need to be changed when installing dependency packages, compiling code, etc.
In the virtual machine, when the VMware virtual network adapter is set to NAT mode, the network in the Ubuntu environment should be set to dynamic IP. In this mode, the virtual NAT device connects and communicates with the host’s network card for internet access. This is the most commonly used method for the virtual machine to access the external network.
3.1.4.2 Bridged Connection Mode
When the VMware virtual network adapter device is in bridged mode, the host network card and the virtual machine network card communicate through a virtual network bridge. In the Ubuntu environment, you need to set a network IP in the same subnet as the host. To access the external network, you need to set the DNS to be consistent with the host network card. If using servers like TFTP or SFTP, you need to set the virtual machine’s network connection to Bridged Mode.
3.2 Installing Toolkits
To install the necessary toolkits required for compiling T527N, please execute the following commands. Ensure the network is functioning normally and can access the external internet before installation:
forlinx@ubuntu:~$ sudo apt-get update
forlinx@ubuntu:~$ sudo apt-get install openssh-server vim git fakeroot make automake \
autoconf libtool libssl-dev bc dosfstools mtools parted iproute2 kmod \
libyaml-dev device-tree-compiler python flex bison build-essential \
u-boot-tools libncurses-dev lib32stdc++6 lib32z1 libc6:i386 \
nodejs gyp ninja-build  bison flex gperf ruby
3.3 Qt Creator Installation
Path: 02-User Files\01-Software Files\04-Tools\qt-opensource-linux-x64-5.12.9.run
Copy qt-opensource-linux-x64-5.12.9.run to any directory under the home directory of the current user, and execute:
forlinx@ubuntu:~$ chmod 777 qt-opensource-linux-x64-5.12.9.run
forlinx@ubuntu:~$ ./qt-opensource-linux-x64-5.12.9.run
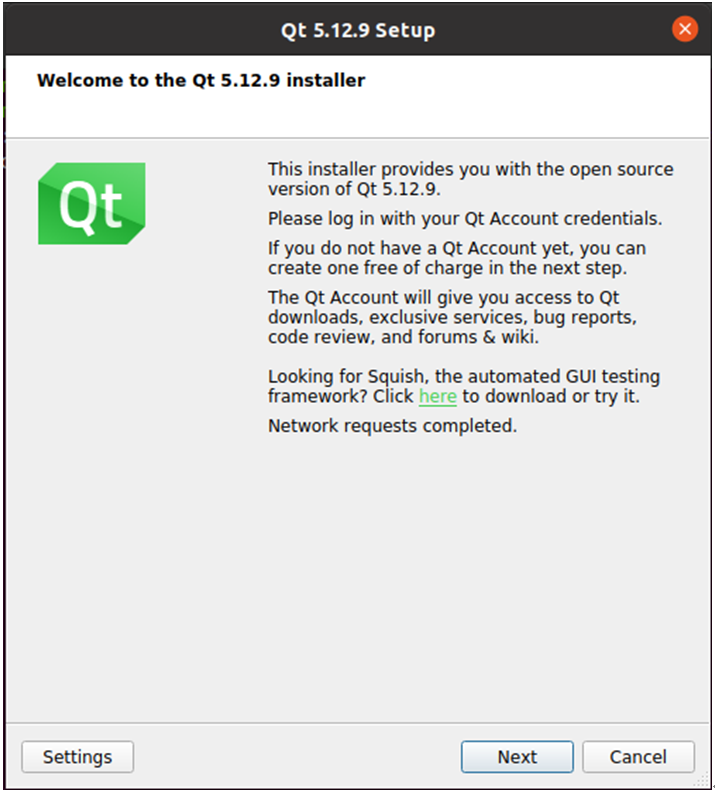
The following interface will pop up. Click “Next” to enter the next step:
Click “Next”:
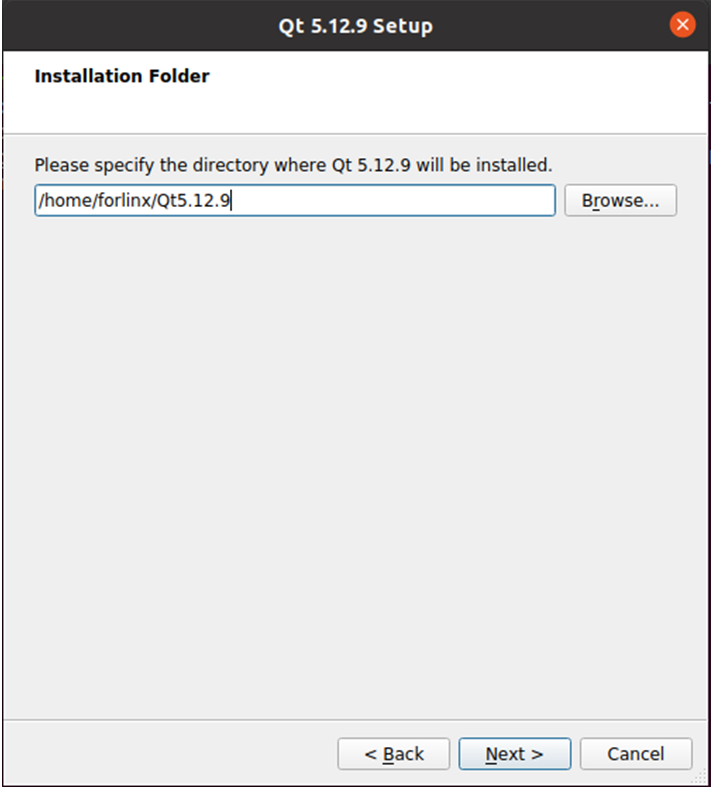
In the following screen, click “Browse …” Select the installation path of Qtcreator, and then click “Next” to enter the next step:
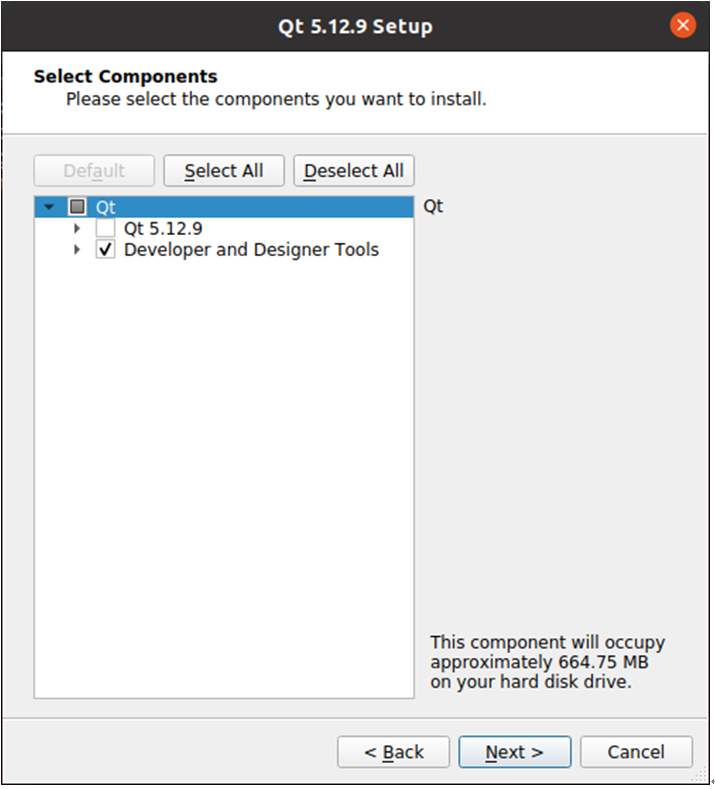
Click “Next”:
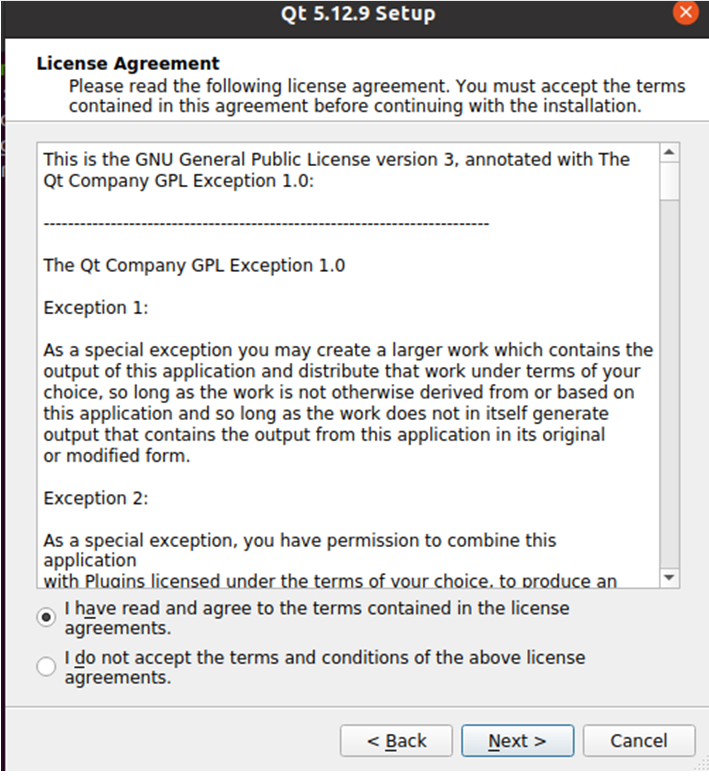
Agree to the license agreement and click “Next”:
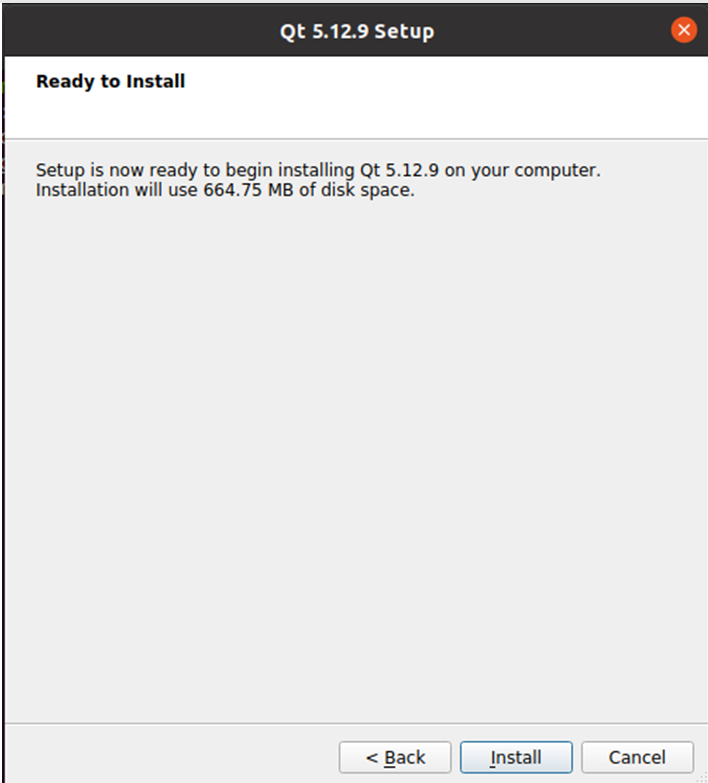
Click “Install”:
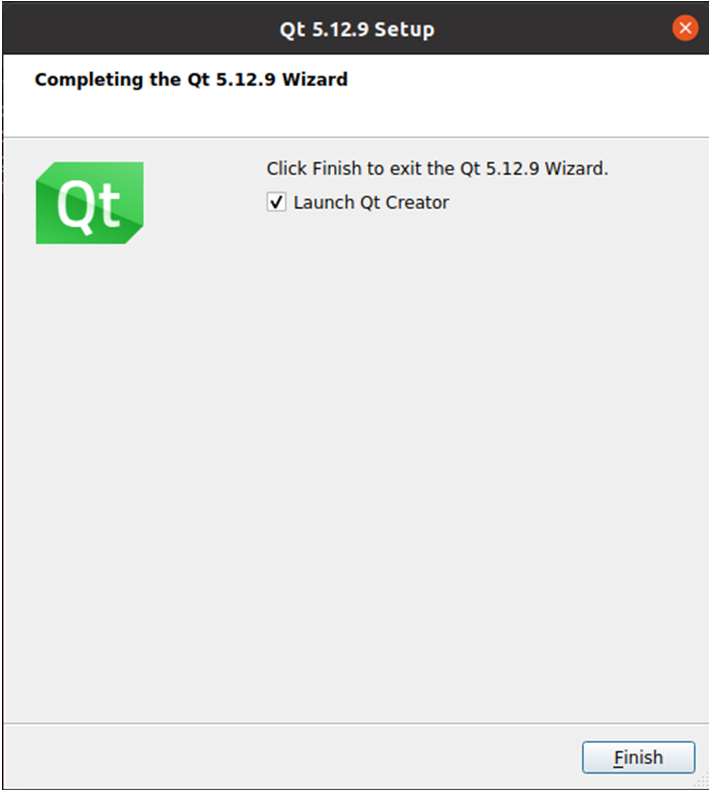
After the installation is completed, the following interface will be displayed. Uncheck the option “Launch Qt Creator” “and click “ Finish” to complete the installation of Qt Creator:
Navigate to the actual Qt Creator installation directory: /home/forlinx/Qt5.12.9/Tools/QtCreator/bin/
forlinx@ubuntu:~$ cd /home/forlinx/Qt5.12.9/Tools/QtCreator/bin/
Start Qt Creator:
forlinx@ubuntu:~/Qt5.12.9/Tools/QtCreator/bin $ sudo./qtcreator
[sudo] password for forlinx: forlinx                         //输入forlinx用户的密码,无回显
QStandardPaths: XDG_RUNTIME_DIR not set, defaulting to '/tmp/runtime-root'
QStandardPaths: XDG_RUNTIME_DIR not set, defaulting to '/tmp/runtime-root'
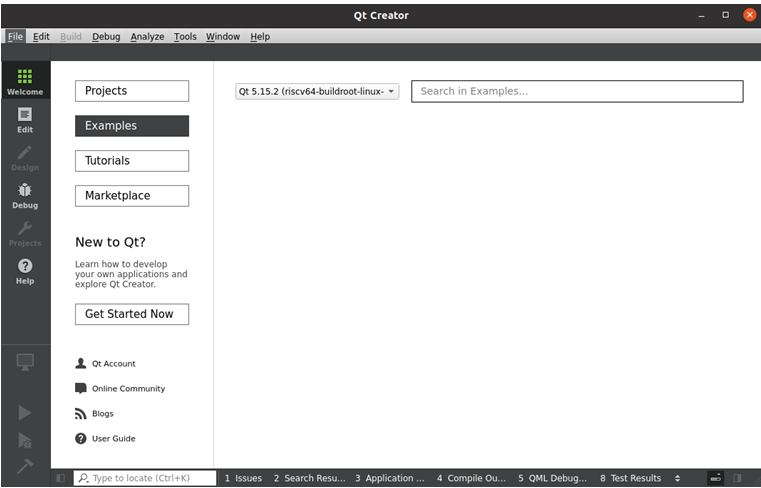
The Qt Creator tool interface will appear. Qt Creator installation is now complete.
3.4 Configuring the Qt Compilation Environment
Path: 02-User Data\01-Software Data\04-Tools\aarch64-buildroot-linux-gnu_sdk-buildroot.tar.gz
The libraries and cross-compilation tools required to compile Qt programs are located in aarch64-buildroot-linux-gnu_sdk-buildroot.tar.gz. The configuration steps are as follows:
Extract the compilation environment archive
Because the qmake tool depends on a local path, this toolkit must be placed in a fixed path: /opt/
Extract the toolkit.
forlinx@ubuntu:~$ sudo tar -xf aarch64-buildroot-linux-gnu_sdk-buildroot.tar.gz -C /opt/
forlinx@ubuntu:~$ cd /opt/aarch64-buildroot-linux-gnu_sdk-buildroot
forlinx@ubuntu:/opt/aarch64-buildroot-linux-gnu_sdk-buildroot $ sudo ./relocate-sdk.sh
Qt Creator Environment Configuration
First, open the Qt Creator software.
Execute:
Navigate to the actual Qt Creator installation directory: /home/forlinx/Qt5.12.9/Tools/QtCreator/bin/
forlinx@ubuntu:~$ cd /home/forlinx/Qt5.12.9/Tools/QtCreator/bin/
Start Qt Creator:
forlinx@ubuntu:~/Qt5.12.9/Tools/QtCreator/bin $ sudo./qtcreator
[sudo] password for forlinx: forlinx                         //输入forlinx用户的密码,无回显
QStandardPaths: XDG_RUNTIME_DIR not set, defaulting to '/tmp/runtime-root'
QStandardPaths: XDG_RUNTIME_DIR not set, defaulting to '/tmp/runtime-root'
Start the Qt Creator program and click Tools- > option:
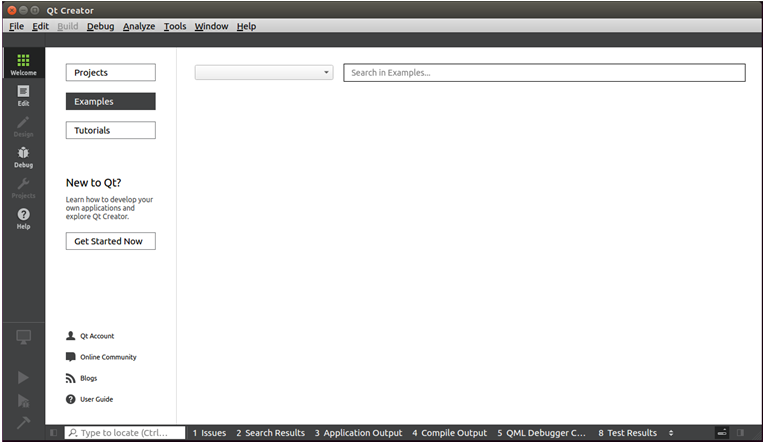
Enter the Options interface, click “Kits” on the left, then click the “Compilers” tab on the top of the middle, and click “Add-> GCC-> C + +” on the right, as shown in the figure:
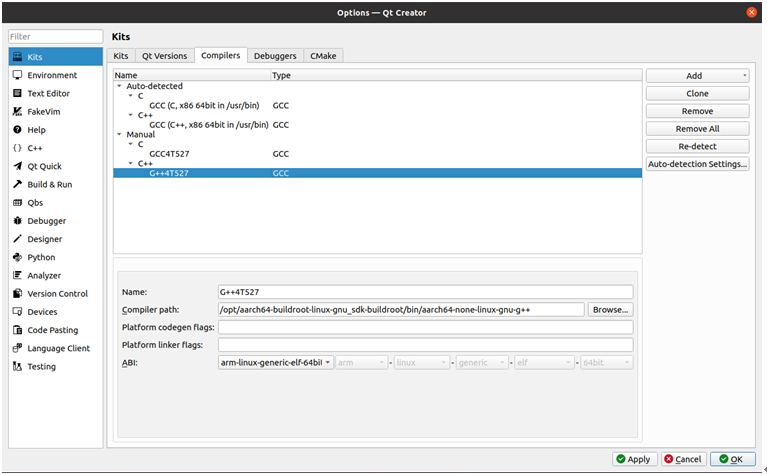
Locate “aarch64-linux-g++” in the /opt/aarch64-buildroot-linux-gnu_sdk-buildroot/bin directory, select it, click “Open”, and change the “Name”
Add the GCC compiler using the same method, and click “Add->GCC->C” on the right, as shown in the image:
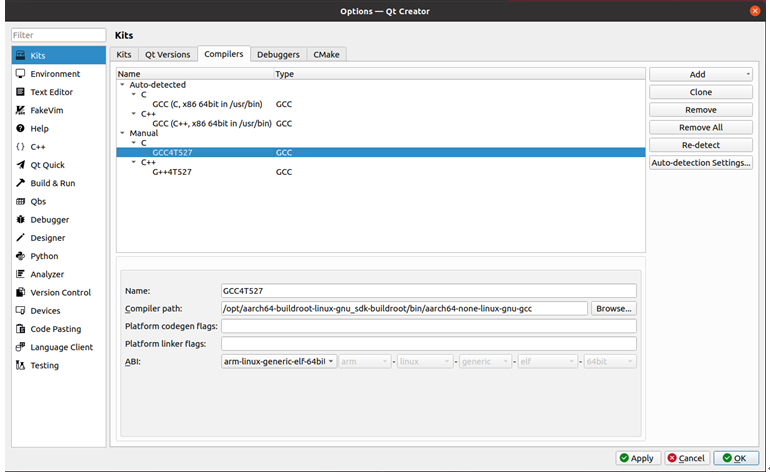
Locate “aarch64-none-linux-gnu-gcc” in the opt/aarch64-buildroot-linux-gnu_sdk-buildroot/bin directory, select it, click “Open”, and change the Name.
Click the “Qt Versions” tab, then click “Add”:
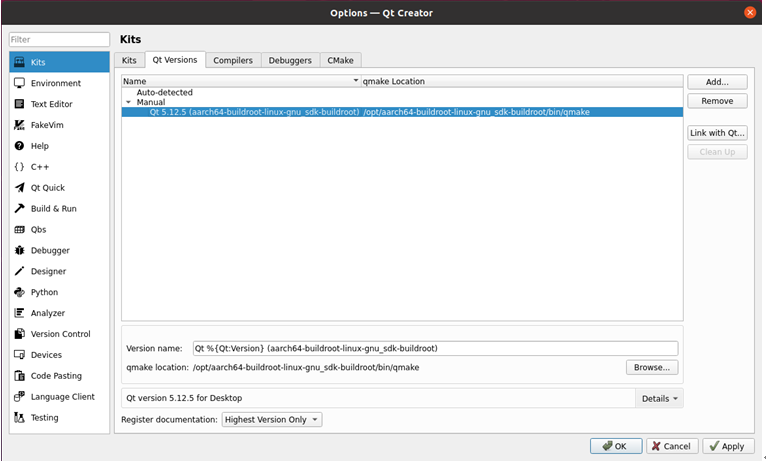
Locate “qmake” in the /opt/aarch64-buildroot-linux-gnu_sdk-buildroot/bin directory, select it and click “Open”. Once added, the screen will appear as shown below; click “Apply”.
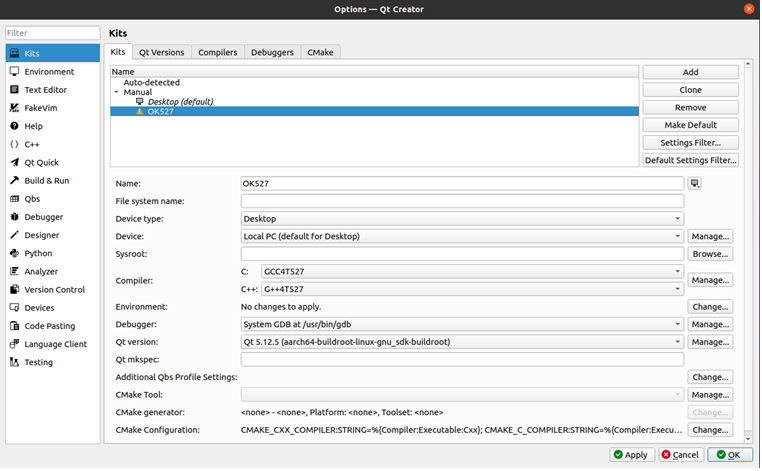
Click the “Kits” tab, click “Add” on the right to add a new Kit. Modify the contents according to the figure below and click “Apply”.
3.5 VMware Error Resolution
Error 1: Unable to connect to MKS: Too many socket connection attempts; giving up.
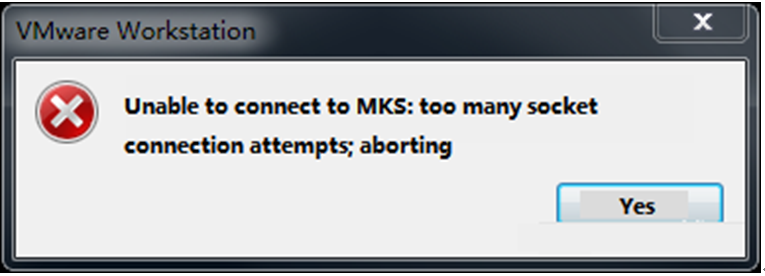
Solution:
My Computer -> Right-click -> Manage -> Services and Applications -> Services: Start all VMware-related services.
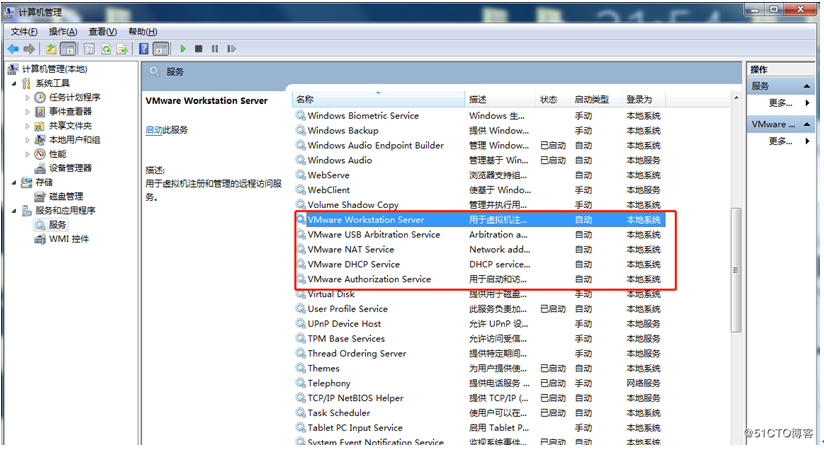
After the services start successfully, restart the virtual machine; or suspend the virtual machine first, then after the services start, resume the suspended virtual machine.
Error 2: Internal Error
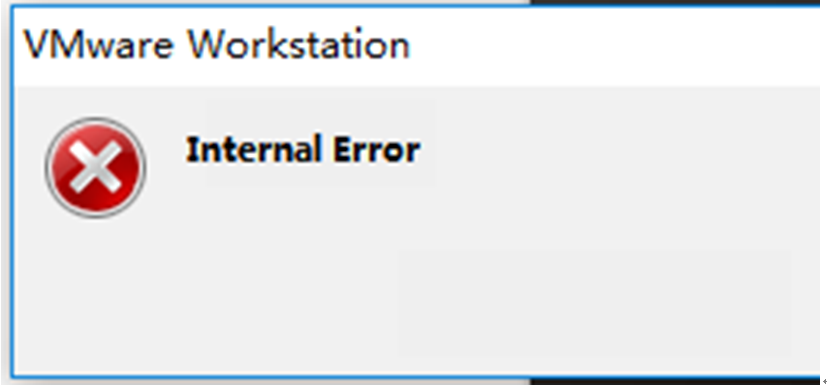
Solution: Refer to Solution 1
Error 3: Unable to install the VMware Authorization Service (VMAuthdService)
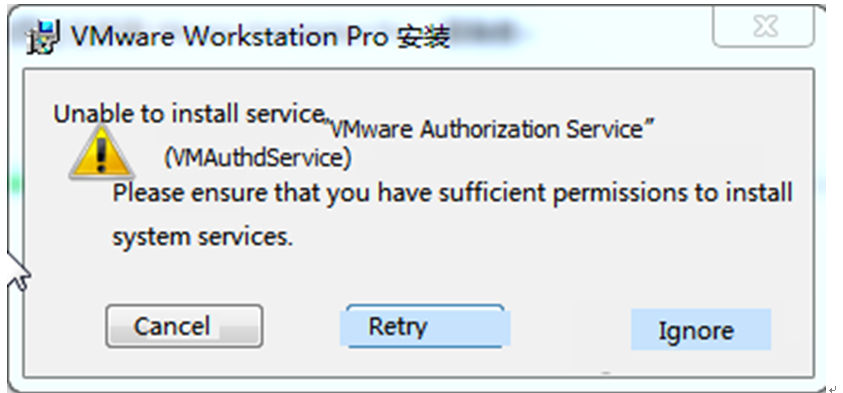
Solution:
win+R
Enter services.msc
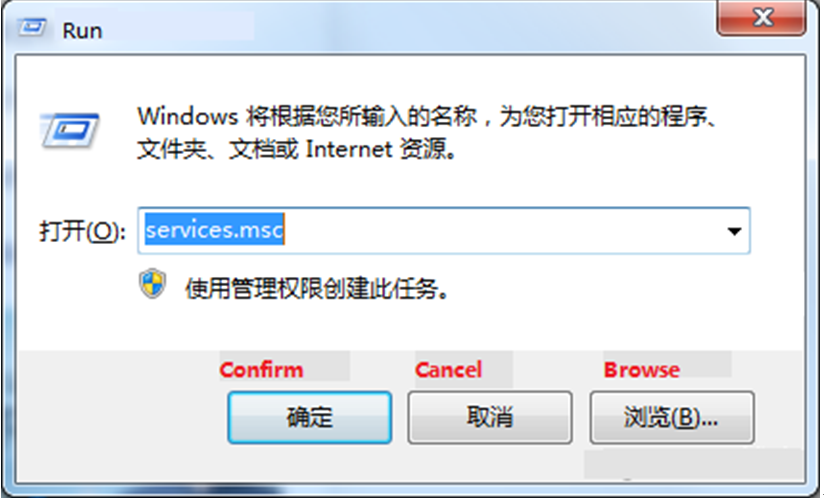
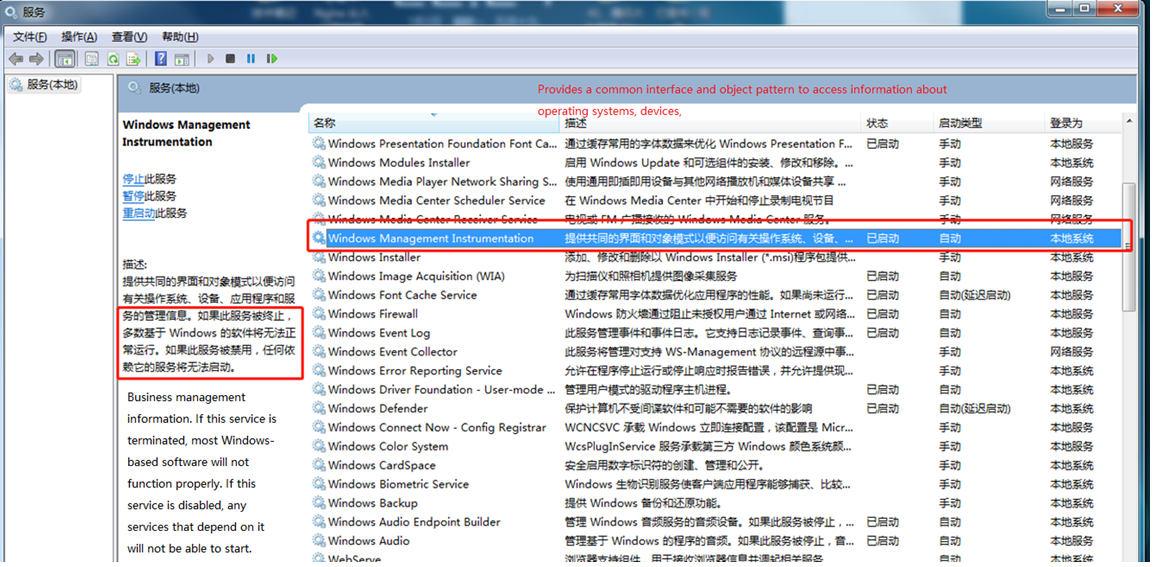
Then find the service and start it because this service is used for authorization and authentication to start and access virtual machines.
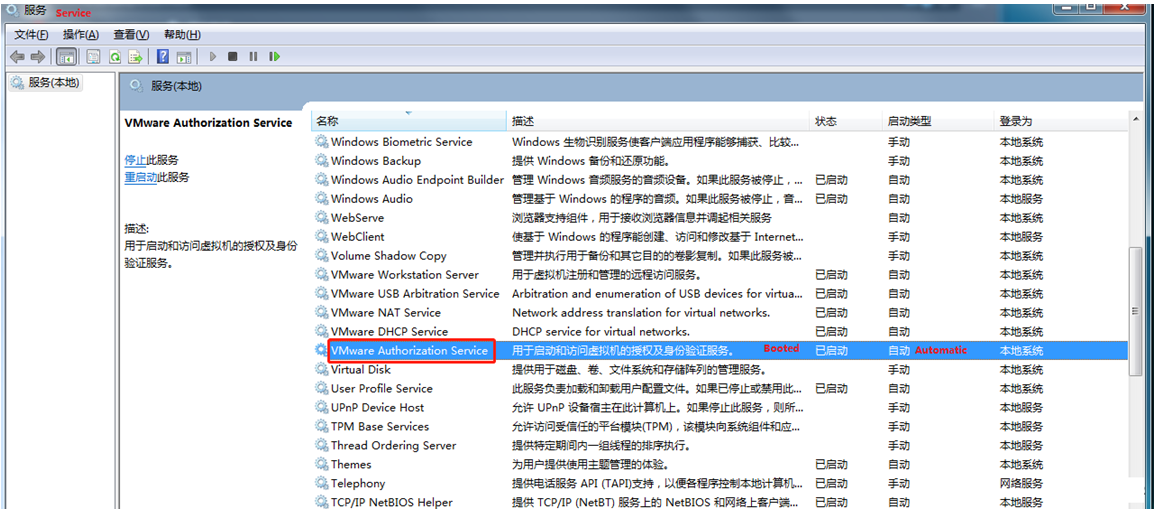
The WMI service must be started first.
Error 4: Failed to install the hcmon driver
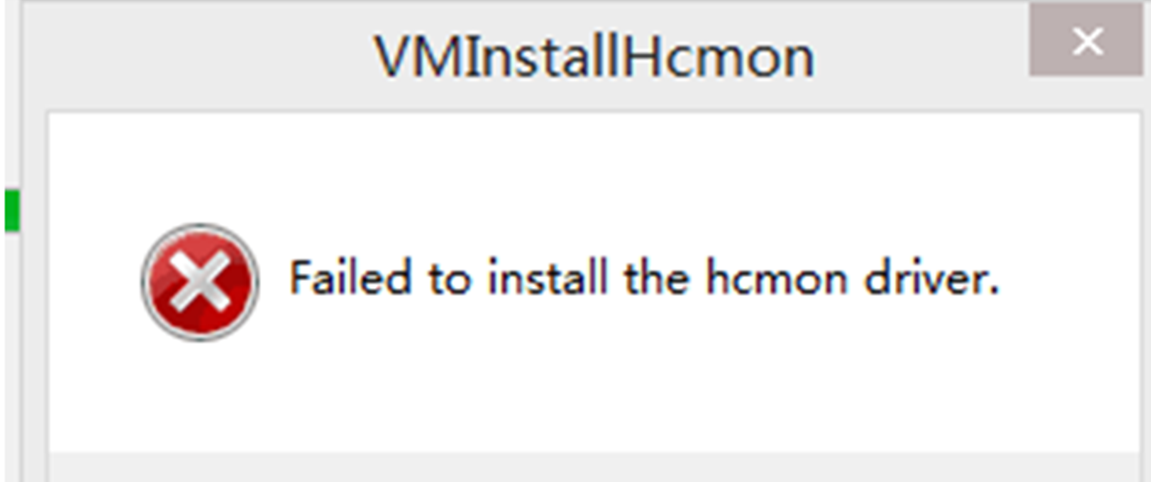
Solution: Delete C:\Windows\System32\drivers\hcmon.sys, then reinstall.
Error 5: Intel VT-x is disabled
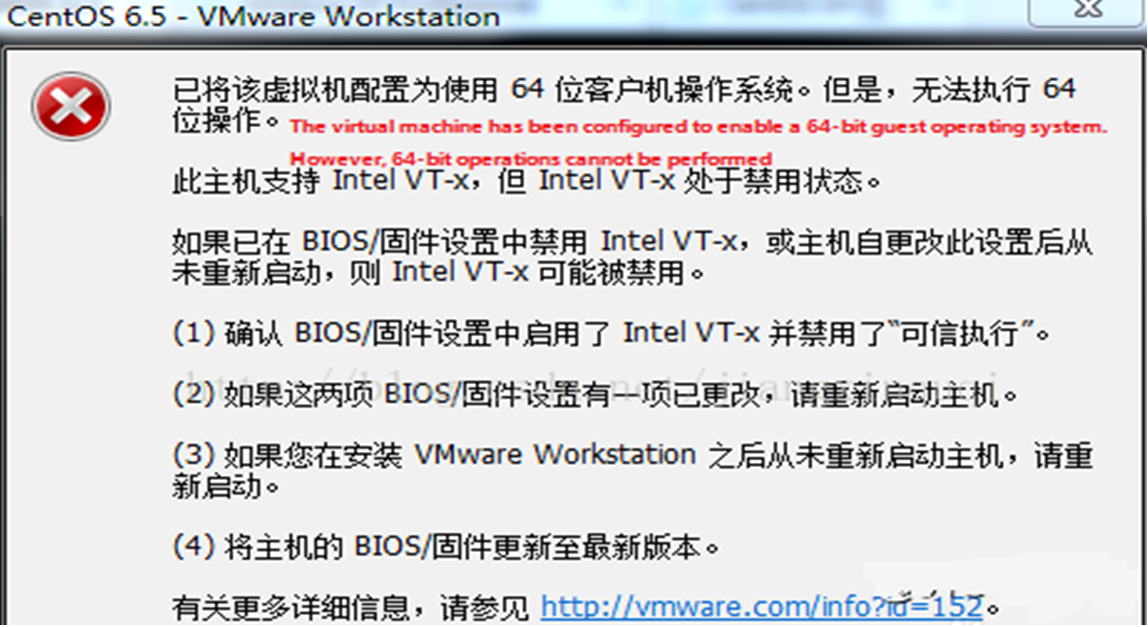
Solution:
Enter the BIOS interface during startup (F2 or F12);
Configuration -> Intel Virtual Technology -> Change from Disabled to Enabled -> Save settings and exit to restart;
Reopen VMware and start the virtual machine.
If it still doesn’t work, turn off the firewall and restart the virtual machine. (May vary depending on the machine)
Error 6: The virtual machine appears to be in use… Take Ownership (T)
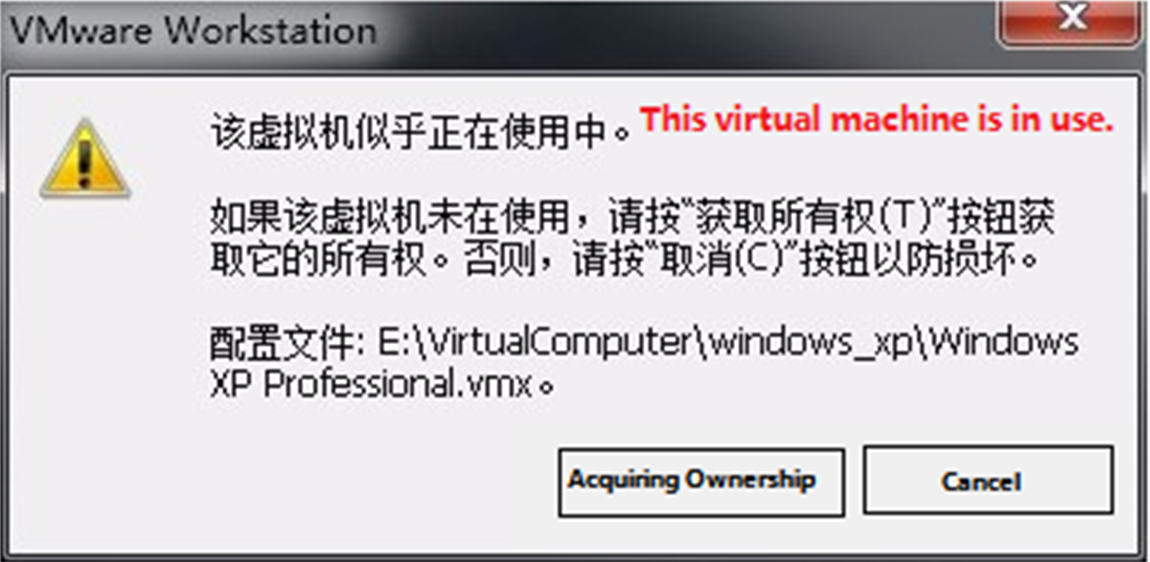
Solution:
Shut down the virtual machine;
Navigate to the virtual machine’s storage directory and delete all *.lck files (lck stands for lock files);
Open Windows Task Manager and kill all VMware processes.
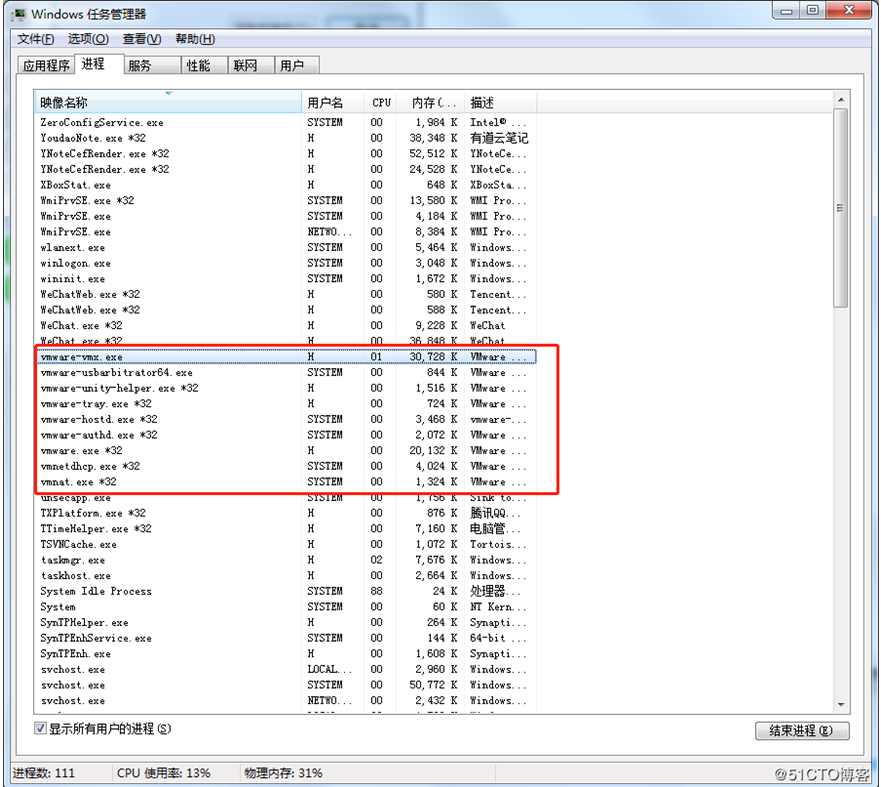
Restart the virtual machine.
Error 7: Failed to lock the file
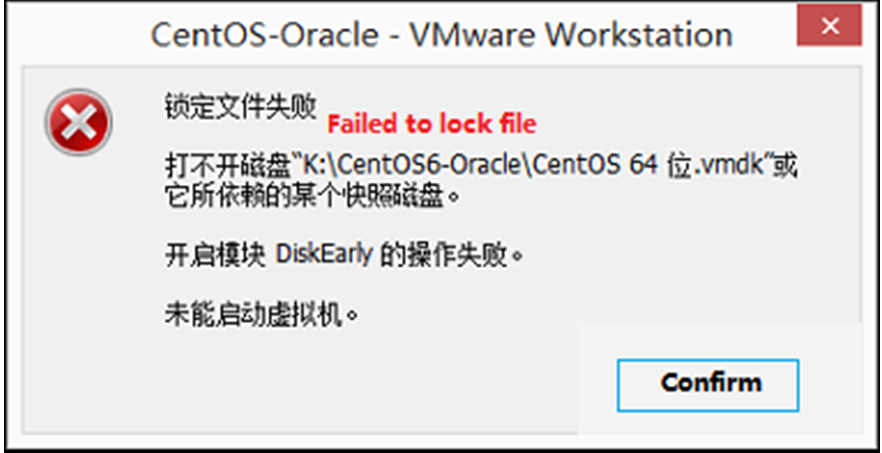
Solution:
Navigate to the virtual machine’s storage directory;
Delete .vmem.lck, .vmdk.lck, *.vmx.lck files;
Restart the virtual machine; it should now start normally.
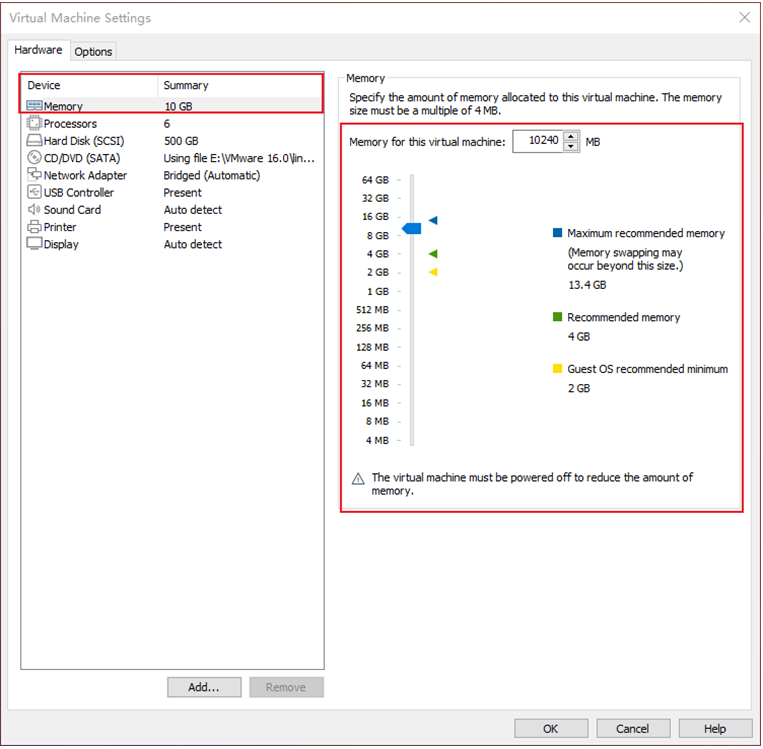
Error 8: The virtual machine could not be started because there was not enough memory available on the host.
Solution:
The host does not have enough memory to meet the maximum requirements of the virtual machine image. Increase the virtual machine’s memory and restart it.
4. Linux Compilation
Note: Please do not skip this paragraph.
The development environment refers to the software and hardware platforms required by developers during the development process. The development environment is not fixed to a specific configuration. In the previous sections, detailed a method for setting up an embedded Linux development environment. If you are already very familiar with embedded development, you can set up the environment according to your own needs. If you encounter any usage issues, you can search for related information on major Linux forums and websites in China to resolve them. If you encounter any problems, you can search for relevant information on some major Linux forums and websites to find solutions. The operations mentioned in this chapter are performed on the development environment provided. They have been tested. If you are not very familiar with embedded development, it is recommended to use the environment provided. General user is: forlinx, password: forlinx, and the superuser is: root, password: root.
4.1 Preparation Before Compilation
4.1.1 Version Description
Virtualization Software: VMware 15.1.0
Recommended Development OS: Ubuntu 20.04 64-bit
Cross-compiler: gcc-arm-10.3-2021.07-x86_64-aarch64-none-linux-gnu (kernel)
aarch64-buildroot-linux-gnu_sdk-buildroot (Application)
Bootloader Version: u-boot-2018.07
Kernel Version: linux-5.15.147
Development Board QT Version: qt5.15.8
4.1.2 Source Code Copying and Extraction
Kernel source code path: User Data - Software Data\03-Image and Source Code\02-Source Code\OKT527-linux-sdk1.3.tar.bz2..
Source Code Copy:
The OKT527-linux-sdk1.3.tar.bz2 package is comprised of the followings: toolchain, user SDK, Linux kernel, filesystem, source code for test programs, and various tools.
forlinx@ubuntu:~$ mkdir /home/forlinx/work //Create working directory
Copy the source code package to the virtual machine’s /home/forlinx/work directory.
There are two primary methods to transfer the source code package: you can either drag and drop it directly from your computer to a folder on the virtual machine’s desktop, or utilize a shared folder for command-line copying. This guide focuses on the latter method.
A common method for file transfer between Ubuntu and the Windows host is to set up a shared folder via VMware Tools. This mounts a Windows directory within Ubuntu, providing an efficient channel for sharing files.
Setup method: Click on the “Virtual Machine” and select “Settings.”
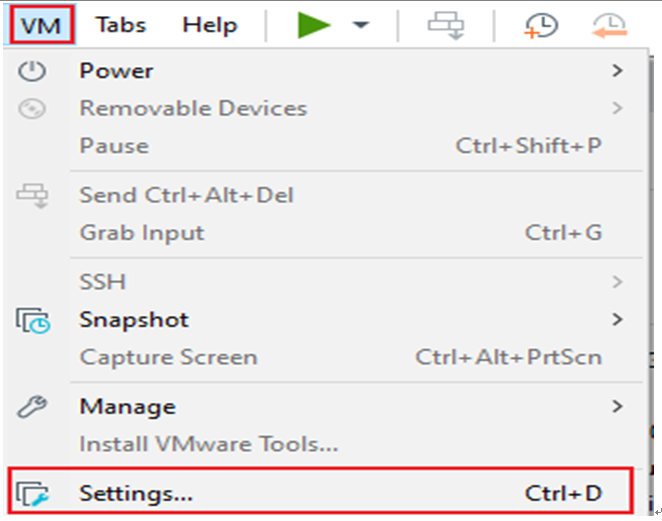
Click on “Options,” enable “Shared Folders,” set the shared directory on the Windows host, and click “OK.”
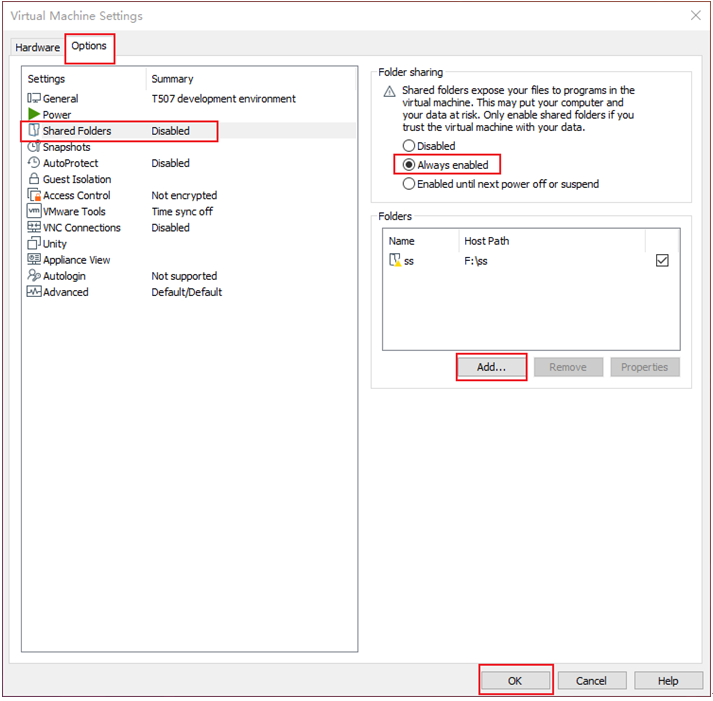
Once the virtual machine’s file sharing is set up, place the source code package OKT527-linux-sdk1.3.tar.bz2 into the Windows host’s shared folder. Here, it is named share.
The shared folder is mounted in Ubuntu at /mnt/hgfs/share. View the files in the mounted directory.
forlinx@ubuntu:~$ ls /mnt/hgfs/share/                                //View files in the shared folder
OKT527-linux-sdk1.3.tar.bz2
Copy the source code from the shared folder to Ubuntu’s /home/forlinx/work directory and perform an MD5 checksum:
forlinx@ubuntu:~$ cp /mnt/hgfs/share/OKT527-linux-sdk1.3.tar.bz2.* /home/forlinx/work/
forlinx@ubuntu:~$ cd /home/forlinx/work
forlinx@ubuntu:~/work$ md5sum OKT527-linux-sdk1.3.tar.bz2.*
If the returned MD5 checksum matches the one provided in the documentation, you can proceed to extract the source code:
forlinx@ubuntu:~/work$ cat OKT527-linux-sdk1.3.tar.bz2.0* | tar jxv
4.1.3 Common Source Code File Paths
OK527_UP4 platform: the software configuration file paths (starting from the OKT527-linux-sdk1.3 directory in the SDK source code) are as follows:
File Type |
Path |
|---|---|
Kernel configuration |
device/config/chips/t527/configs/OK527_UP4/linux-5.15/bsp_defconfig |
Device tree file: |
kernel/linux-5.15/bsp/configs/linux-5.15/sun55iw3p1.dtsi |
kernel/linux-5.15/arch/arm64/boot/dts/allwinner/OKT527-UP4-Common.dtsi |
|
kernel/linux-5.15/arch/arm64/boot/dts/allwinner/OKT527-UP4-Linux.dts |
|
sysconfig.fex |
device/config/chips/t527/configs/OK527_UP4/sys_config.fex |
System File |
out/t527/OK527_UP4/buildroot/buildroot/target |
U-Boot environment variable configuration file: |
device/config/chips/t527/configs/OK527_UP4/buildroot/env.cfg If you need to modify or add default environment variables, you can edit this file. |
OK527_UP4 platform: the path to the test programme (starting from the OKT527-linux-sdk1.3 directory in the SDK source code) is as follows
platform/forlinx/forlinx_cmd_demo/ Source code directory for the command-line test programme
platform/forlinx/forlinx_qt_demo/ Qt test programme source code directory
Source code path: |
||
|---|---|---|
qt-demo |
4G |
platform/forlinx/forlinx_qt_demo/4g |
ADC |
platform/forlinx/forlinx_qt_demo/adc |
|
Backlight |
platform/forlinx/forlinx_qt_demo/backlight |
|
SQL |
platform/forlinx/forlinx_qt_demo/books |
|
Browser |
platform/forlinx/forlinx_qt_demo/browser |
|
Camera test |
platform/forlinx/forlinx_qt_demo/camera |
|
Recording |
platform/forlinx/forlinx_qt_demo/fltest_qt_audiorecorder |
|
Audio Playback |
platform/forlinx/forlinx_qt_demo/fltest_qt_musicplayer |
|
Key test |
platform/forlinx/forlinx_qt_demo/keypad |
|
Desktop |
platform/forlinx/forlinx_qt_demo/matrix-browser |
|
Network Configuration |
platform/forlinx/forlinx_qt_demo/network |
|
ping |
platform/forlinx/forlinx_qt_demo/ping_test |
|
platform/forlinx/forlinx_qt_demo/qopenglwidget |
||
rtc |
platform/forlinx/forlinx_qt_demo/rtc |
|
Spi |
platform/forlinx/forlinx_qt_demo/spitest |
|
Serial Port Testing |
platform/forlinx/forlinx_qt_demo/terminal |
|
Watchdog |
platform/forlinx/forlinx_qt_demo/watchdog |
|
WiFi |
platform/forlinx/forlinx_qt_demo/wifi |
|
cmd-demo |
GPADC |
platform/forlinx/forlinx_cmd_demo/fltest_adc |
Backlight |
platform/forlinx/forlinx_cmd_demo/fltest_backlight |
|
Key test |
platform/forlinx/forlinx_cmd_demo/fltest_keytest |
|
SPI test |
platform/forlinx/forlinx_cmd_demo/fltest_spidev_test |
|
UART |
platform/forlinx/forlinx_cmd_demo/fltest_uarttest |
|
USB camera |
platform/forlinx/forlinx_cmd_demo/fltest_usbcam |
|
Watchdog |
platform/forlinx/forlinx_cmd_demo/fltest_watchdog |
|
ec20 4G |
platform/forlinx/forlinx_cmd_demo/quectelCM |
|
wifi |
platform/forlinx/overlay_rootfs/usr/bin/fltest_wifi.sh |
|
Wifi-ap |
platform/forlinx/overlay_rootfs/usr/bin/fltest_hostap.sh |
|
gpio |
platform/forlinx/overlay_rootfs/usr/bin/fltest_gpio.sh |
|
Desktop |
platform/forlinx/overlay_rootfs/etc/init.d/S42matrix-browser |
4.2 Source Code Compilation
4.2.1 Full Compilation
Full compilation refers to the unified compilation of source code, including kernel source code, library files, applications, file system packaging, etc.
Step 1: Select Configuration:
forlinx@ubuntu:~$ cd /home/forlinx/work/OKT527-linux-sdk1.3     //Navigate to the source code directory
forlinx@ubuntu:~/work/OKT527-linux-sdk1.3$ ./build.sh config  //Execute the configuration command
forlinx@ubuntu:~/work/OKT527-linux-sdk1.3$ ./build.sh config
========ACTION List: mk_config ;========
options :
All available board:
   0. OK527_UP4
Choice [OK527_UP4]:
Setup BSP files
.

…
Run the compilation script to perform a full compilation:
forlinx@ubuntu:~/work/OKT527-linux-sdk1.3$ ./build.sh
After the source code compilation is complete, you need to generate the image. This involves packaging various compiled files and configuration files.
Execute the packaging command to generate the image file:
forlinx@ubuntu:~/work/OKT527-linux-sdk1.3$ ./build.sh pack

…

Dragon execute image.cfg SUCCESS !
----------image is at----------

655M    ~/work/OKT527-linux-sdk1.3/out/t527_linux_OK527_UP4_uart0.img

pack finish
4.2.2 Compiling the Kernel/Device Tree Separately
Compiling the kernel separately only compiles the kernel source code and affects the drivers. It is suitable for compiling when only the kernel needs to be modified.
After selecting the configuration as described above:
forlinx@ubuntu:~$ cd /home/forlinx/work/OKT527-linux-sdk1.3
forlinx@ubuntu:~/work/OKT527-linux-sdk1.3$ ./build.sh kernel                    //Execute the command to compile the kernel

…

Copy modules to target ...
15985 blocks
28830 blocks
bootimg_build
Copy boot.img to output directory ...

sun55iw3p1 compile all(Kernel+modules+boot.img) successful

…

forlinx@ubuntu:~/work/OKT527-linux-sdk1.3$ ./build.sh pack
4.2.3 Compiling Test Programs Separately
When only the test programs have been modified, you can compile only the test programs to reduce compilation time.
forlinx@ubuntu:~$ cd /home/forlinx/work/OKT527-linux-sdk1.3
forlinx@ubuntu:~/work/OKT527-linux-sdk1.3$ source .buildconfig              //Configuration before compilation
forlinx@ubuntu:~/work/OKT527-linux-sdk1.3$ ./platform/forlinx/build.sh
4.2.4 Compiling U-Boot Separately
To compile U-Boot separately, use the following command:
forlinx@ubuntu:~/work/OKT527-linux-sdk1.3$ ./build.sh brandy
forlinx@ubuntu:~/work/OKT527-linux-sdk1.3$ ./build.sh pack
4.2.5 Individual Compilation Filesystem
The file system is not compiled during the full compilation process; it must be modified and compiled separately. Navigate to the file system directory to compile the software and make configuration changes.
The compilation instructions are as follows: use the compilation scripts in the buildroot-202205 directory to compile the project.
forlinx@ubuntu:~/work/OKT527-linux-sdk1.3/buildroot/buildroot-202205$ ./build.sh
If you wish to amend the configuration, please do so as follows. Once you have made the changes, compile using the command above.
forlinx@ubuntu:~/work/OKT527-linux-sdk1.3/buildroot/buildroot-202205$ make OKT527-UP4-Linux_defconfig ARCH=arm64					//Read the current configuration
forlinx@ubuntu:~/work/OKT527-linux-sdk1.3/buildroot/buildroot-202205$ make menuconfig	//Access the graphics configuration interface to modify the settings
forlinx@ubuntu:~/work/OKT527-linux-sdk1.3/buildroot/buildroot-202205$ cp ../../out/t527/OK527_UP4/buildroot/buildroot/.config configs/OKT527-UP4-Linux_defconfig		//Save the changes as the default configuration
4.2.6 Cleaning the OKT527-linux-sdk
This operation removes all intermediate files but does not affect the source files, including any modified source files. However, it does not affect the source files, including those that have already been modified.
forlinx@ubuntu:~$ cd /home/forlinx/work/OKT527-linux-sdk
forlinx@ubuntu:~/work/OKT527-linux-sdk1.3$ ./build.sh clean                            //执行清除命令
4.2.7 Changing the Boot Logo
Replace the boot logo file at: device/config/chips/t527/boot-resource/boot-resource/bootlogo.bmp
The image must be in BMP format with a resolution of 720×480 and the filename must be “bootlogo.bmp”.
Repackage the image.
forlinx@ubuntu:~/work/OKT527-linux-sdk1.3$ ./build.sh pack
4.3 Qt Configuration and Usage
The OKT527-linux-sdk1.3.tar.bz2 provided by Forlinx includes the complete Qt4.7.0 development environment. Our development environment already has Qt Creator5.12.9 installed, but you can also set it up manually as described earlier.
4.3.1 OKT527-linux-sdk Installation
Please refer to Chapter 3 for SDK installation and full compilation.
4.3.2 Qt Creator Environment Configuration
Please refer to Chapter 3 for installation and configuration.
4.3.3 Qt Creator Development Example
Open Qt Creator software.
forlinx@ubuntu:~$ cd /home/forlinx/Qt5.12.9/Tools/QtCreator/bin/
forlinx@ubuntu:~/qtcreator-4.7.0/bin$ sudo ./qtcreator
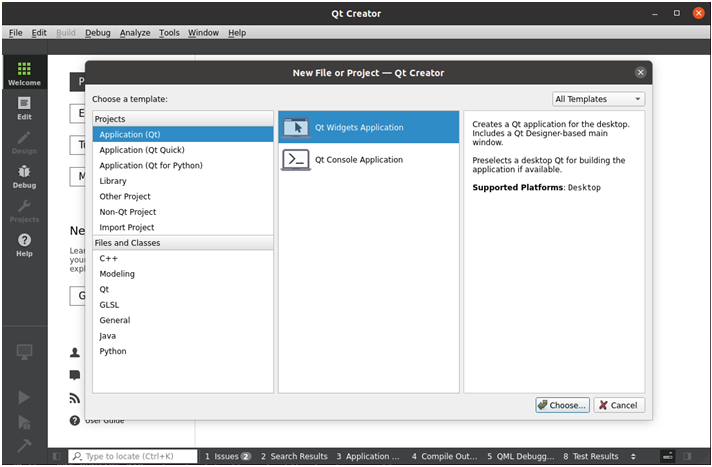
Launch the Qt Creator program and enter the Qt Creator interface. Click “File” -> “New File or Project” to create a new project. Select “Application (Qt)” -> “Qt Widgets Application”, and then click “Choose” in the lower right corner.
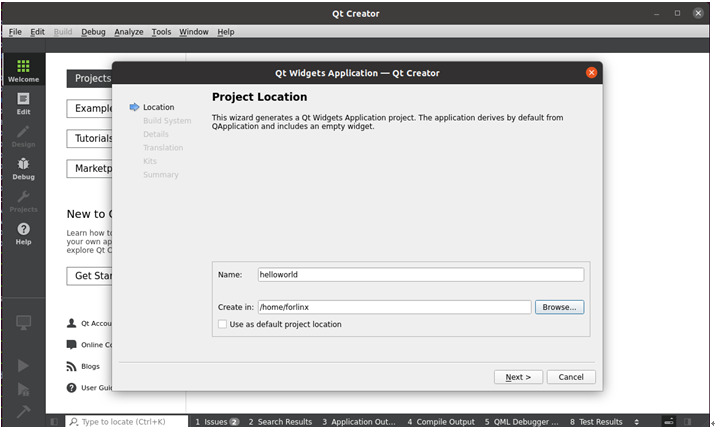
In the following interface, set the project name to “helloworld”. Set the installation path to /home/forlinx, then click “Next”.
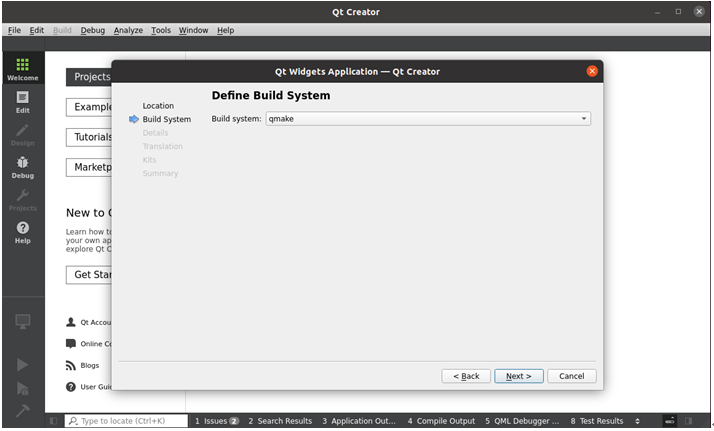
Select “qmake” and click “Next” to continue.
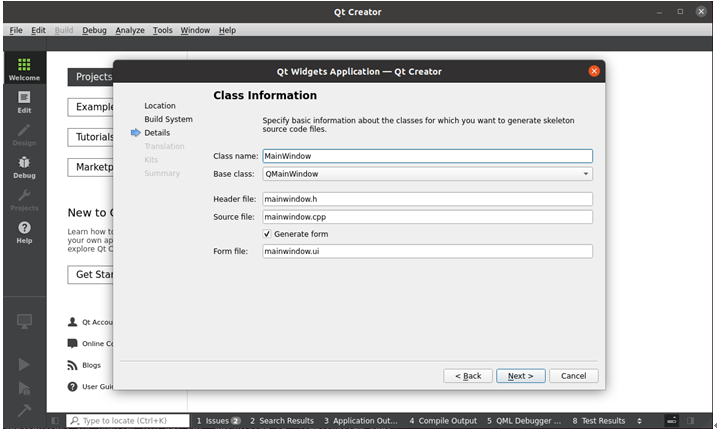
In the following interface, you can modify the Class name and Base class as needed. Here, we’ll use the default settings and then click “Next”:
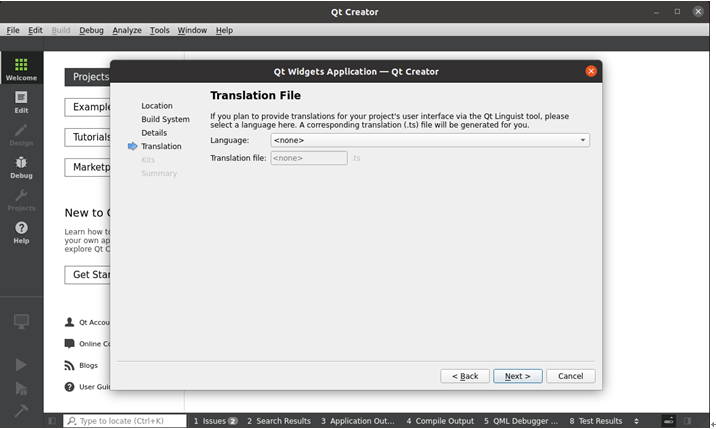
Choose the file to be translated. If you require multilingual support, you can select the language. Here, use the default and click “Next”.
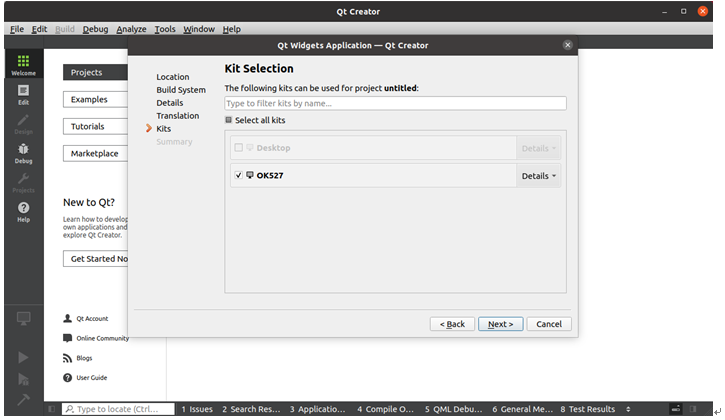
In the following interface, select the previously added “OK527” as the kit for the current project, then click “Next”
In the following interface, click “Finish” to complete the project creation.
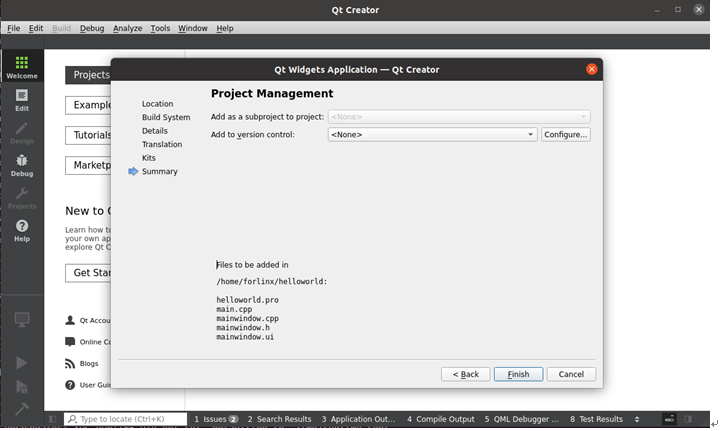
Once the project is created, the following window will appear:
Project created successfully.
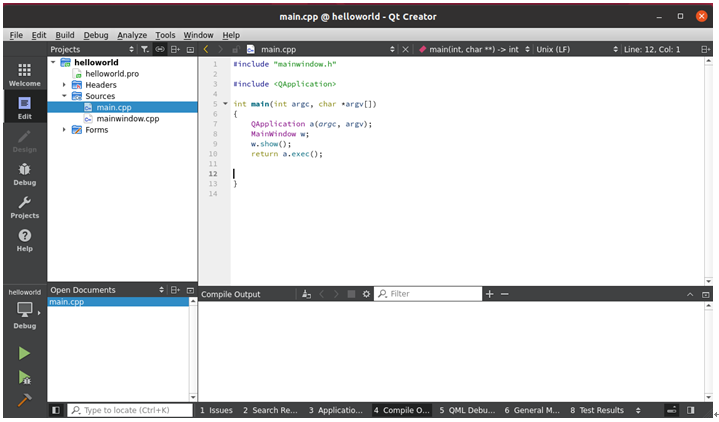
After writing the program, click the hammer icon in the bottom left corner to perform cross-compilation.
Copy the compiled executable to the development board for application testing.
4.3.4 Qt Creator Common Issues and Solutions
Open the QtCreator integrated development environment from the command line or shortcut. After starting, you will see an interface similar to the one below.
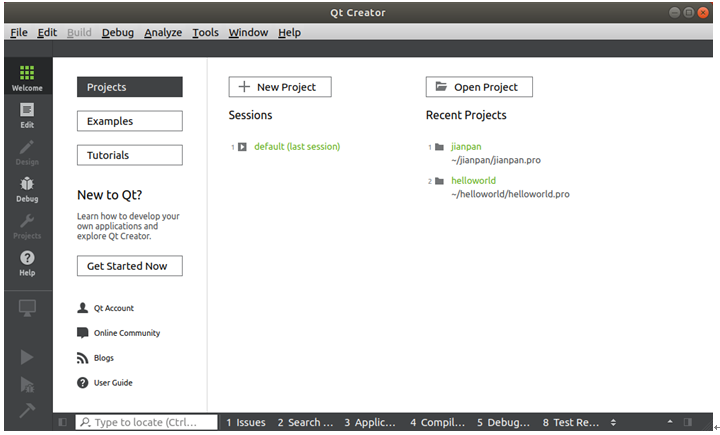
The design button, project button, and build debug area on the left will only become available after a project is opened or created.
Below Qt Creator are the navigation tools and output panel, which are used when writing project code and running and debugging programs. The output panel includes seven sections: Issues (issues encountered during project build), Search Results (searching project file contents), Application Output (displaying running and debugging information), Compilation Output (compiling and linking commands and their output information), QML/JS Console (QML command window), Summary Information (project information summary), and Version Control (version control system).
If you click the hammer icon in the bottom left corner and find that there is no compilation information, the solution is as follows:
The default output panel selects 1 (Issues). If you need to view compilation information, you need to select 4 in the output panel (compile output).
Build and debug.
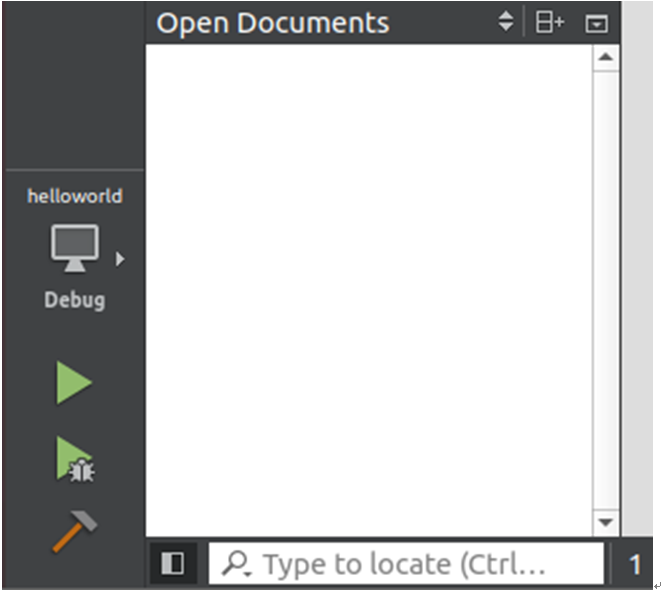
If the Run button in Qt Creator is greyed out, the solution is as follows:
This problem occurs because there was an issue with configuring the C, C++, and Qt versions in the kits package. It could be a path problem or an incomplete compilation. Changing the editor language should resolve the issue.
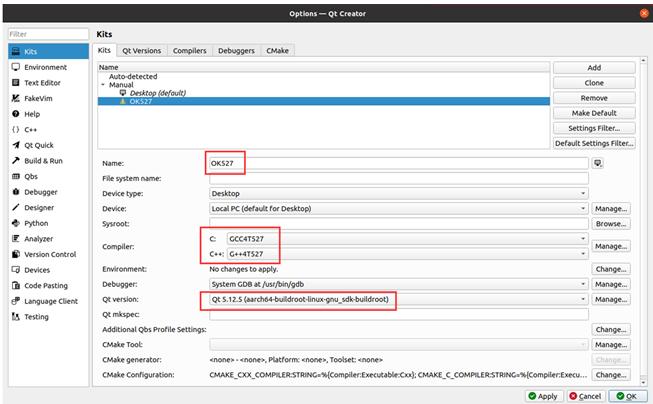
Check that the cross-compiler path configuration in the box is correct.
For specific instructions on configuring the path, please refer to section “4.3.2, Qt Creator Environment Configuration”.