Android16.0_User’s Compilation Manual_V1.0
Document classification: □ Top secret □ Secret □ Internal information ■ Open
Copyright
The copyright of this manual belongs to Baoding Folinx Embedded Technology Co., Ltd. Without the written permission of our company, no organizations or individuals have the right to copy, distribute, or reproduce any part of this manual in any form, and violators will be held legally responsible.
Forlinx adheres to copyrights of all graphics and texts used in all publications in original or license-free forms.
The drivers and utilities used for the components are subject to the copyrights of the respective manufacturers. The license conditions of the respective manufacturer are to be adhered to. Related license expenses for the operating system and applications should be calculated/declared separately by the related party or its representatives.
Overview
This manual is designed to help you quickly understand the compilation process and become the compilation methods. Applications need to be cross-compiled on an Ubuntu host before they can run on the development board. By following the methods in this compilation manual and through hands-on practice, you can successfully compile your own software code.
The manual will explain the environment setup process. Some unpredictable issues may arise during environment setup, so it is recommended that beginners directly use the pre-configured development environment Forlinx provide to get started quickly and reduce development time.
There are there installation methods: dual-boot on a physical machine, single-boot on a physical machine, or in a virtual machine. Each installation method has its advantages and disadvantages. This manual only provides a method for setting up Ubuntu in a virtual machine. Hardware requirements: It is recommended to have at least 16 GB of RAM or more. This ensures that after allocating memory for the virtual machine (it is recommended to allocate over 16 GB for the virtual machine), you can still perform other operations on Windows without significant lag.
There are total 5 chapters:
Chapter 1. covers the installation of virtual machine software, briefly introducing the download and installation of VMware;
Chapter 2. covers loading the Ubuntu system Forlinx provide;
Chapter 3. covers setting up and configuring the Ubuntu system, installing necessary tools, and addressing common issues with the development environment;
Chapter 4. covers the deployment, addition, and usage of Docker containers, as well as the compilation of kernel and Android-related source code.
Chapter 5. introduces the development of Android applications.
Additionally, the manual includes explanations of some symbols and formats.
Format |
Meaning |
|---|---|
Note |
Note or particularly important information must be read carefully. |
📚 |
Relevant explanations regarding the testing section |
️️️️🛤️ ️ |
Related paths. |
Blue on gray |
Refers to the command entered on the command line, which needs to be entered manually. |
Bold font. |
Serial output information after command input |
Black Bold |
Key information in the serial output: |
// |
Explanation of input commands or output information: |
Username@Hostname |
forlinx@ubuntu: Development environment Ubuntu account information. You can use this information to determine the operating environment for specific functions. |
Example: Check the Version of Docker-CE
forlinx@ubuntu:~$ apt-cache madison docker-ce                   # Check the version of Docker-CE
docker-ce | 18.06.3~ce~3-0~ubuntu | http://mirrors.aliyun.com/docker-ce/linux/ubuntu/trusty/stable amd64 Packages
forlinx@ubuntu: Username: forlinx, Hostname: ubuntu — This indicates operating on the development environment ubuntu with the user forlinx.#: Explanatory content for the operation, not to be entered.apt-cache madison docker-ce: Blue text indicates relevant commands that need to be entered manually.docker-ce | 18.06.3~ce~3-0~ubuntu: Black text is the output information after entering the command, with bold text highlighting key information.
Application Scope
This software manual is designed for the OK3572-C platform running Android16. While other platforms may also reference this manual, there could be differences that require adjustments for the specific use.
Revision History
Date |
Version |
Revision History |
|---|---|---|
26/06/2026 |
V1.0 |
OK3572-C Android16 User’s Compilation Manual Initial Version |
1. VMware Virtual Machine Software Installation
This chapter focuses on the installation of VMware virtual machines, using VMware workstation 15 Pro as an example to demonstrate the process of installing and configuring an operating system..
1.1 Downloading and Purchasing VMware Software
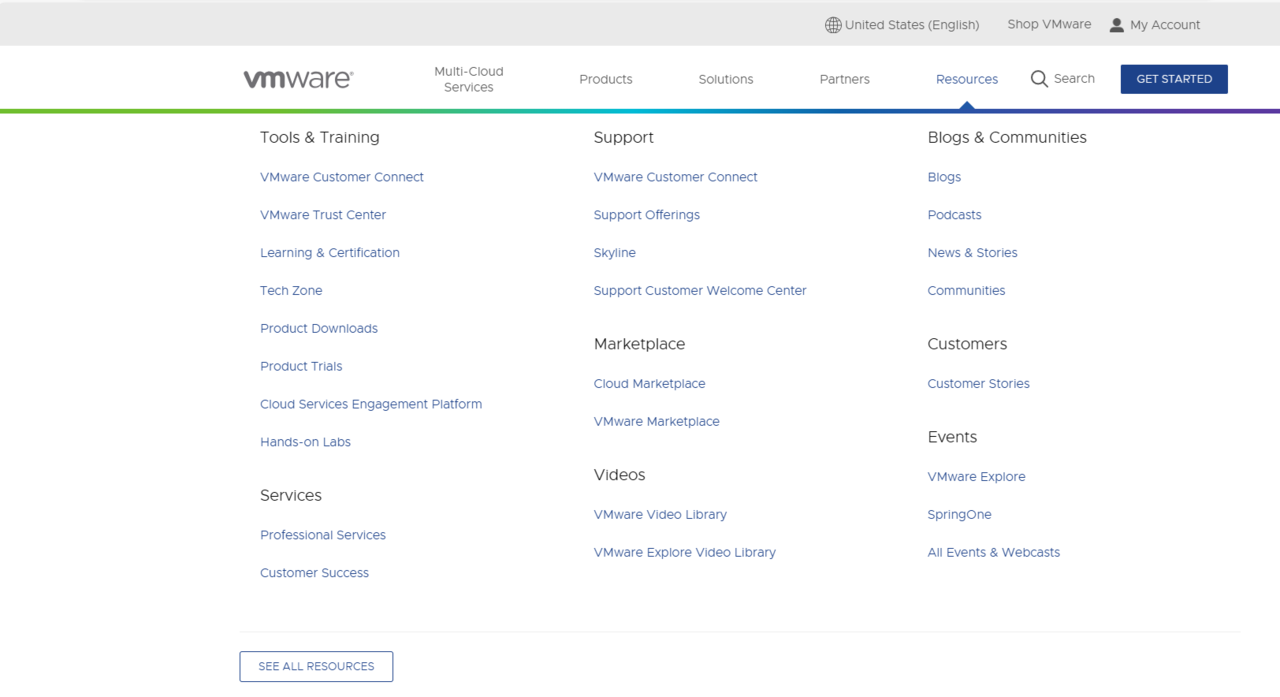
Visit the VMware official website at https://www.vmware.com/cn.html to download Workstation Pro and obtain the product key. VMware is paid software that requires individual purchase, or you can choose to use a trial version Version.
1.2 VMware Software Installation
Double-click the setup file to enter the installation wizard.
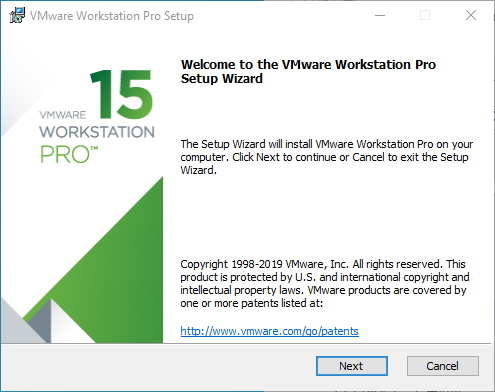
Click “Next”.
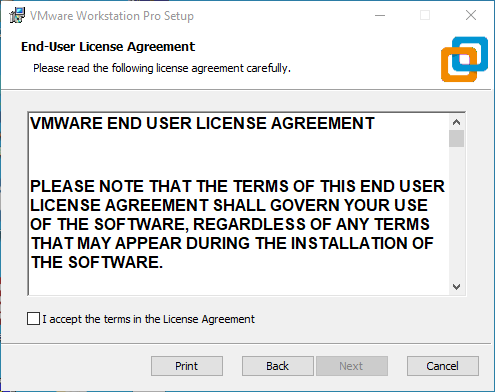
Check “I accept the terms in the license agreement” and click “Next.”
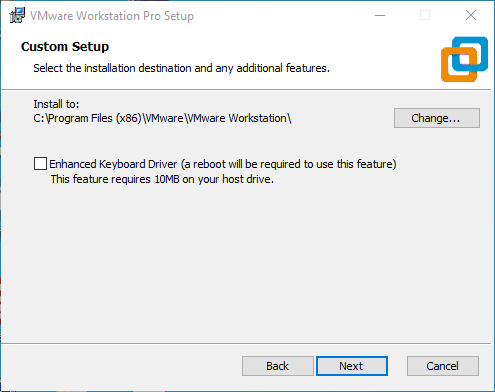
Modify the installation location to the partition on your computer where software is typically installed, then click “Next.”
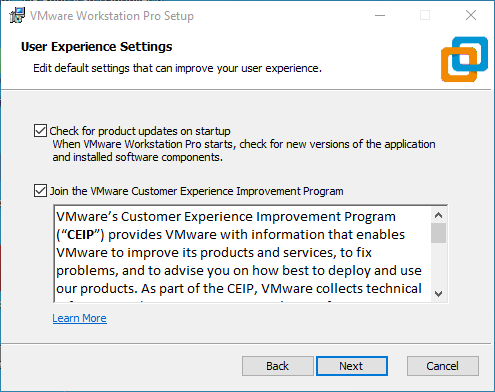
Check, then click “Next.”
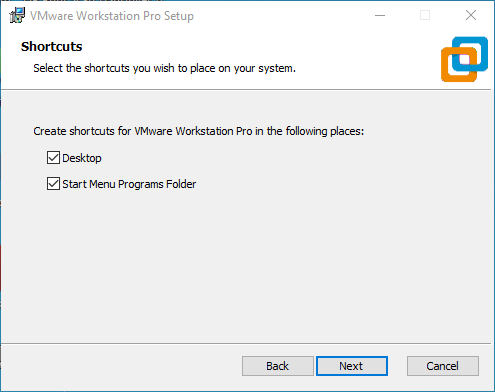
Check “Add shortcuts” and click “Next.”
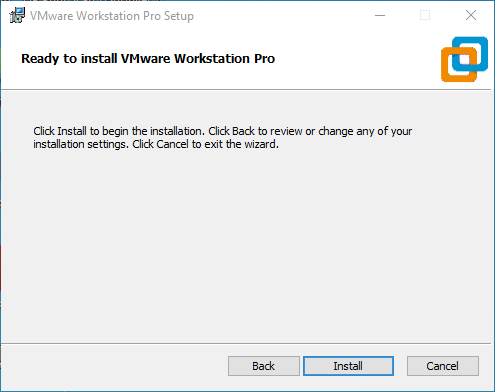
Click “Next”.
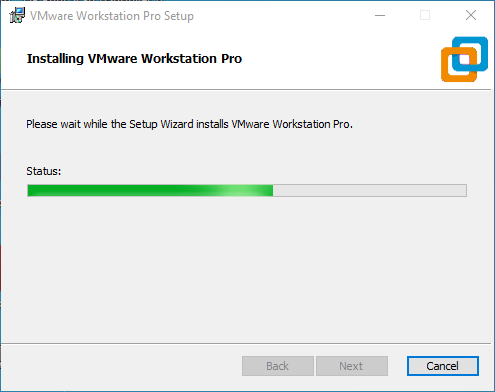
Wait for the installation to complete.
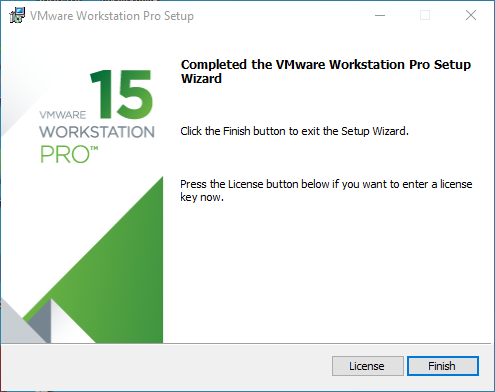
After clicking “Finish,” you can start the trial. For long-term use, please purchase from the official website and enter the license key
2. Loading an Existing Ubuntu Development Environment
Note:
It is recommended that beginners directly use the virtual machine environment pre-configured by Forlinx, which already has the cross-compiler and Qt environment installed. After reviewing this chapter, you can skip directly to the compilation chapters;
Development Environment Account: forlinx, password: forlinx;
You can access software and hardware documentation, source code, and the development environment via the cloud storage link provided by Forlinx. Please ask your sales representative for the download link.
There are two ways to use the virtual machine environment in VMware: one is to directly load an existing environment, and the other is to create a new environment. First explain how to load an existing environment.
First, download the development environment provided by Forlinx. The development environment package includes an MD5 checksum file. After downloading the package, you should verify the integrity of the compressed file by performing an MD5 checksum check. You can either use an online MD5 verification tool or download a dedicated MD5 verification tool, depending on your preference. Compare the checksum that you generate with the one listed in the checksum file. If they match, the downloaded file is intact. If they do not match, the file may be corrupted, and you will need to download it again.
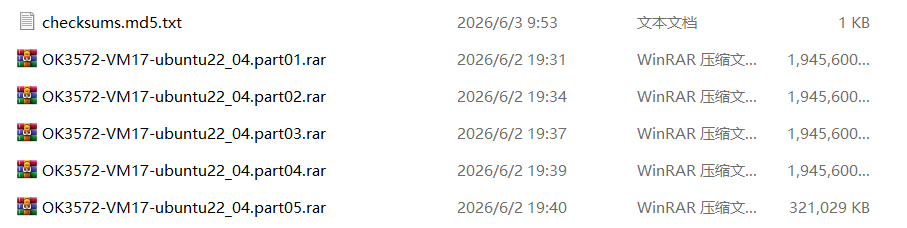
Select all the compressed packages and right click to extract them to the current folder or your own directory:
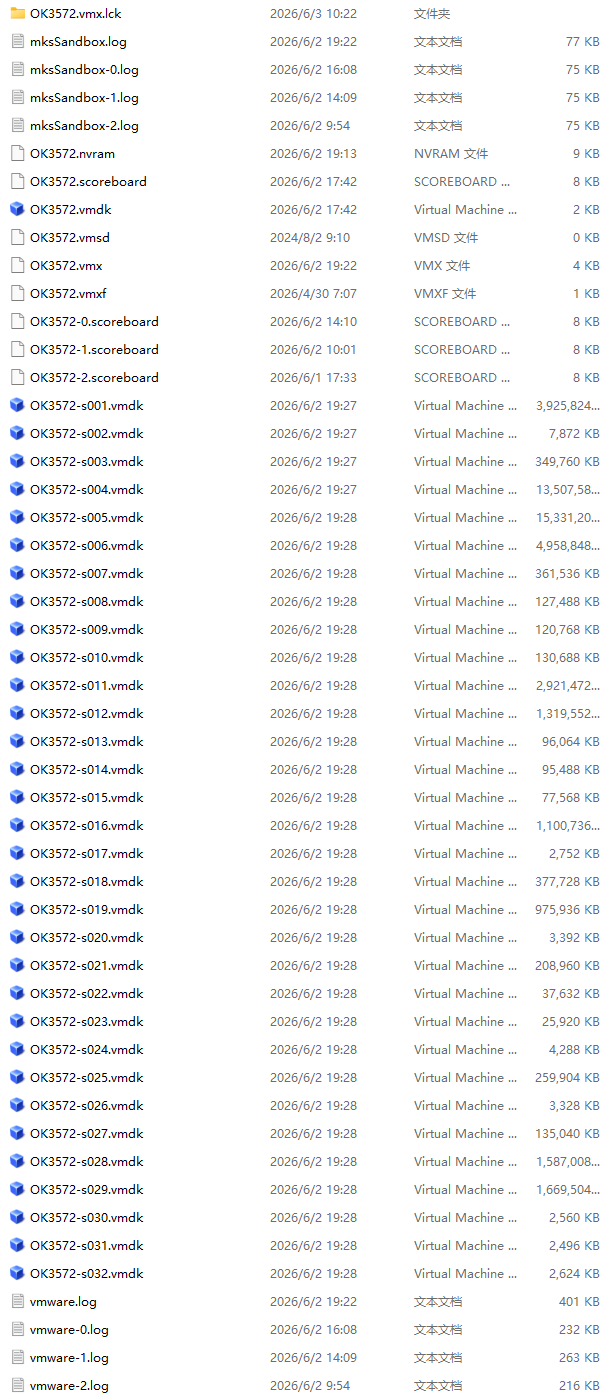
Once the files have been extracted, you will have a development environment OK3572-VM17-ubuntu22_04, which includes the virtual machine files OK3572.vmx.
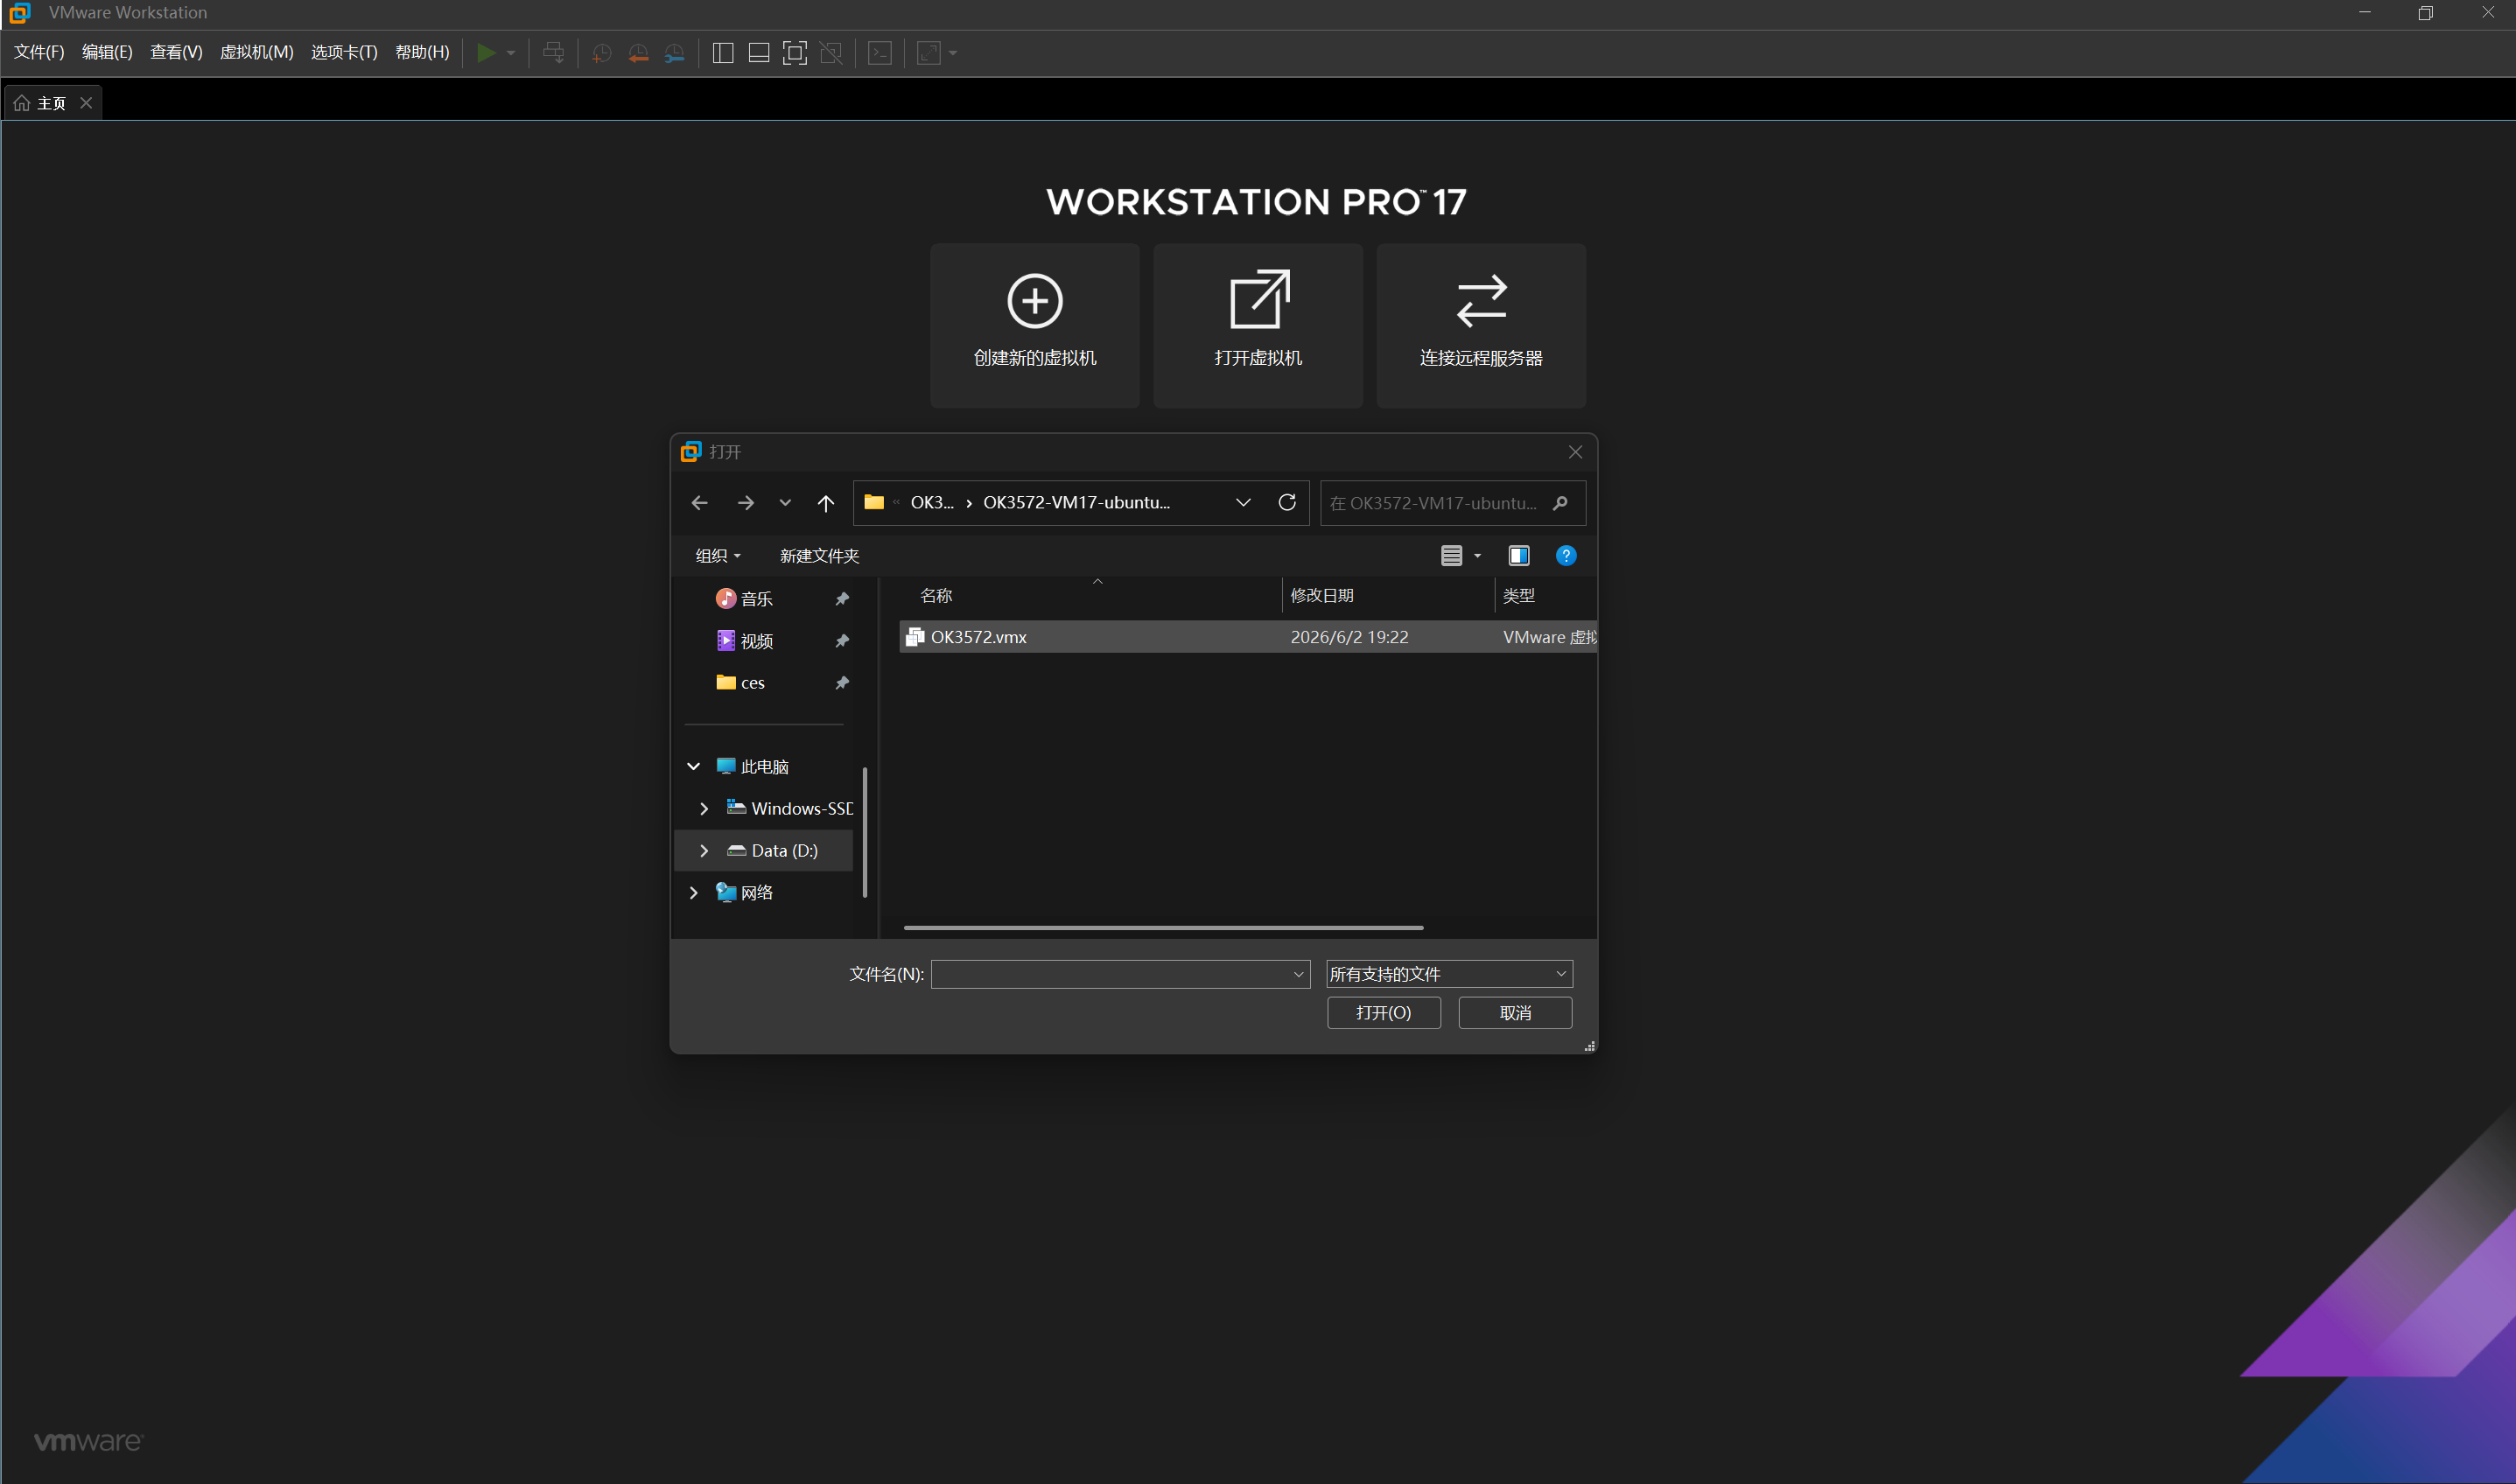
Open your installed virtualization software (e.g., VMware, VirtualBox), select the newly extracted virtual machine, and double-click the startup file.
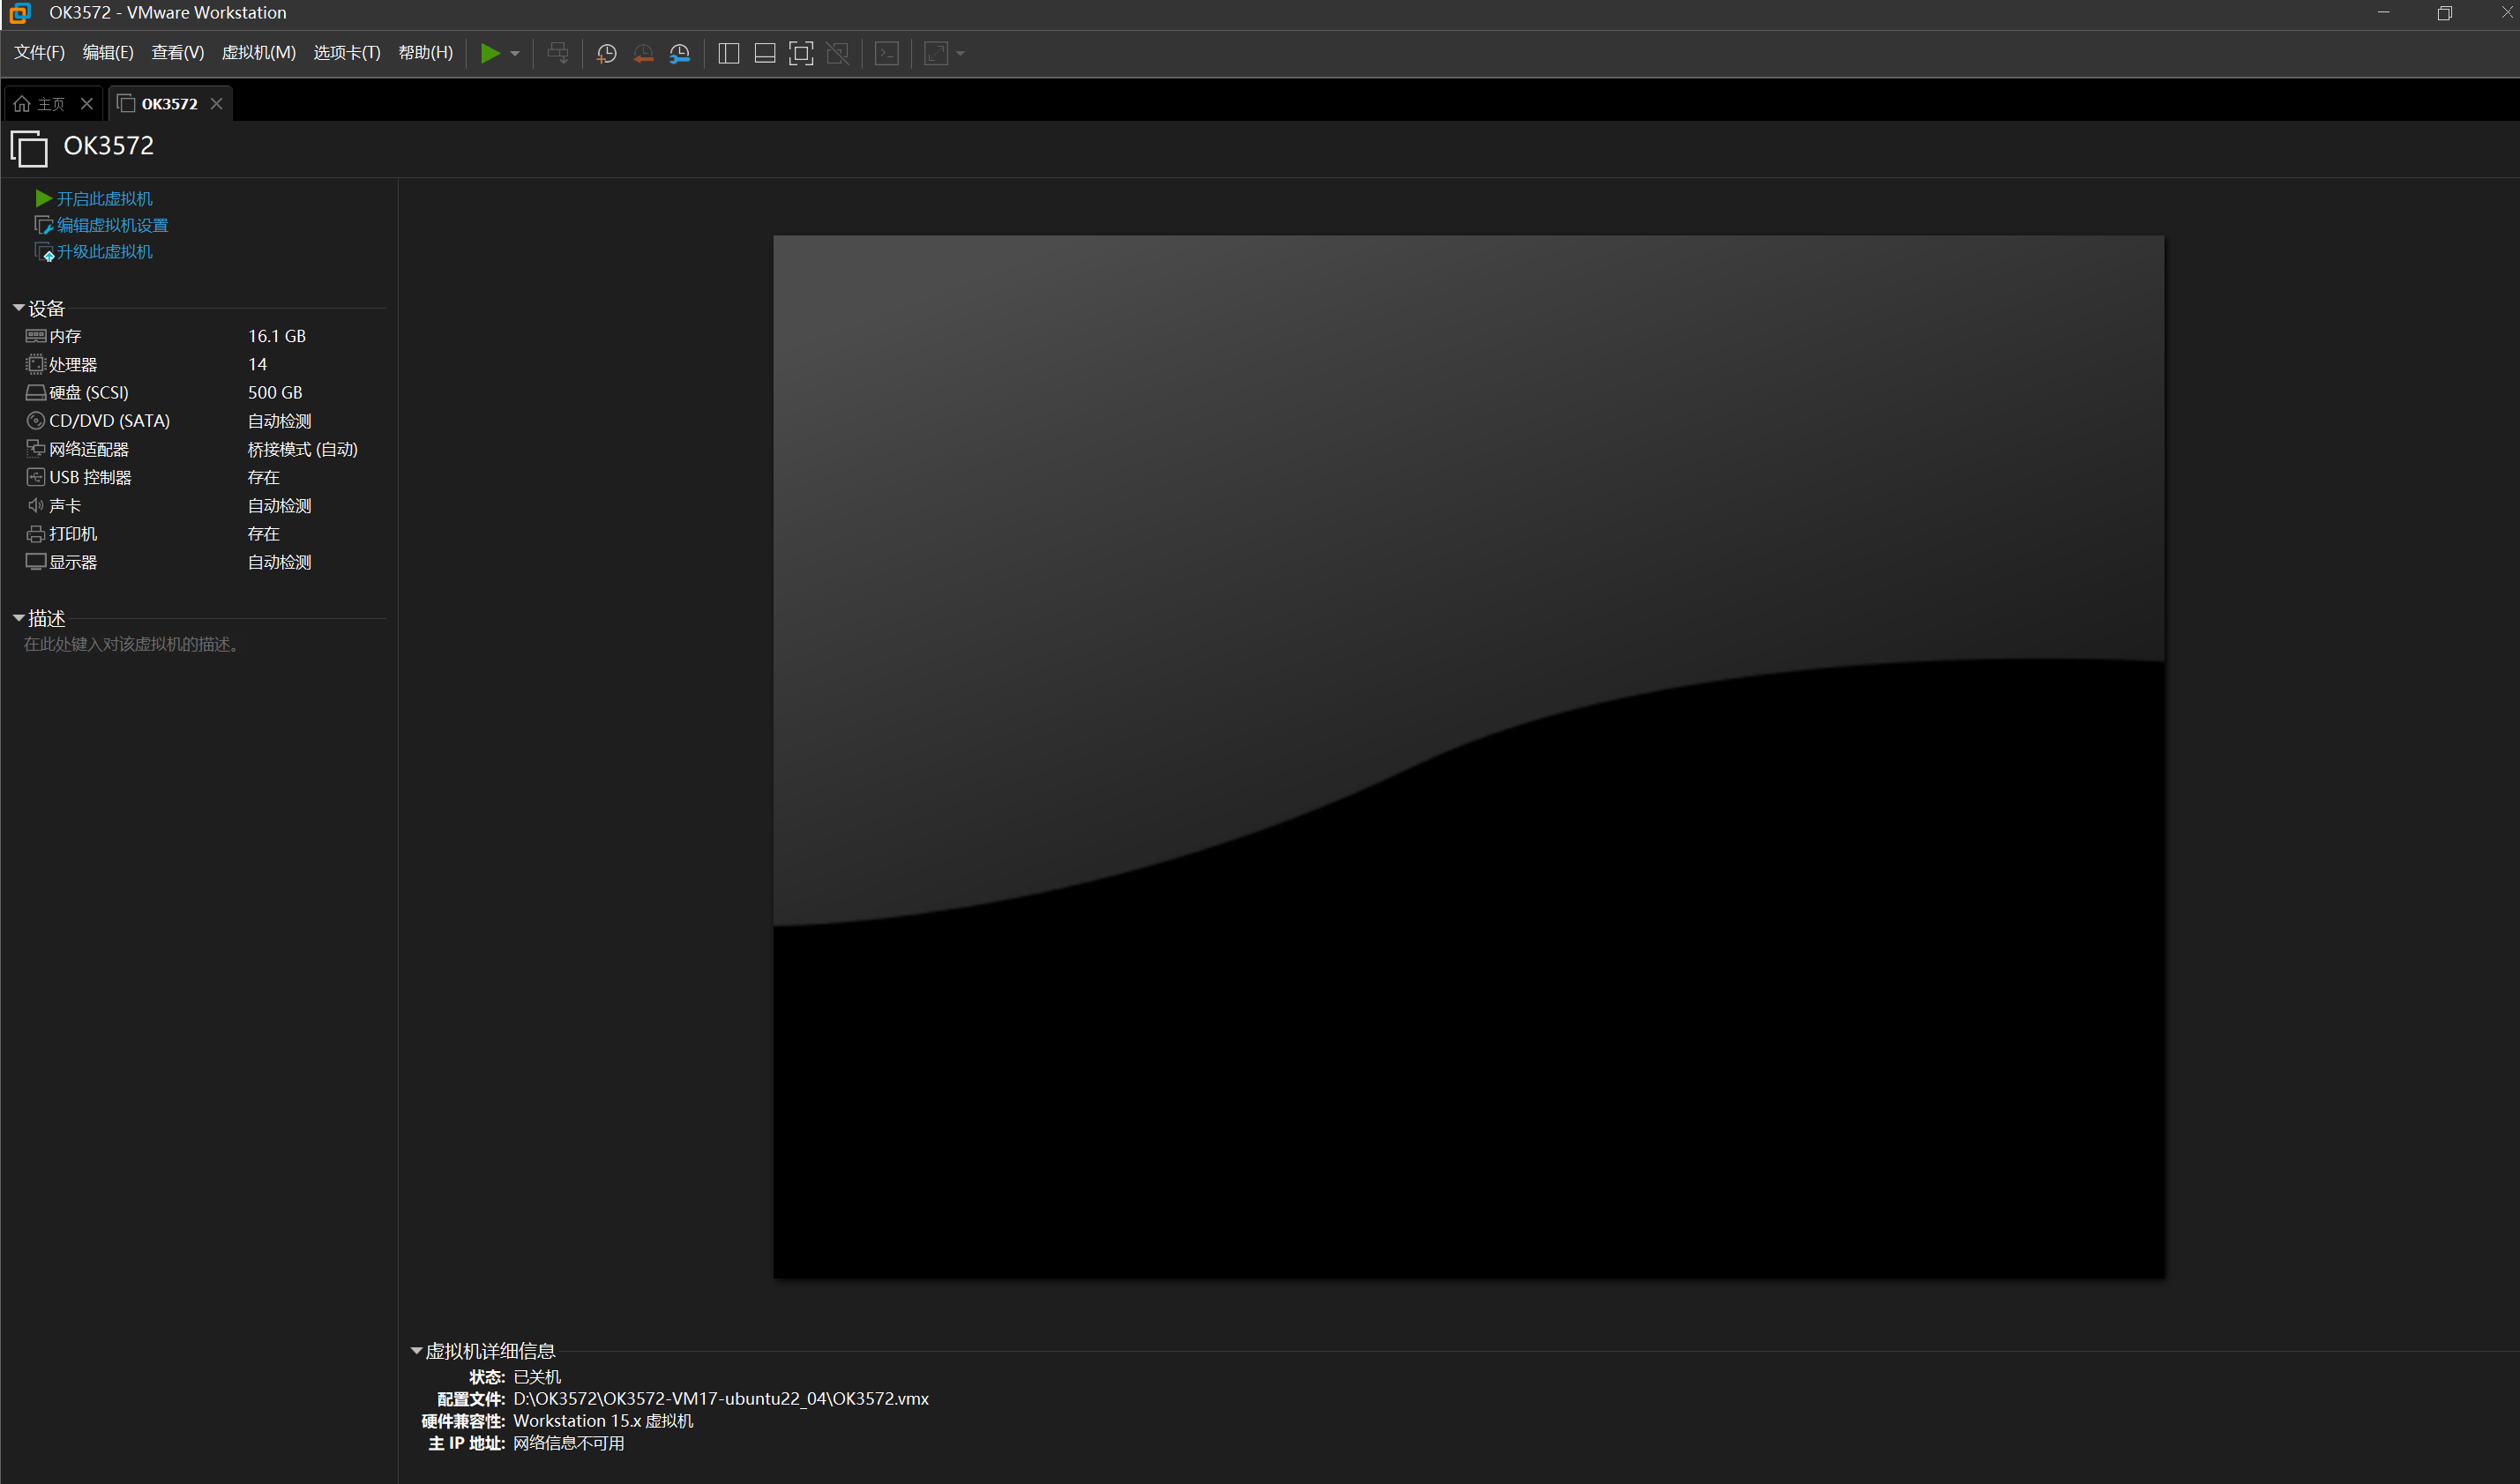
After loading, click to run and enter the system interface.
The development environment includes two users: forlinx and root.
Username:
forlinx, password:forlinxUsername:
root, password:root
3. Setting Up a New Ubuntu Development Environment
This chapter mainly explains the setup process of the Ubuntu system.
Note: It is not recommended for beginners to build the system by themselves. It is recommended to use the existing virtual machine environment. This section can be skipped if there is no need to build the environment.
3.1 Creating an Ubuntu Virtual Machine
Open VMware software and click File-> New Virtual Machine to enter the following interface:
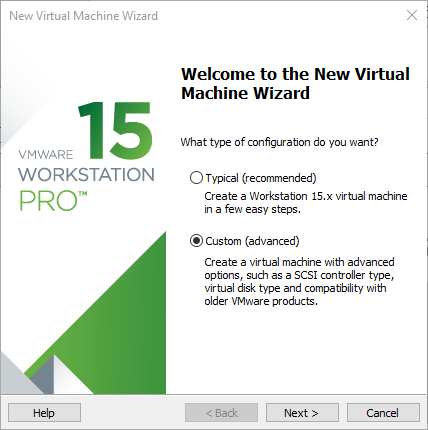
Choose “Custom” and click ‘’Next.’’
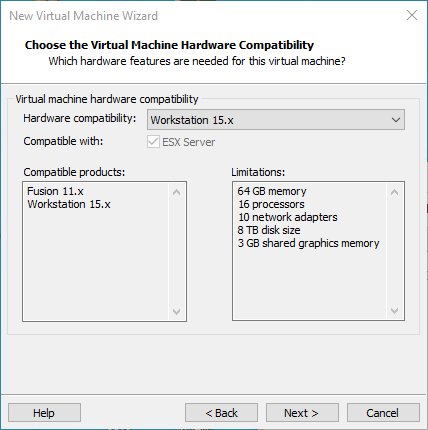
Select compatibility for the corresponding VMware version. The version can be viewed in Help-> About VMwareVMware Workstation. Click ‘’Next.’’
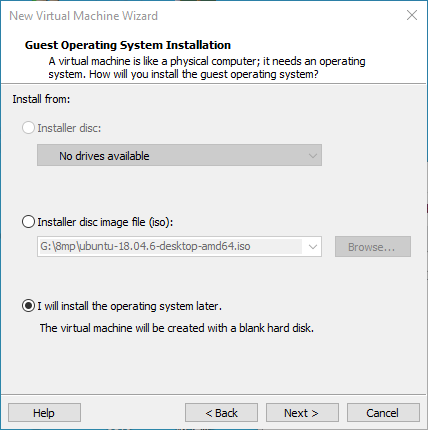
Choose to install the operating system later, and click ‘’Next.’’
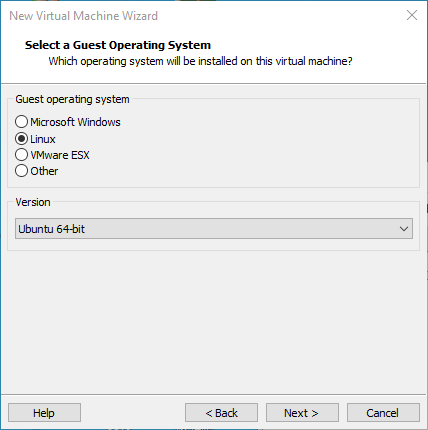
Keep the default settings and click ‘’Next.’’
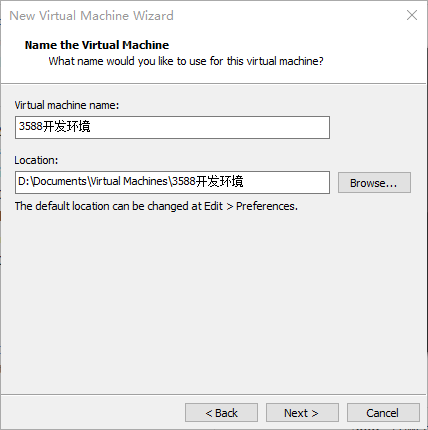
Modify the virtual machine’s name and installation location, then click ‘’Next.’’
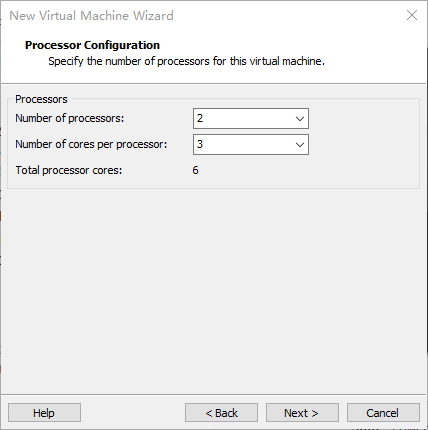
Set the number of processors according to your needs.
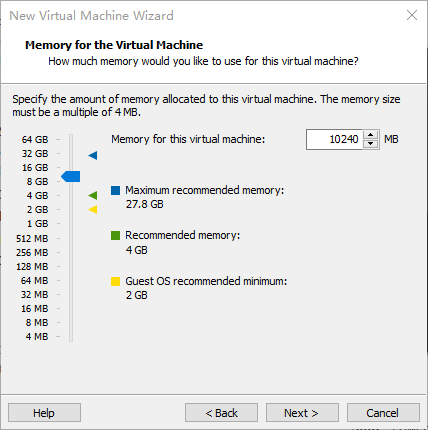
Similarly, set the memory size according to the actual situation (it is recommended to adjust the memory size to be more than 20GB).
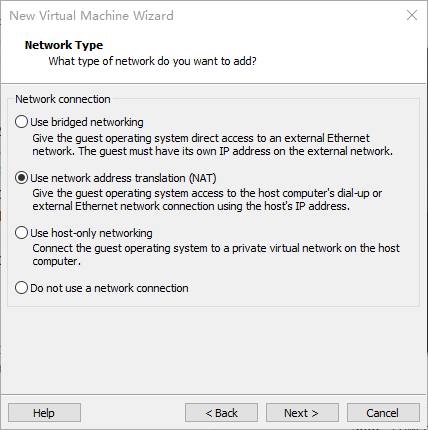
Set the network type, the default is NAT mode, and click “Next.”
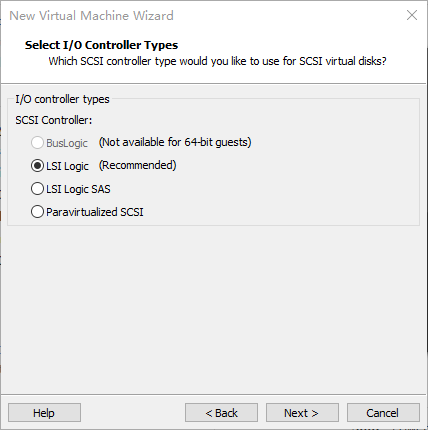
Keep the default settings and click ‘’Next.’’
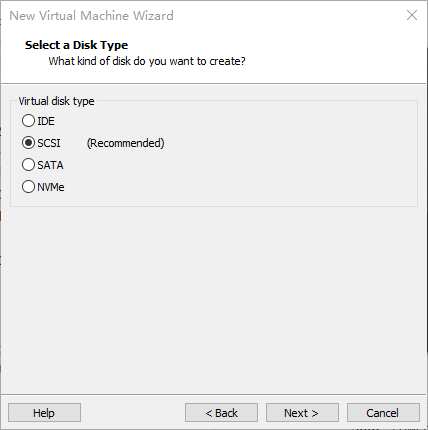
Keep the default settings and click ‘’Next.’’
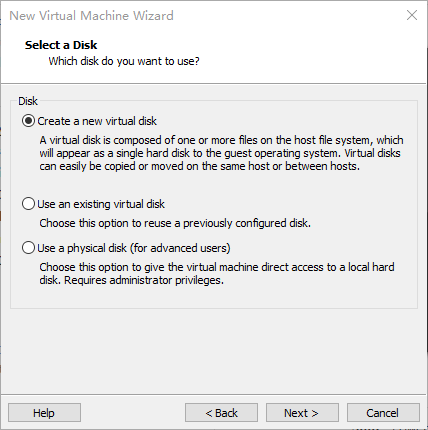
Choose to create a new virtual disk:
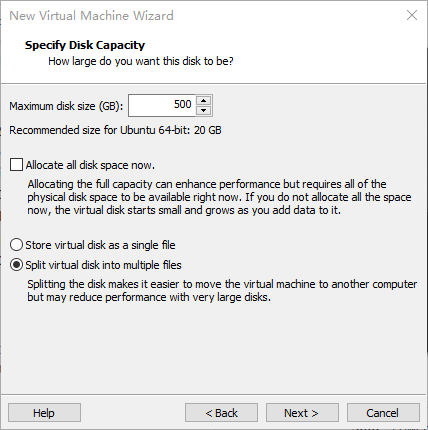
Set the disk size to 500GB and select the disk’s format, then click ‘’Next’’ to complete.
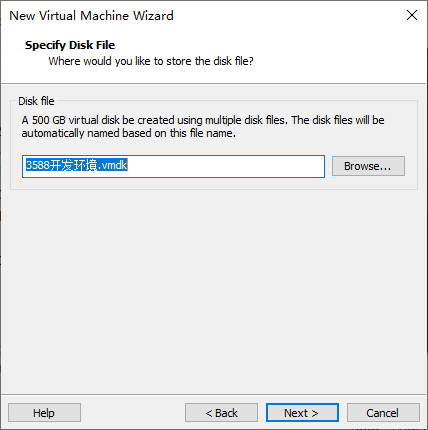
Specify the disk file, the default setting is fine here.
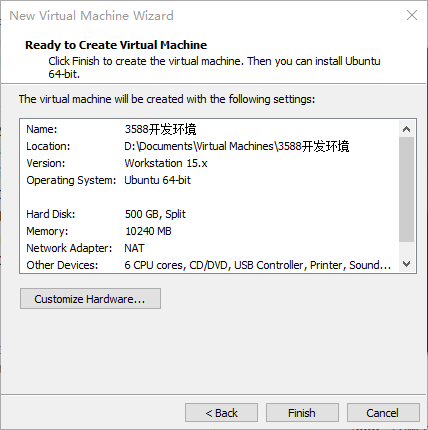
Click ‘’Finish’’ by default.
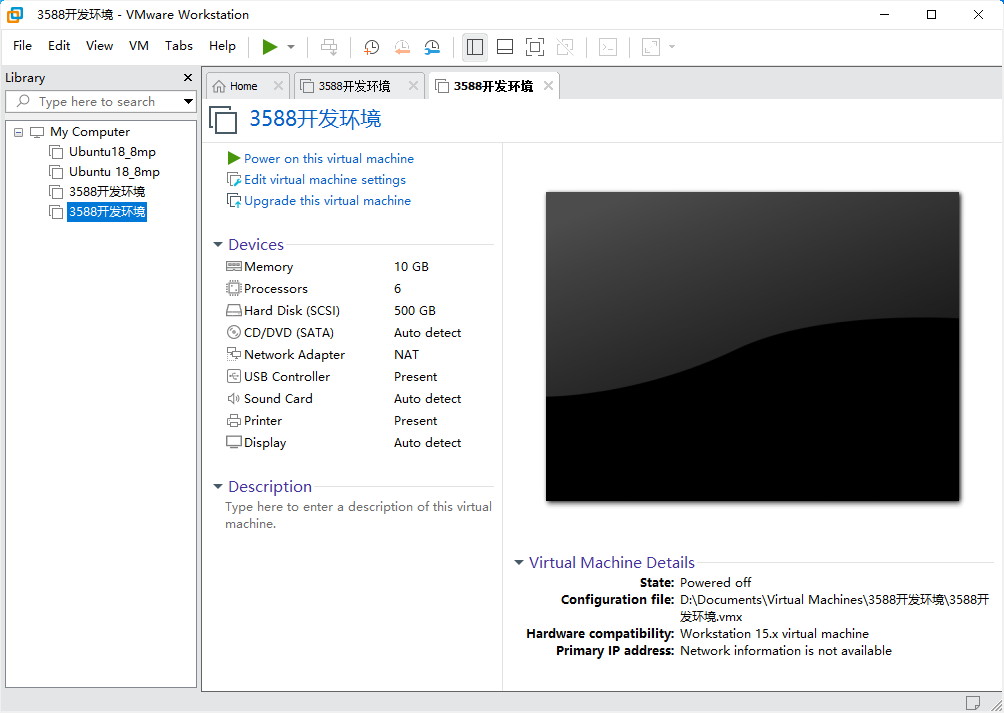
At this point, the virtual machine creation is complete.
3.2 System Installation
The installed Ubuntu version is 22.04, and all the introductions and development in this manual were carried out on Ubuntu 22.04 Image, https://mirrors.tuna.tsinghua.edu.cn/ubuntu-releases/22.04/ubuntu-22.04.4-desktop-amd64.iso
Right-click the Ubuntu 64-bit virtual machine that was created and select “Settings” from the context menu.

The “Virtual Machine Settings Menu” will pop up as shown in the image below.
Click on CD/DVD (SATA), select Use ISO image file, then browse and select the previously downloaded Ubuntu ISO image, and click “OK”.
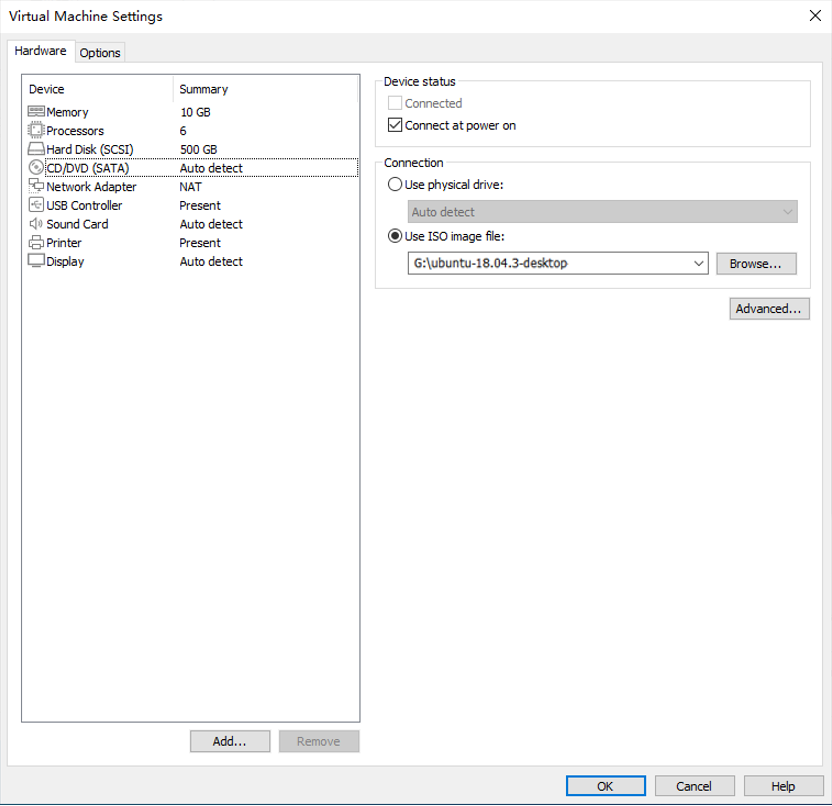
After configuring the image, ensure that the network is working, and then start the virtual machine to begin installing the Ubuntu image
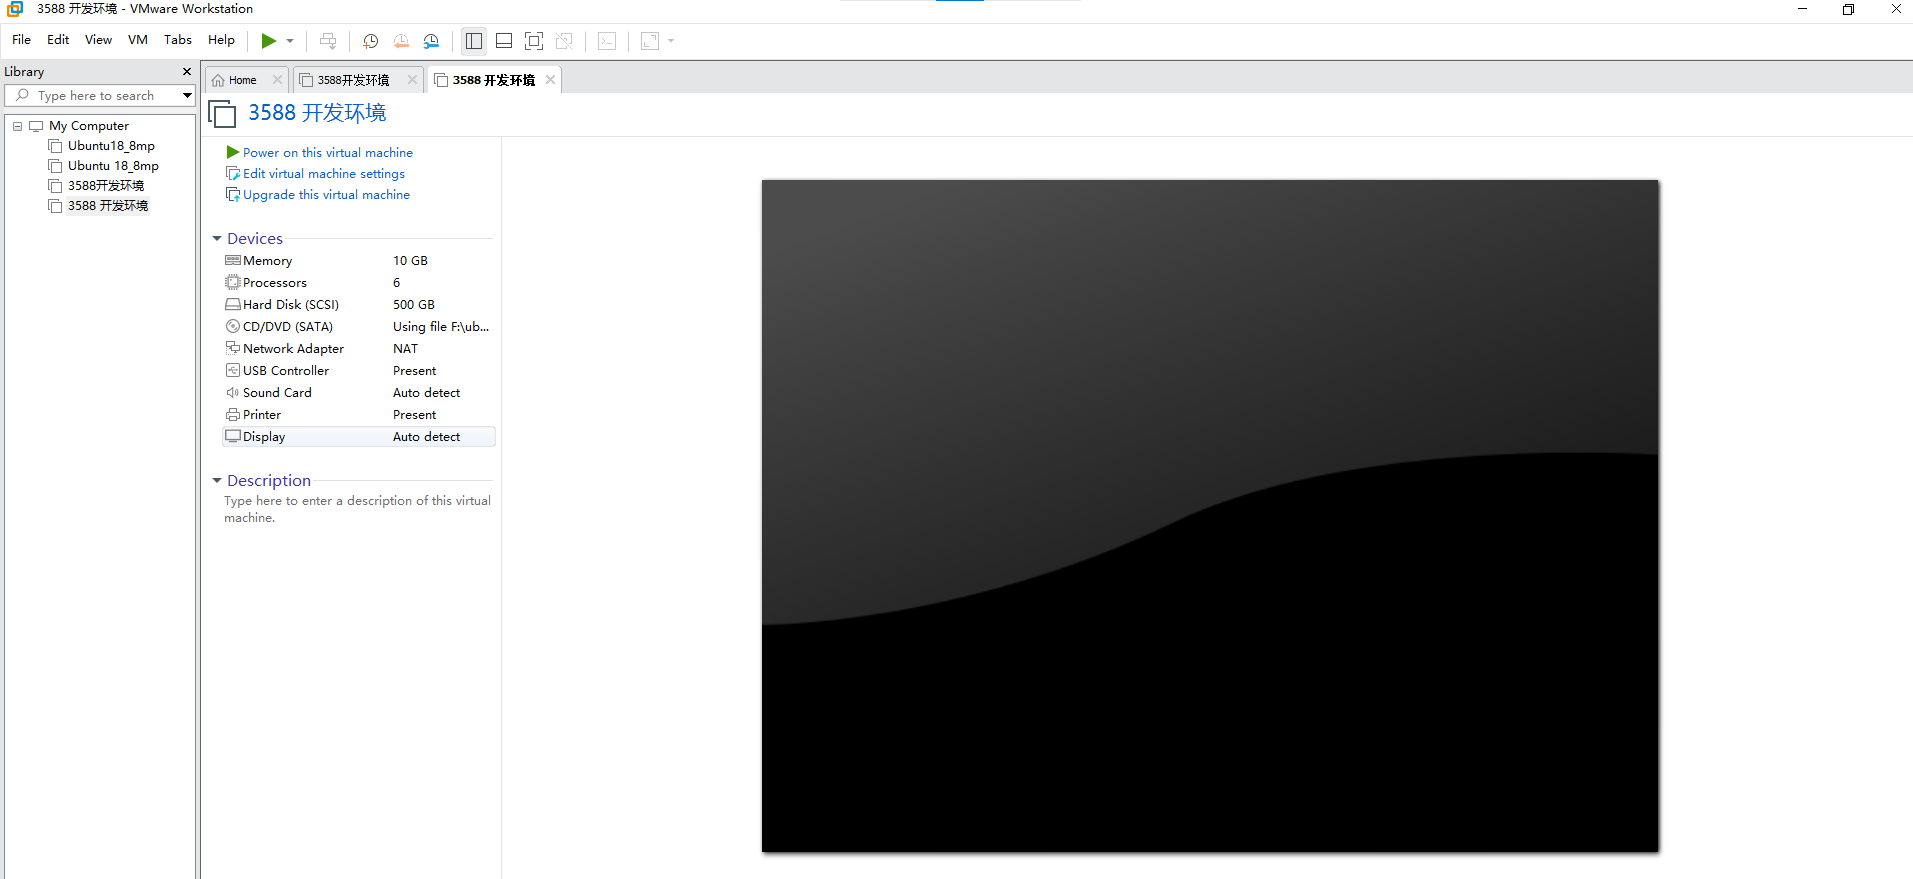
Once the virtual machine starts, wait for the installation interface to appear as shown below.
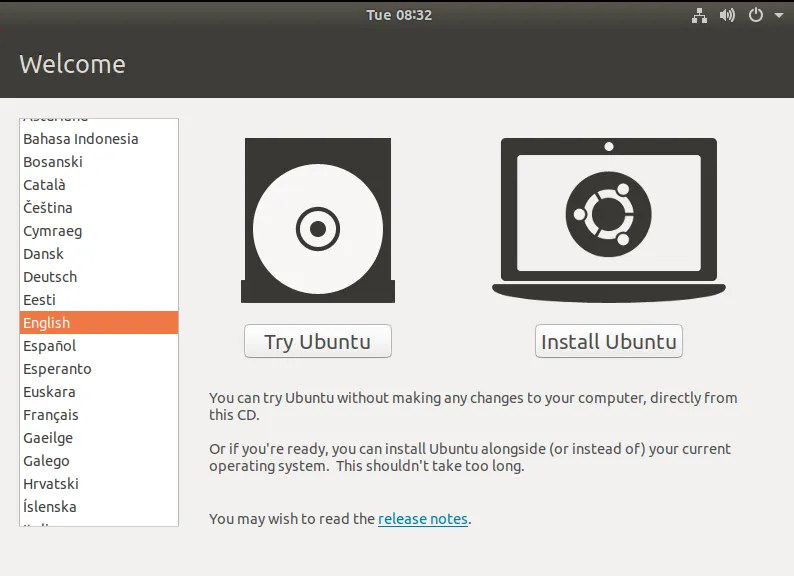
After selecting the language on the left side of the image, click Install Ubuntu to open the language selection interface. The default language of Ubuntu is English, but others can also be selected. The default language can be changed later. After making your selection, click “Continue”.
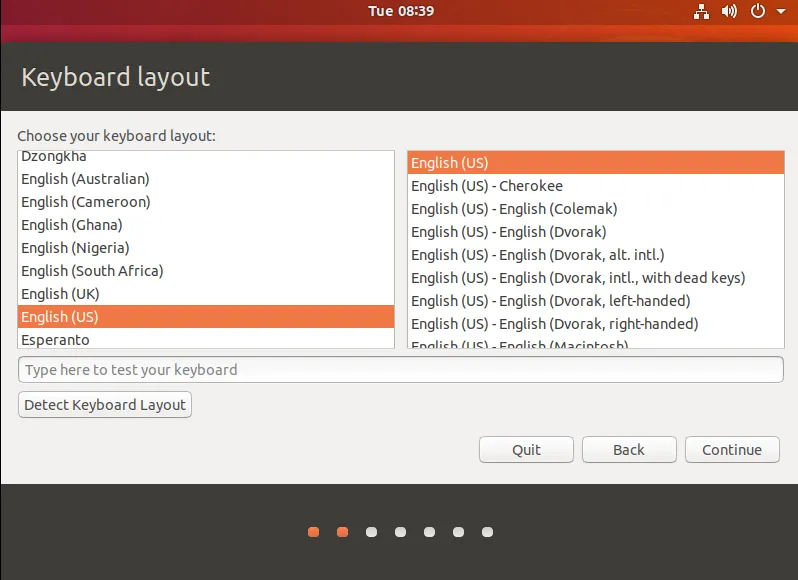
Then, use the default keyboard layout and click Continue.
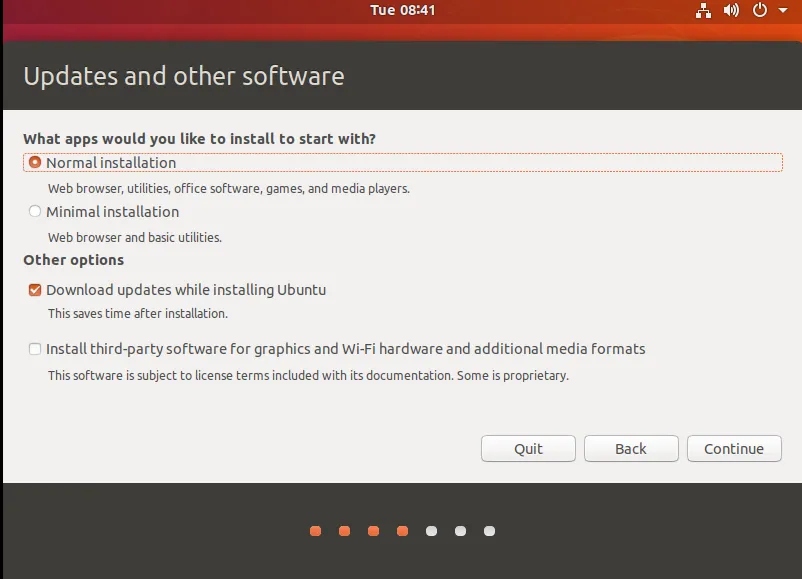
Click “Next”.
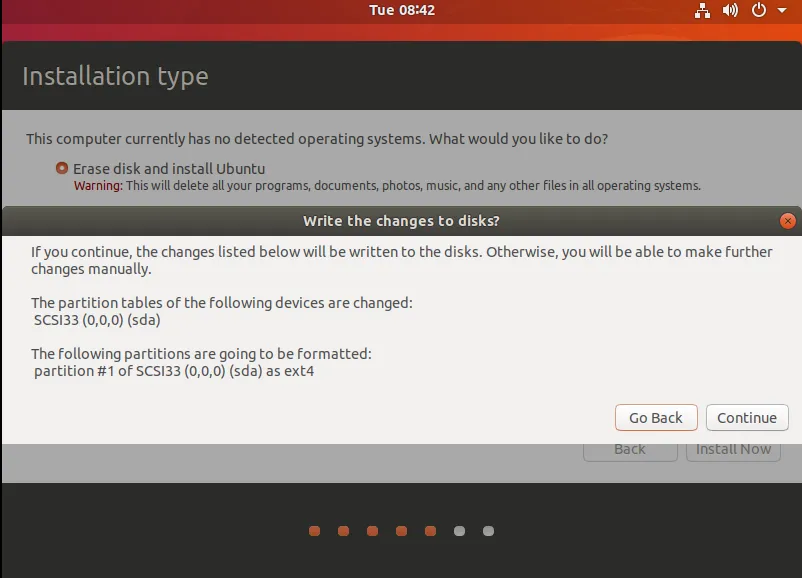
Click “Next”.
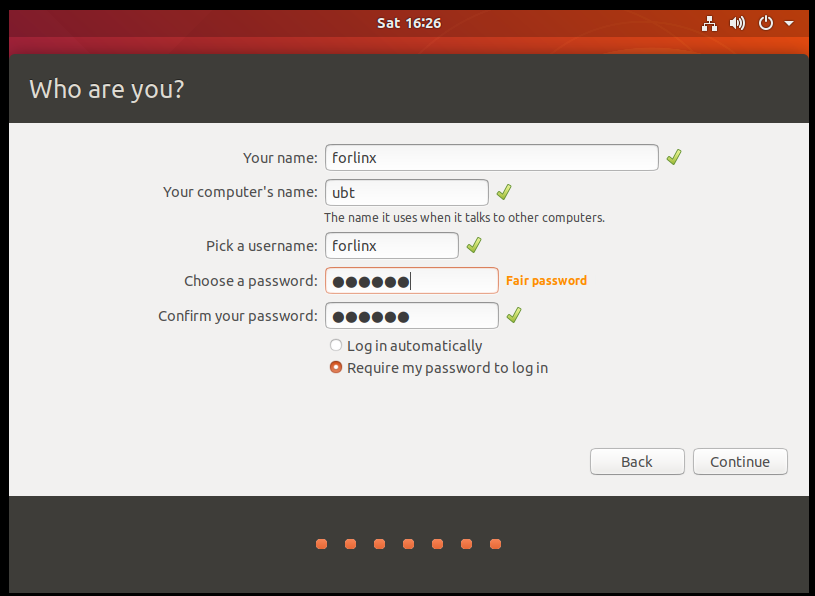
Set a username and password, click, and wait for the installation to complete.
3.3 System Settings
3.3.1 Virtual Memory (Swap) Setup
On certain platforms, compilation may require significant memory. If the host computer has limited total memory (e.g., allocating only 8GB or less to the virtual machine), compilation may fail due to insufficient memory. In such cases, a swap file can be configured to utilize a portion of the hard disk space as virtual memory. However, since hard disk read/write speeds are significantly slower than physical memory, using virtual memory will inevitably reduce performance. Therefore, using physical memory is strongly recommended whenever possible.
When creating the virtual machine, 8GB of memory was allocated. If 8GB of memory is insufficient during compilation, you need to modify the size of the swapfile.
forlinx@ubuntu:~$ sudo swapoff /swapfile
forlinx@ubuntu:~$ sudo dd if=/dev/zero of=/swapfile bs=1G count=32
forlinx@ubuntu:~$ sudo mkswap /swapfile
forlinx@ubuntu:~$ sudo swapon /swapfile
3.3.2 Network Configuration
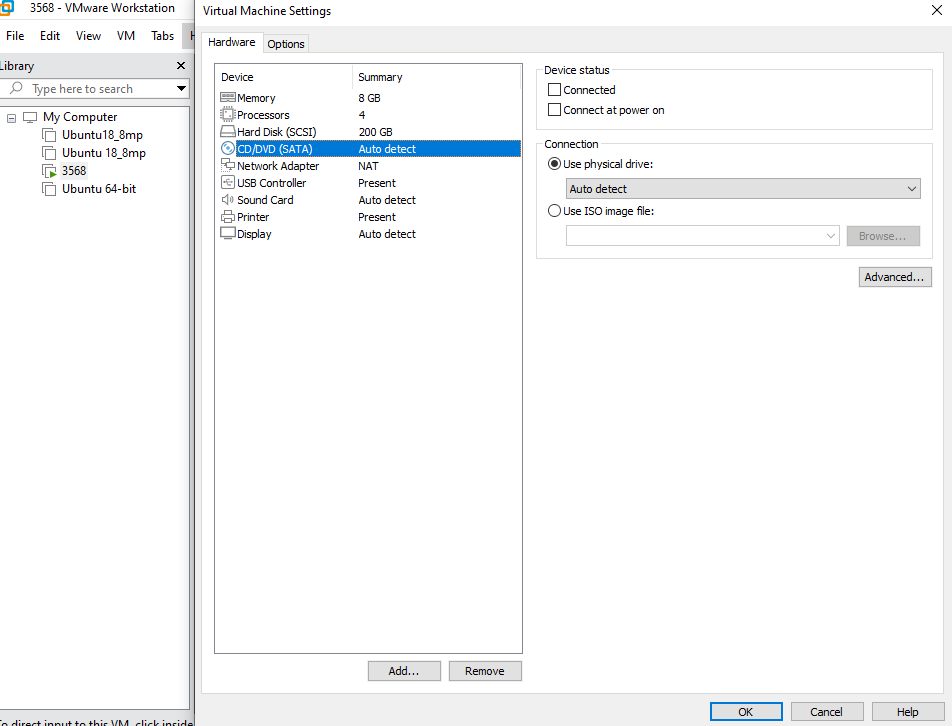
3.3.2.1 NAT (Network Address Translation) Connection Mode
By default, after the virtual machine installation is complete, the network connection mode is set to NAT, as shown in the figure below, sharing an IP address with the host machine. This setting does not need to be changed when installing dependency packages, compiling code, etc.
In the virtual machine, when the VMware virtual network adapter is set to NAT mode, the network in the Ubuntu environment should be set to dynamic IP. In this mode, the virtual NAT device connects and communicates with the host’s network card for internet access. This is the most commonly used method for the virtual machine to access the external network.
3.3 Bridged Connection Mode
When the VMware virtual network adapter device is in bridged mode, the host network card and the virtual machine network card communicate through a virtual network bridge. In the Ubuntu environment, you need to set a network IP in the same subnet as the host. To access the external network, you need to set the DNS to be consistent with the host network card. If using servers like TFTP or SFTP, you need to set the virtual machine’s network connection to Bridged Mode.
4. Android System Compilation
4.1 Preparation Before Compilation
4.1.1 Compilation Environment
Install the compilation environment. The virtual machine provided by Forlinx has already completed the installation. You can skip this section.
forlinx@ubuntu:~$ sudo apt-get update
forlinx@ubuntu:~$ sudo apt-get install software-properties-common
forlinx@ubuntu:~$ sudo add-apt-repository ppa:openjdk-r/ppa
forlinx@ubuntu:~$ sudo apt-get update
forlinx@ubuntu:~$ sudo apt-get install uuid uuid-dev zlib1g-dev liblz-dev liblzo2-2 liblzo2-dev lzop \
    git curl u-boot-tools mtd-utils android-sdk-libsparse-utils openjdk-8-jdk \
    device-tree-compiler gdisk m4 make bc fakeroot unzip zip gawk busybox libncurses5 \
    libstdc++6 lib32stdc++6 bison flex python2 libssl-dev cpio lz4 rsync
forlinx@ubuntu:~$ sudo ln -s /usr/bin/python2 /usr/bin/python
4.1.2 Prepare the Source Code
Copy the source code ( ) into the virtual machine directory and extract it.
forlinx@ubuntu:~/work$ cat OK3572-android-source.* | tar -jxv
4.2 Compilation
4.2.1 Compiling the Kernel Separately
The kernel configuration is as follows:
config:
rockchip_defconfig
android-16.config
OK3572-C-android.config
rk3572.config
dts:
OK3572-C-android.dts
Compile
forlinx@ubuntu:~/work/OK3572-android-source$ source build/envsetup.sh
forlinx@ubuntu:~/work/OK3572-android-source$ lunch ok3572_c-bp4a-userdebug
forlinx@ubuntu:~/work/OK3572-android-source$ ./build.sh -Ku
4.2.2 Compiling Android Separately
The directory device/rockchip/rk3572/ok3572_c for Android configuration files.
Compilation Command
forlinx@ubuntu:~/work/OK3572-android-source$ source build/envsetup.sh
forlinx@ubuntu:~/work/OK3572-android-source$ lunch ok3572_c-bp4a-userdebug
forlinx@ubuntu:~/work/OK3572-android-source$ ./build.sh -Au
4.2.3 Full Compilation and Image Packaging
forlinx@ubuntu:~/work/OK3572-android-source$ source build/envsetup.sh
forlinx@ubuntu:~/work/OK3572-android-source$ lunch ok3572_c-bp4a-userdebug
forlinx@ubuntu:~/work/OK3572-android-source$ ./build.sh -KAup
The generated files are located in the directory
rockdev/Image-ok3572_c.update.imgcan be used for flashing the system.
4.3 OTA Upgrade Package
A full OTA package contains the complete system. An incremental OTA package contains only the differences between two versions. Therefore, to perform an incremental upgrade correctly, the development board must already have the lower version of the system flashed.
4.3.1 Full OTA Upgrade Package
forlinx@ubuntu:~/work/OK3572-android-source$ source build/envsetup.sh
forlinx@ubuntu:~/work/OK3572-android-source$ lunch ok3572_c-bp4a-userdebug
forlinx@ubuntu:~/work/OK3572-android-source$ ./build.sh -KAuop
The generated files are located in the directory
rockdev/Image-ok3572_c.Rename
ok3572_c-ota.ziptoupdate.zip, and it can be used for a full OTA upgrade.
4.3.2 Incremental OTA Upgrade Package
First, release the v1.0 version image and flash it to the development board. (Flashing can be done via OTG cable, TF card, etc.)
forlinx@ubuntu:~/work/OK3572-android-source$ source build/envsetup.sh
forlinx@ubuntu:~/work/OK3572-android-source$ lunch ok3572_c-bp4a-userdebug
forlinx@ubuntu:~/work/OK3572-android-source$ ./build.sh -KAuop
Generate the rockdev/Image-ok3572_c/ok3572_c-target_files.zip for the v1.0 version. For the convenience of description in this document, rename it as files-v1.0.zip.
Modify the kernel code or Android code (to upgrade to v2.0).
Following the same steps as step 1, generate the v2.0 version target files, naming them as files-v2.0.zip.
Generate the incremental upgrade package from v1.0 to v2.0.
forlinx@ubuntu:~/work/OK3572-android-source$ out/host/linux-x86/bin/ota_from_target_files -v -i files-v1.0.zip --block -p ./out/host/linux-x86 files-v2.0.zip ./v1.0--v2.0.zip
The generated v1.0--v2.0.zip is the incremental upgrade package from v1.0 to v2.0.
Rename v1.0--v2.0.ziptoupdate.zip , and it can be used for an incremental OTA upgrade (provided the development board is running the v1.0 version system).
If you encounter failures while generating OTA packages in the virtual machine, you can adjust line 3328 of the file build/make/tools/releasetools/common.py to increase the default timeout.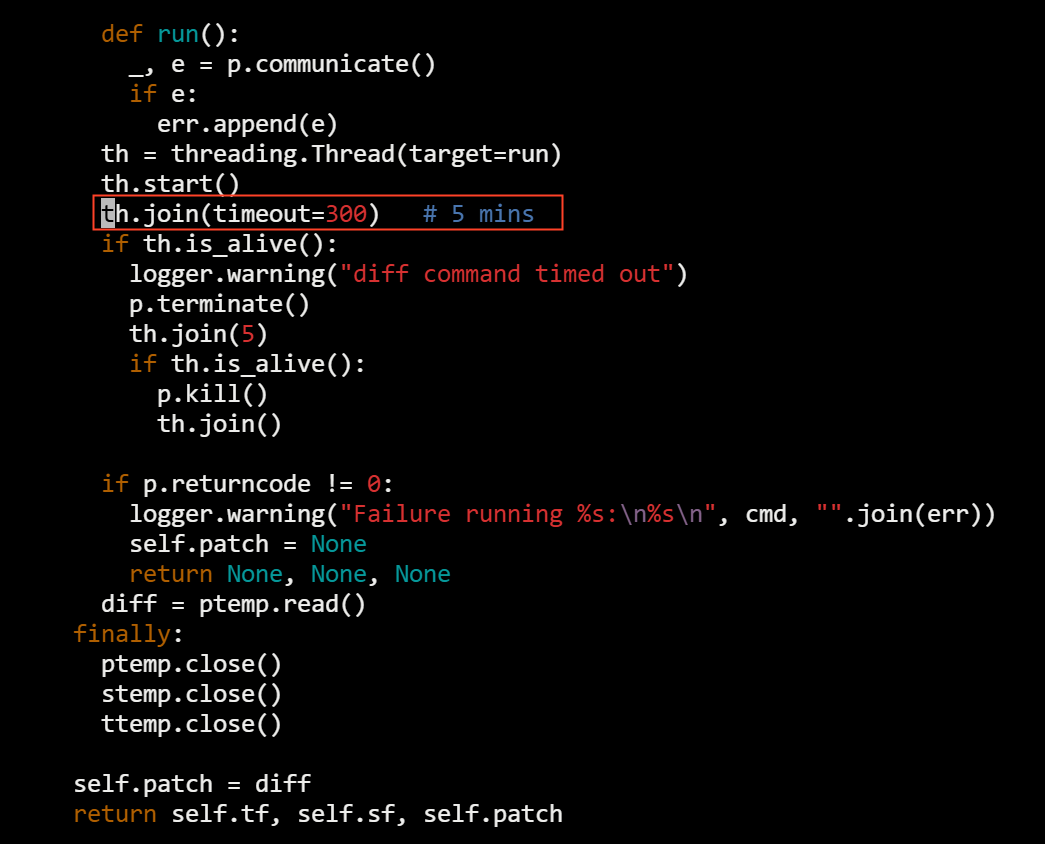
5. Android Application Development
This chapter explains how to set up an Android application development environment, including downloading and installing the Android SDK and the Android Studio integrated development environment, as well as how to use the OK3572 development board as a physical device for debugging. It is very suitable for Android beginners to learn and reference.
5.1 Installing Android Studio
Open 3-tools\android-studio-panda2-windows.exe
Click “Next”.
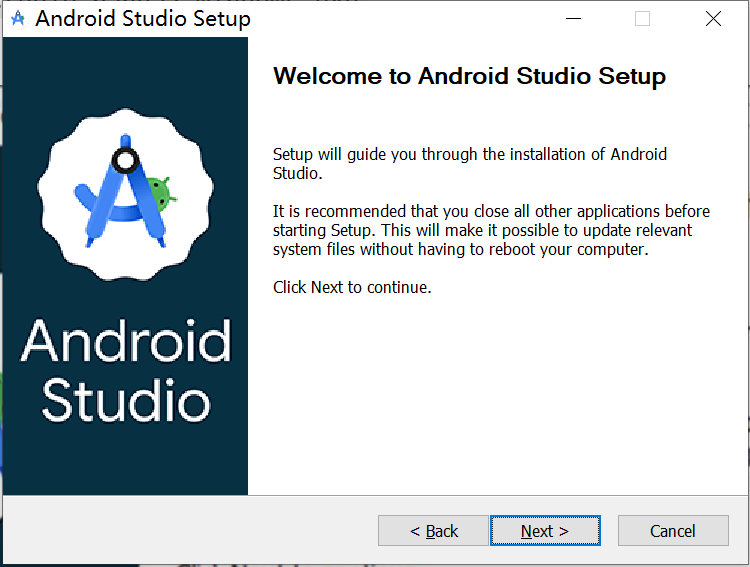
Click “Next”.
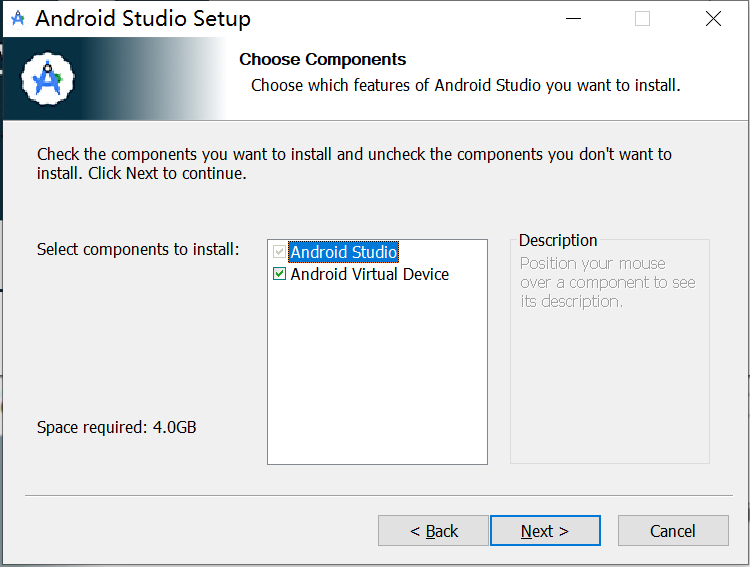
Click “Next”.
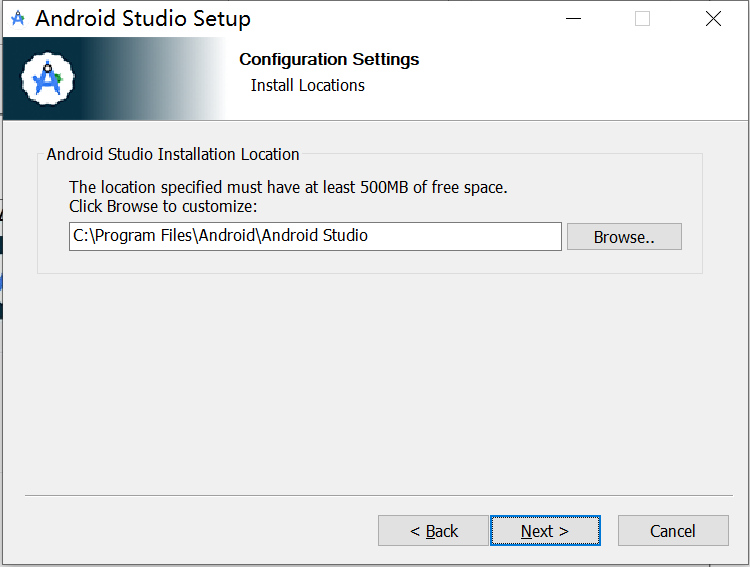
Click “Next”.
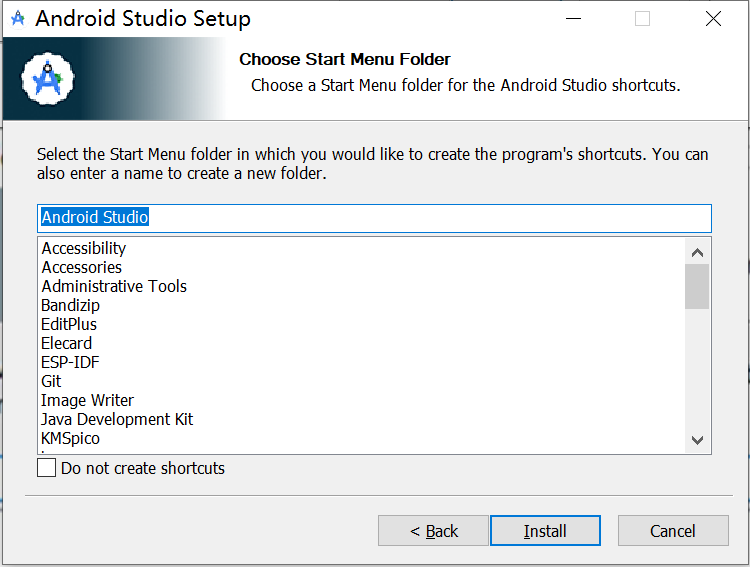
Click “Next”.
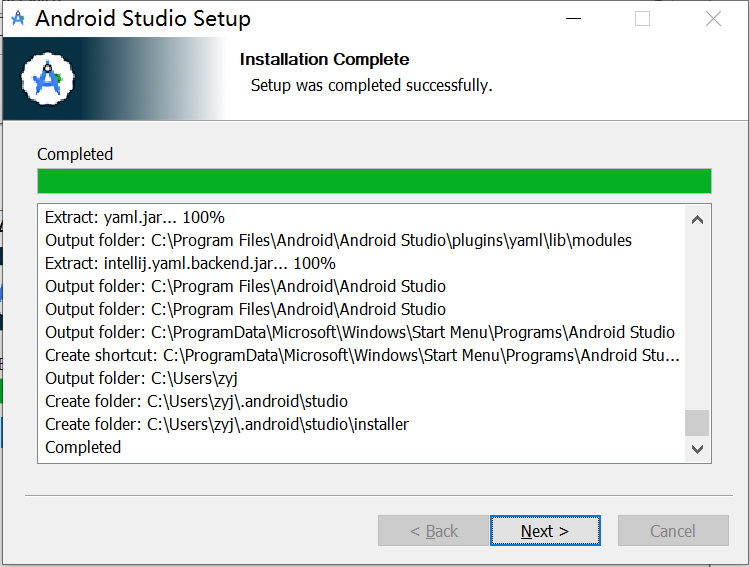
Click “Next”.
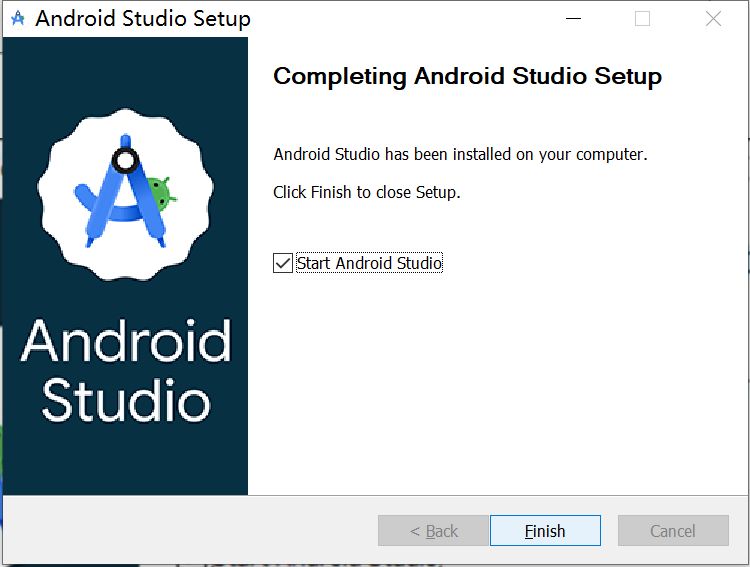
Installation is complete.
Configure the SDK. Click the small gear icon.
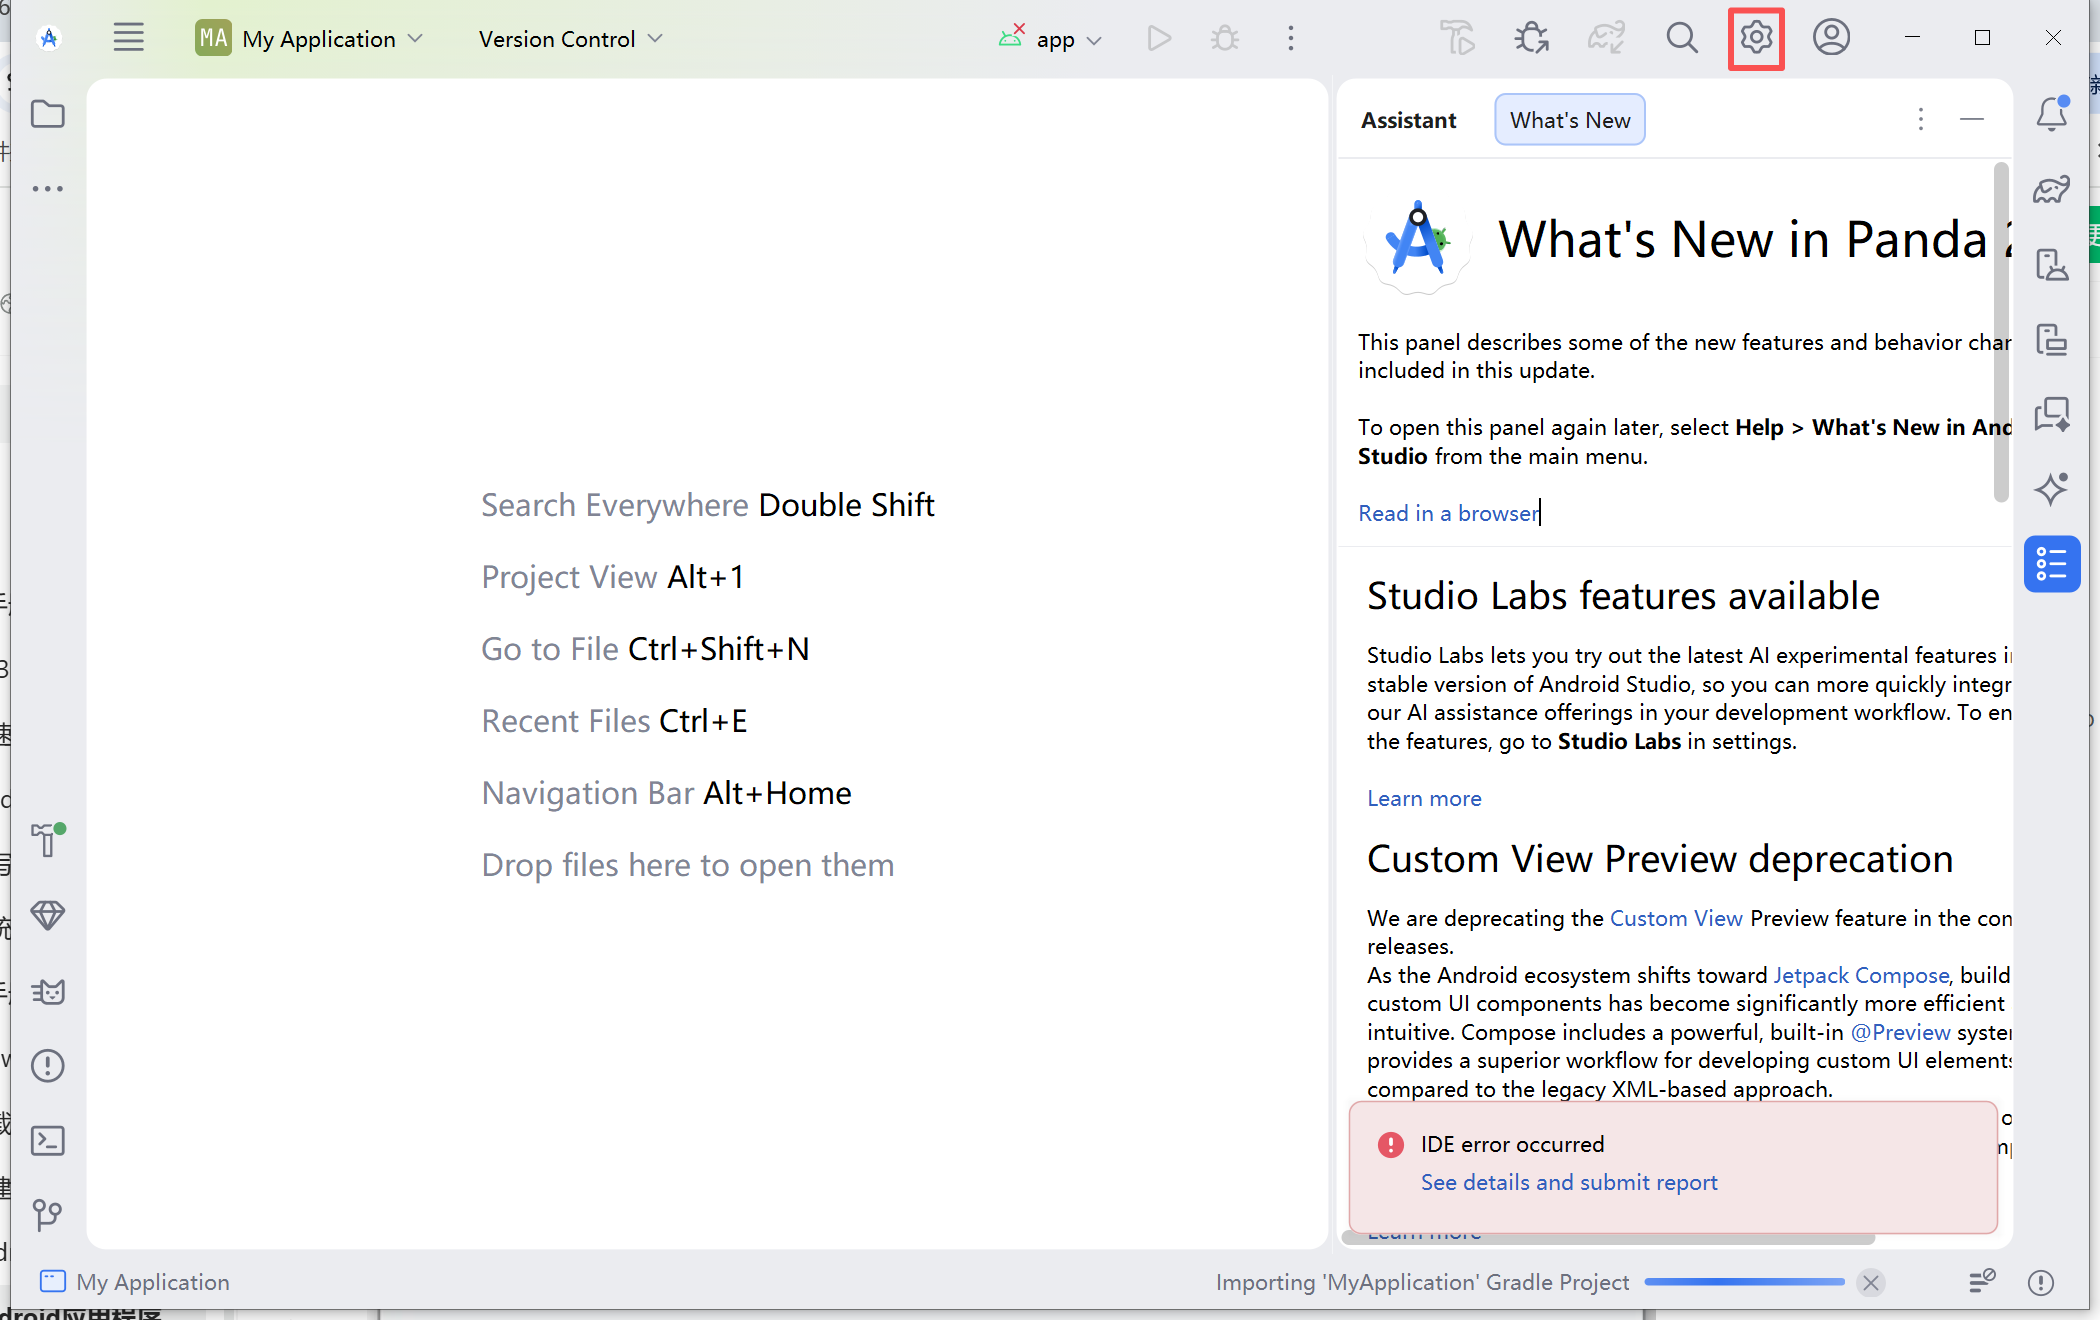
Click “SDK Manager”.
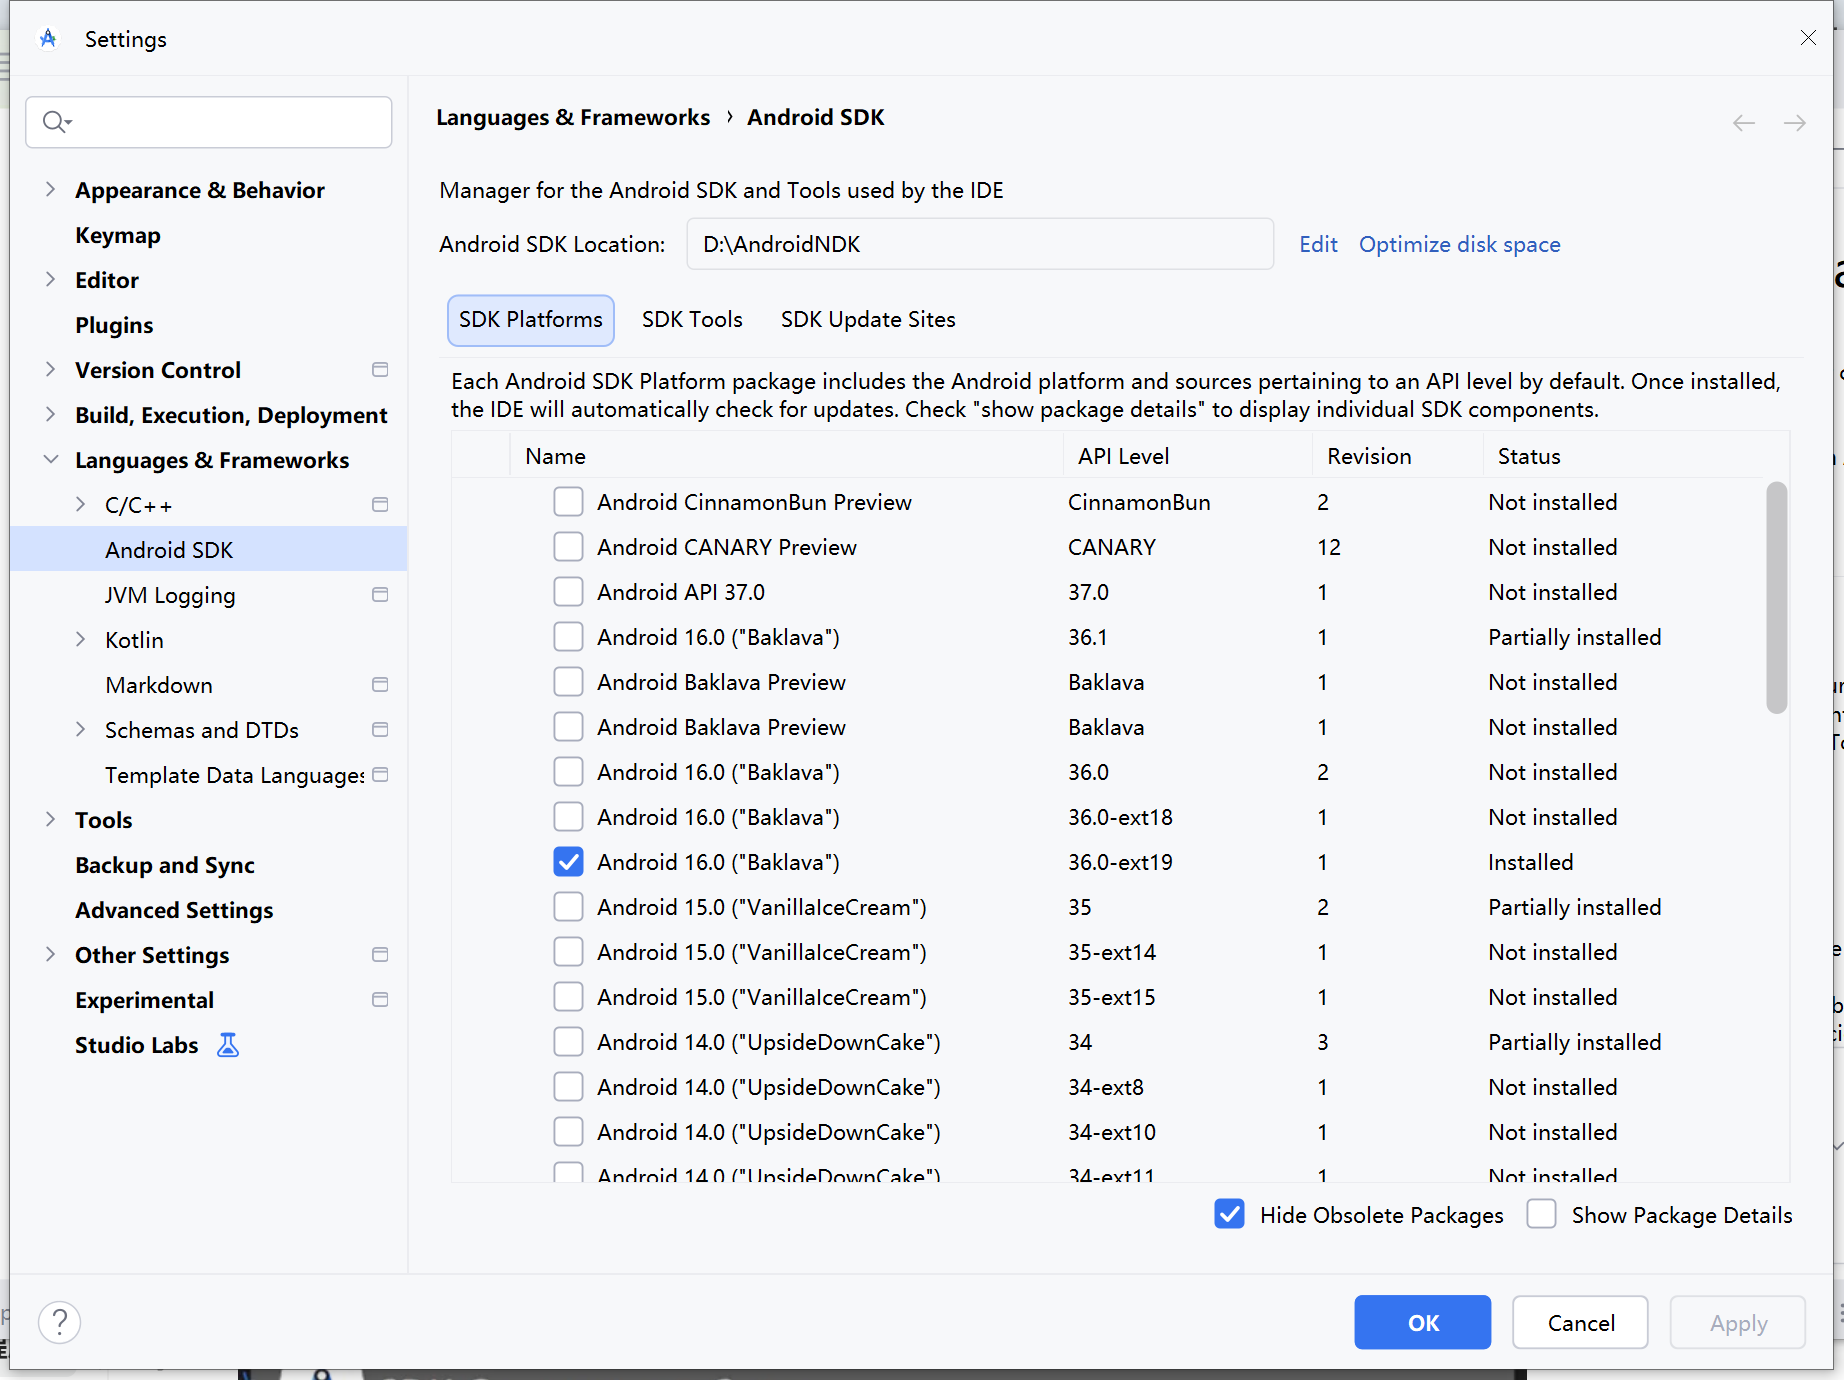
Click “Apply”.
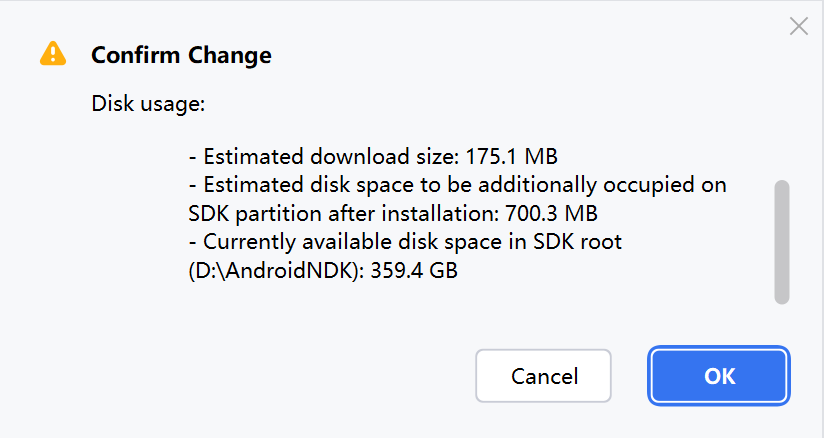
Click “OK”.
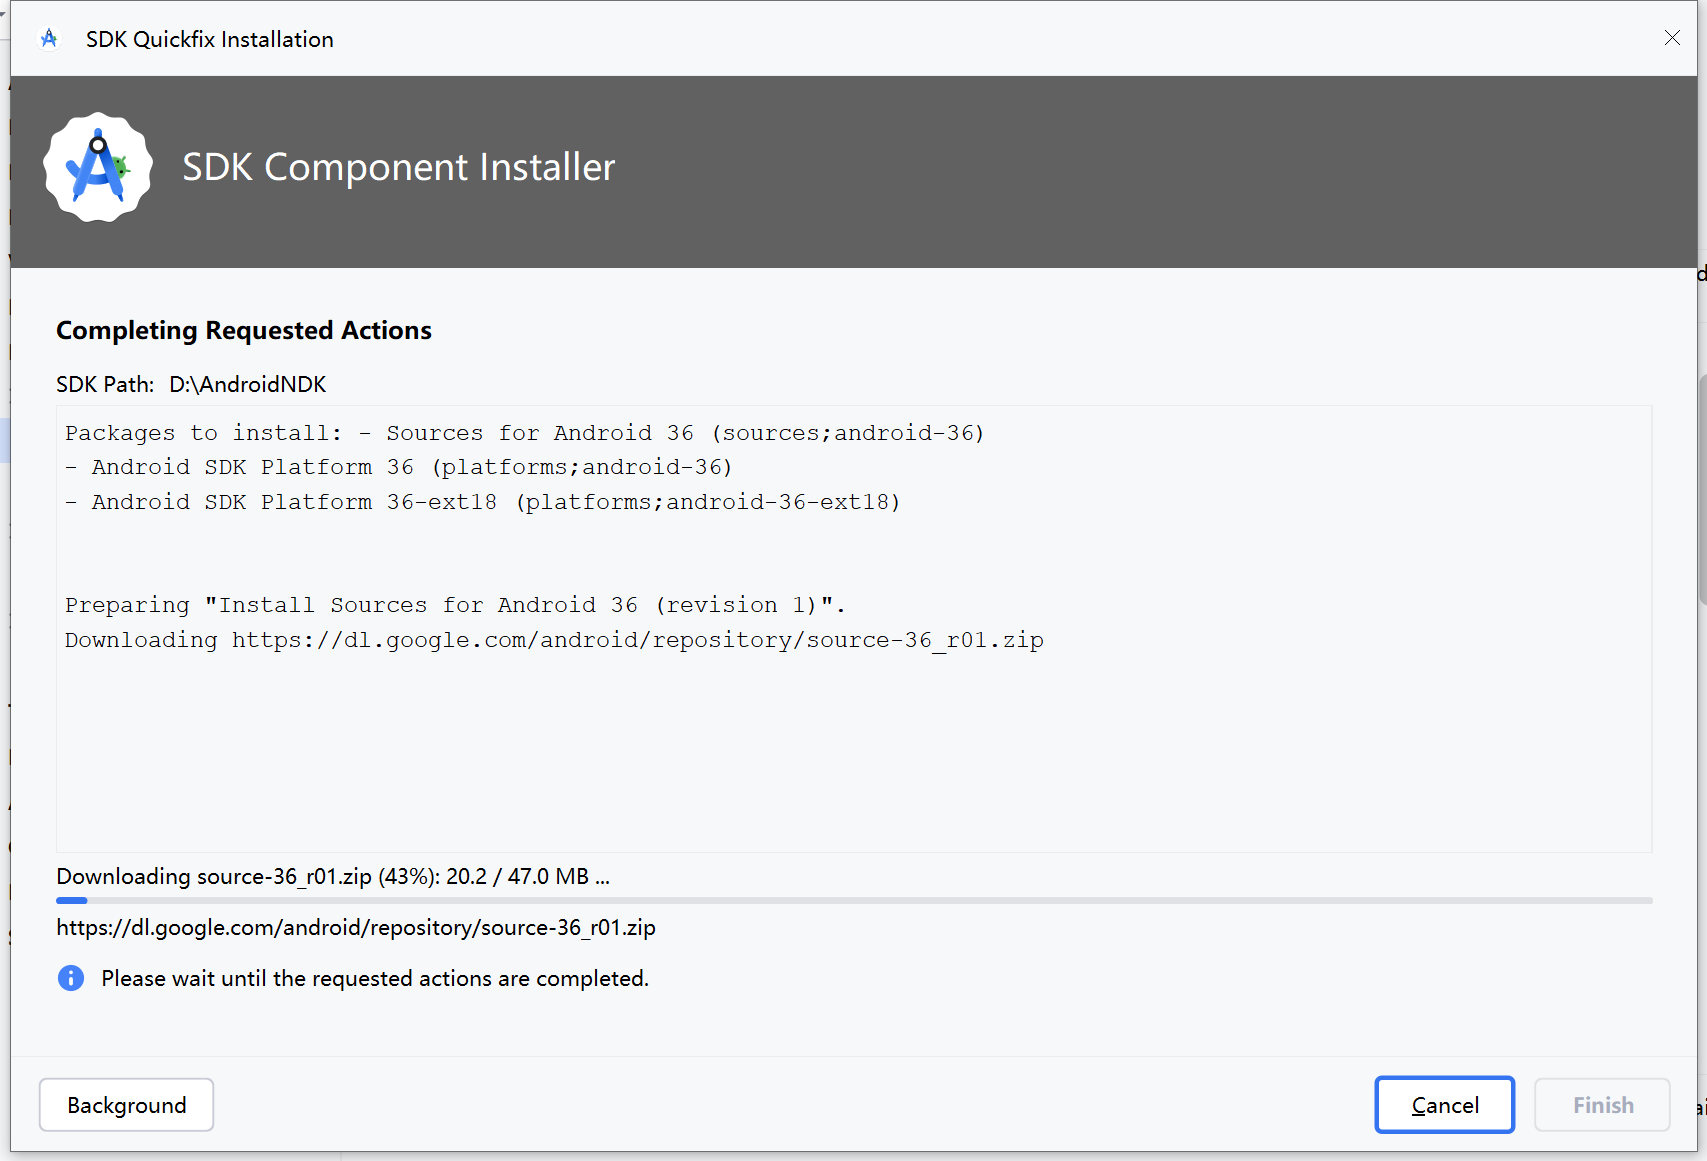
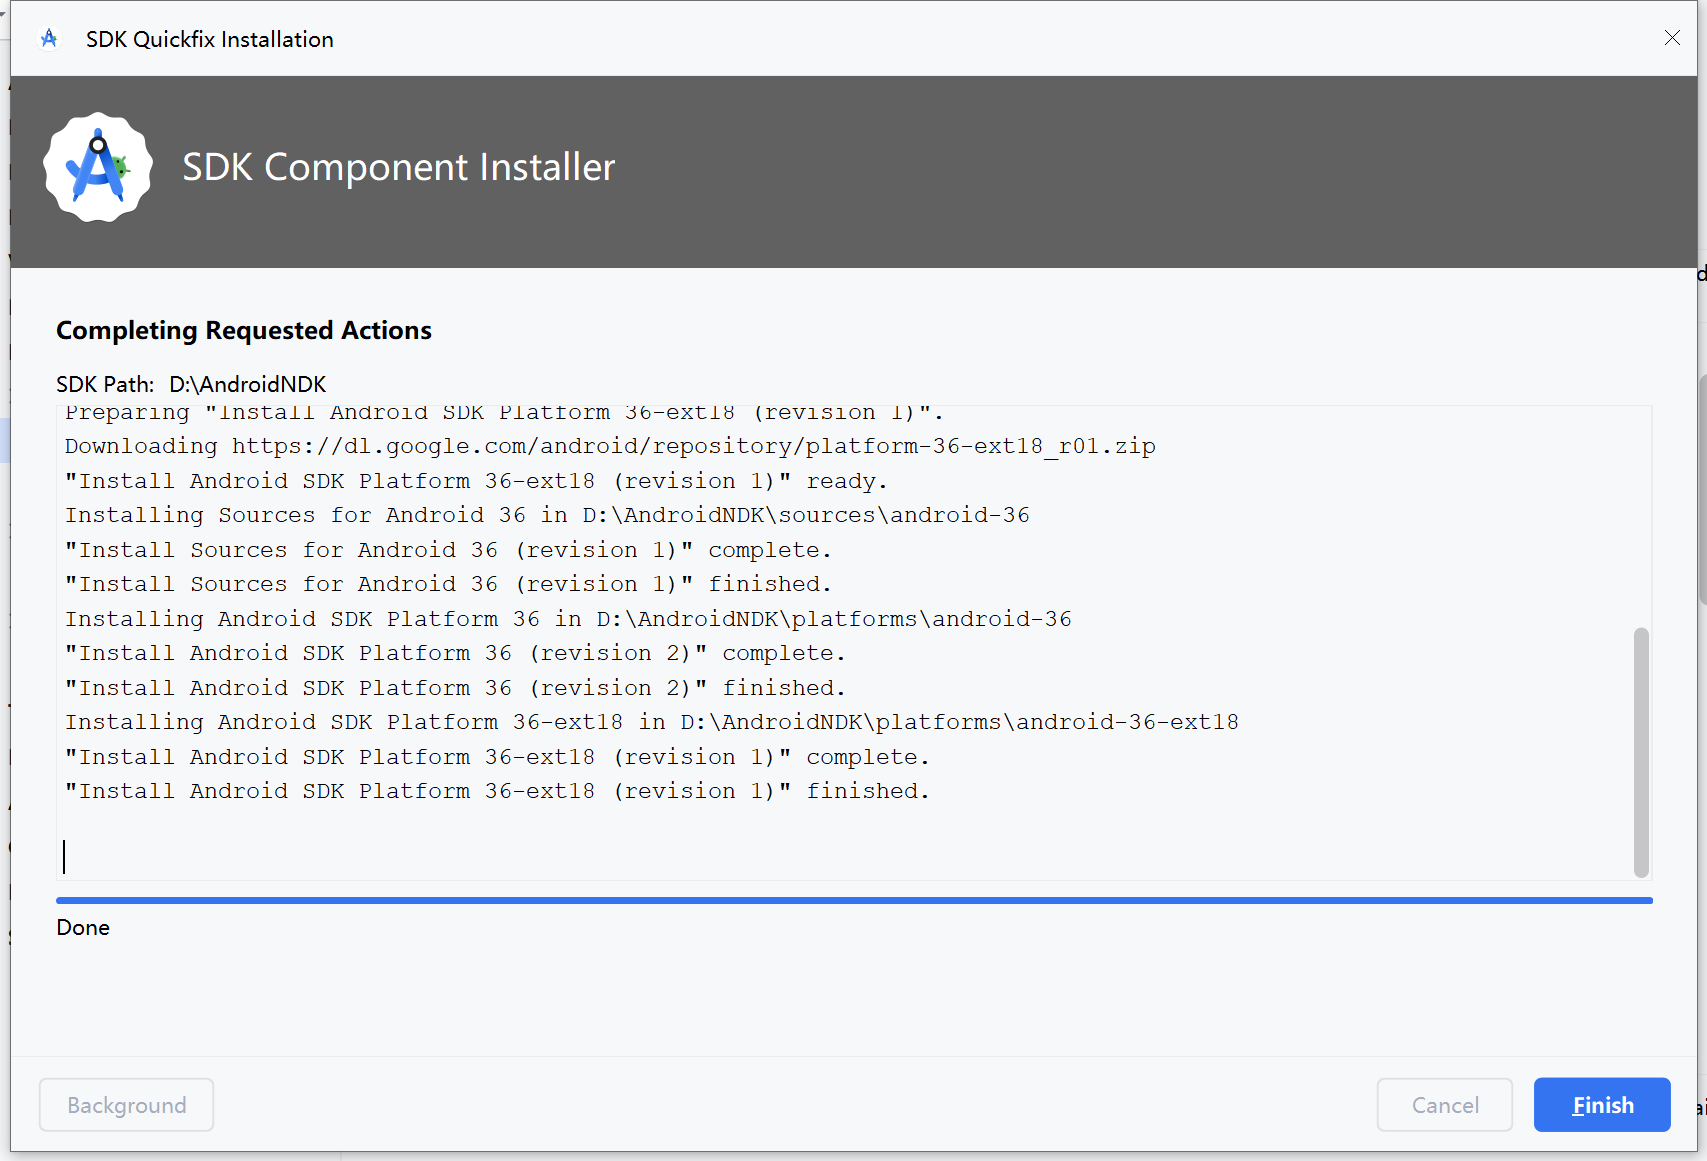
Wait for the download to complete, then click “Finish”.
5.2 Creating a New Project
Click “Next”.
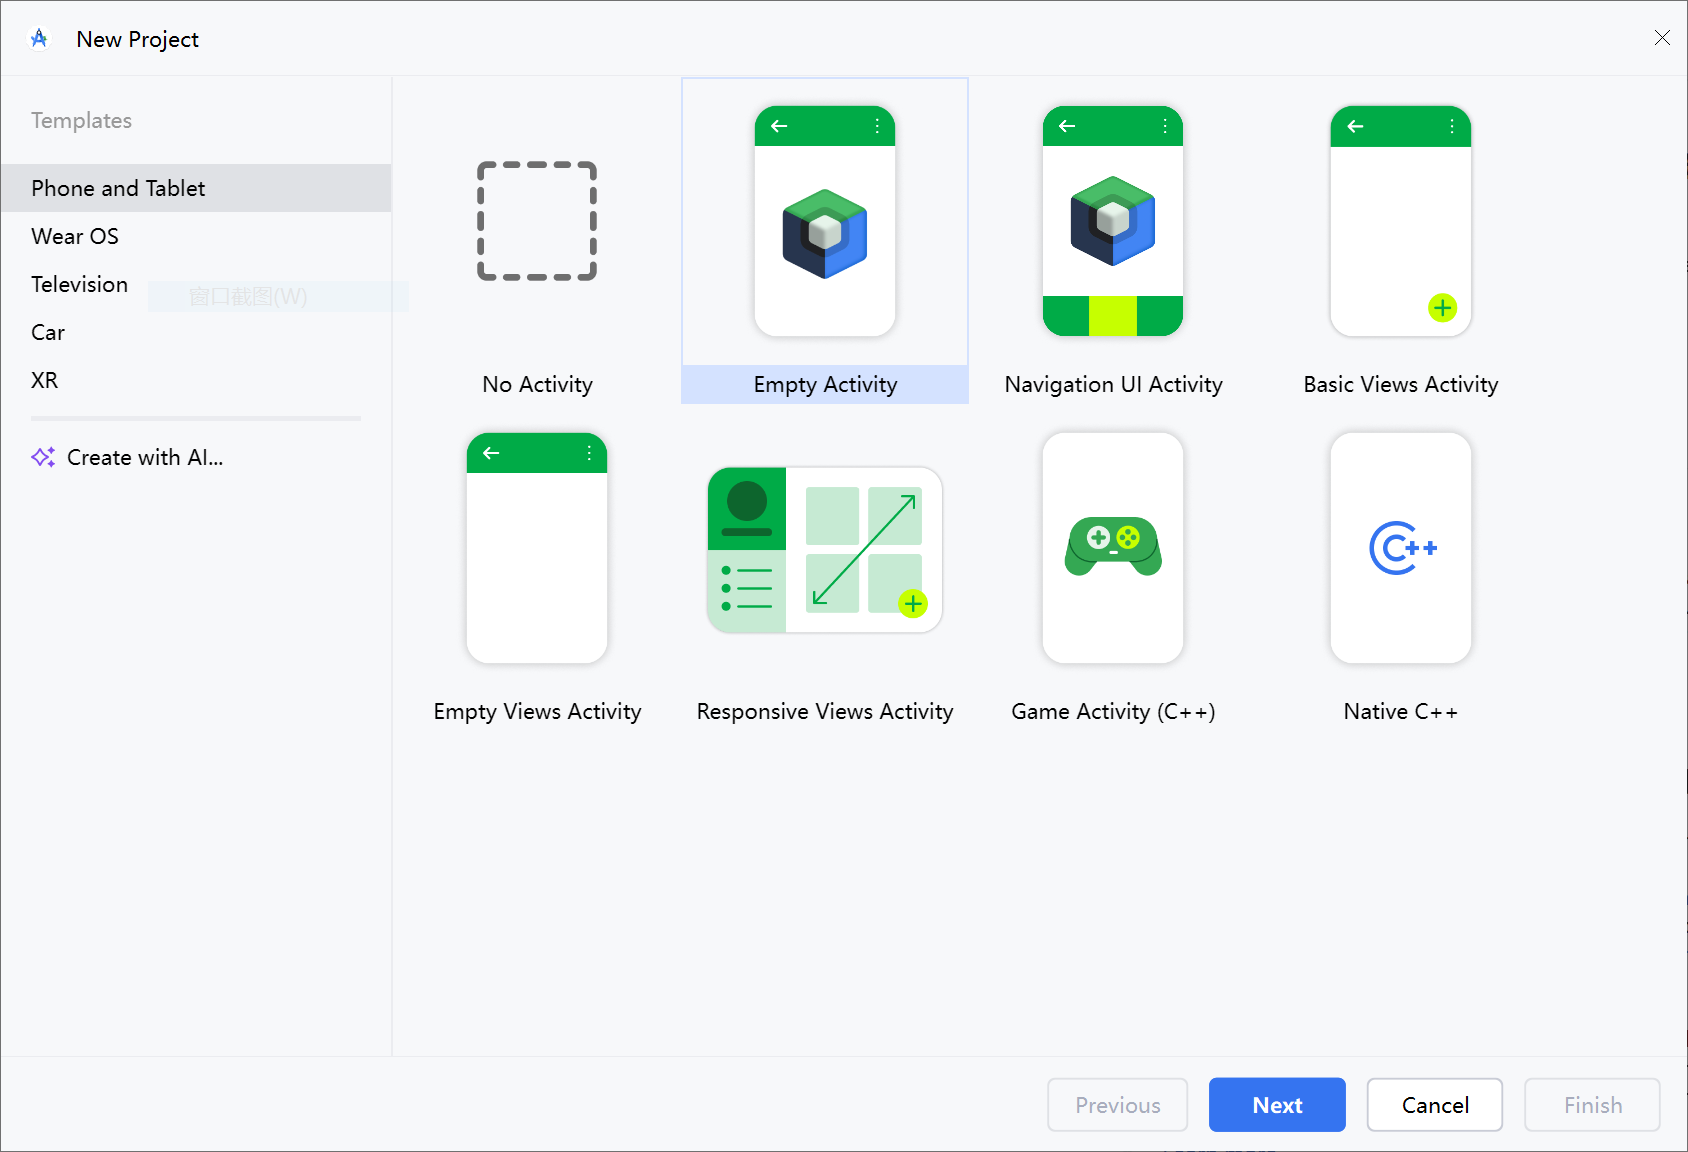
Select Empty View Acticity.
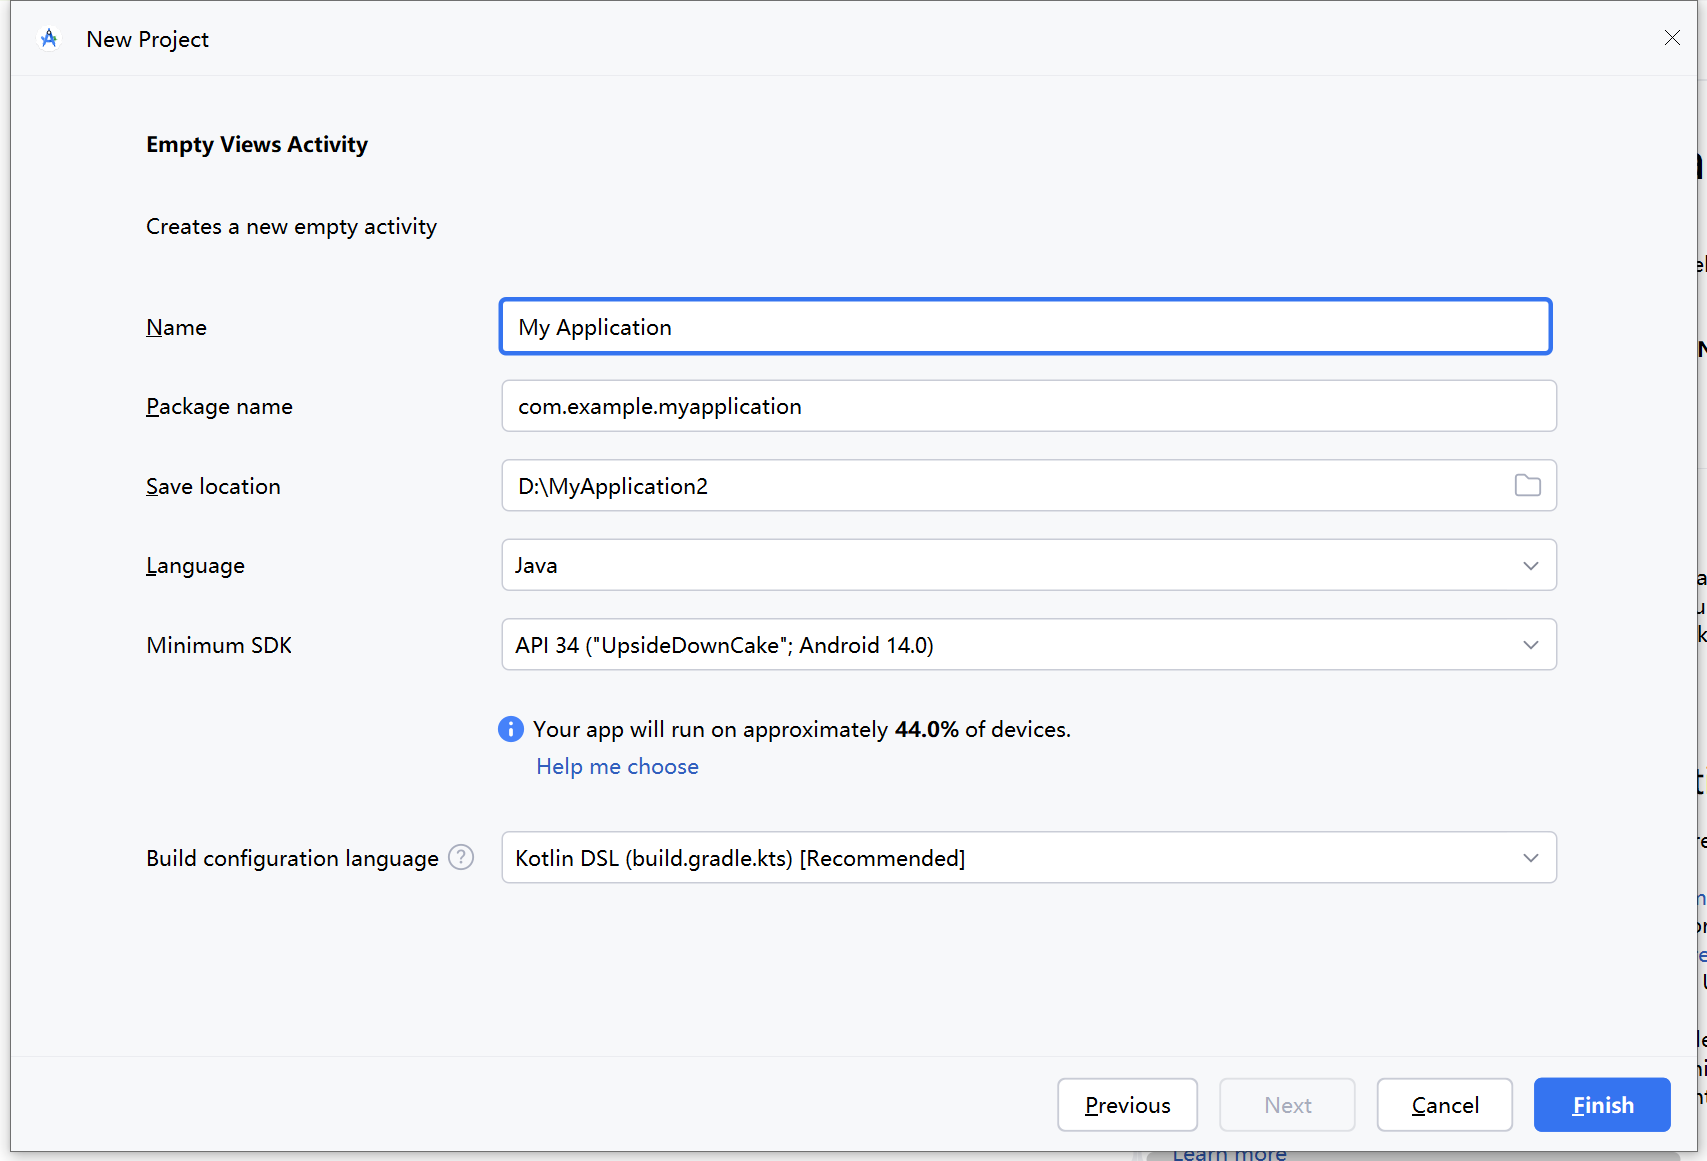
Modify project name and other information, then click Finish.
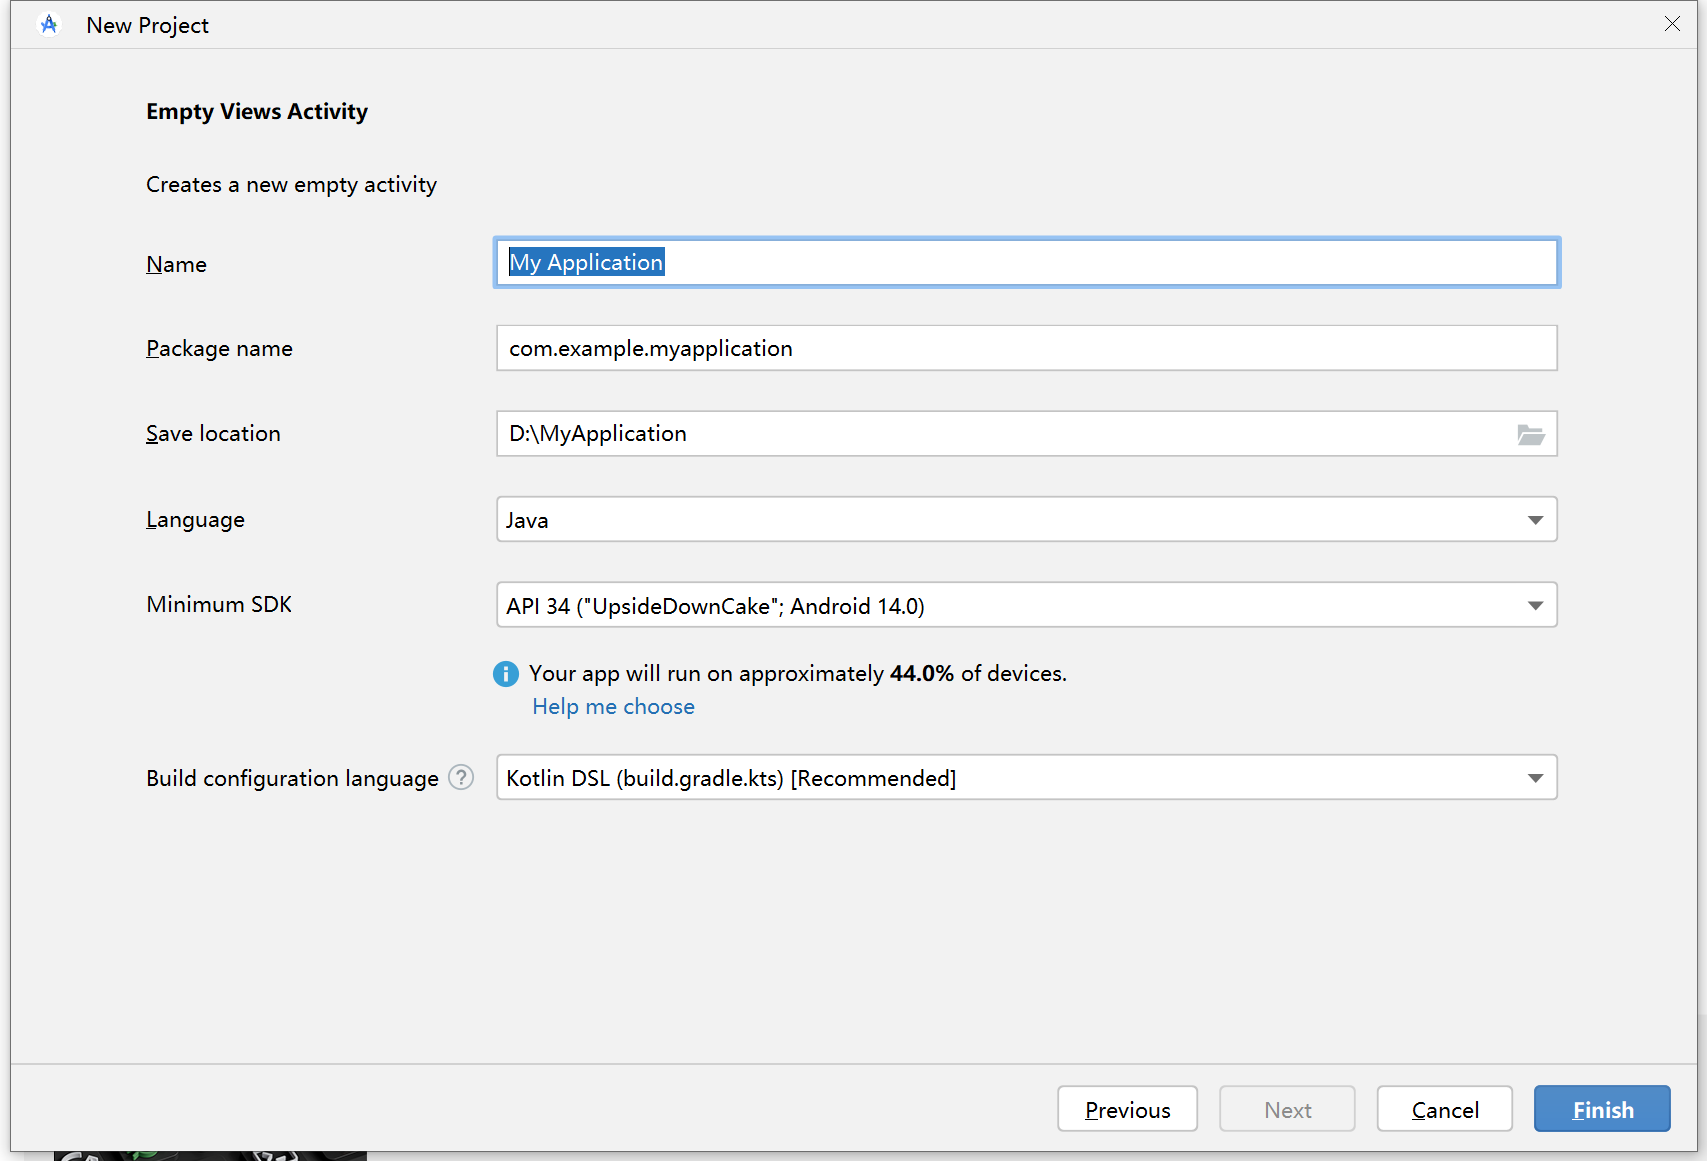
The first time you create a project, the relevant SDK and tools will be downloaded automatically, indicated by a prompt in the status bar.
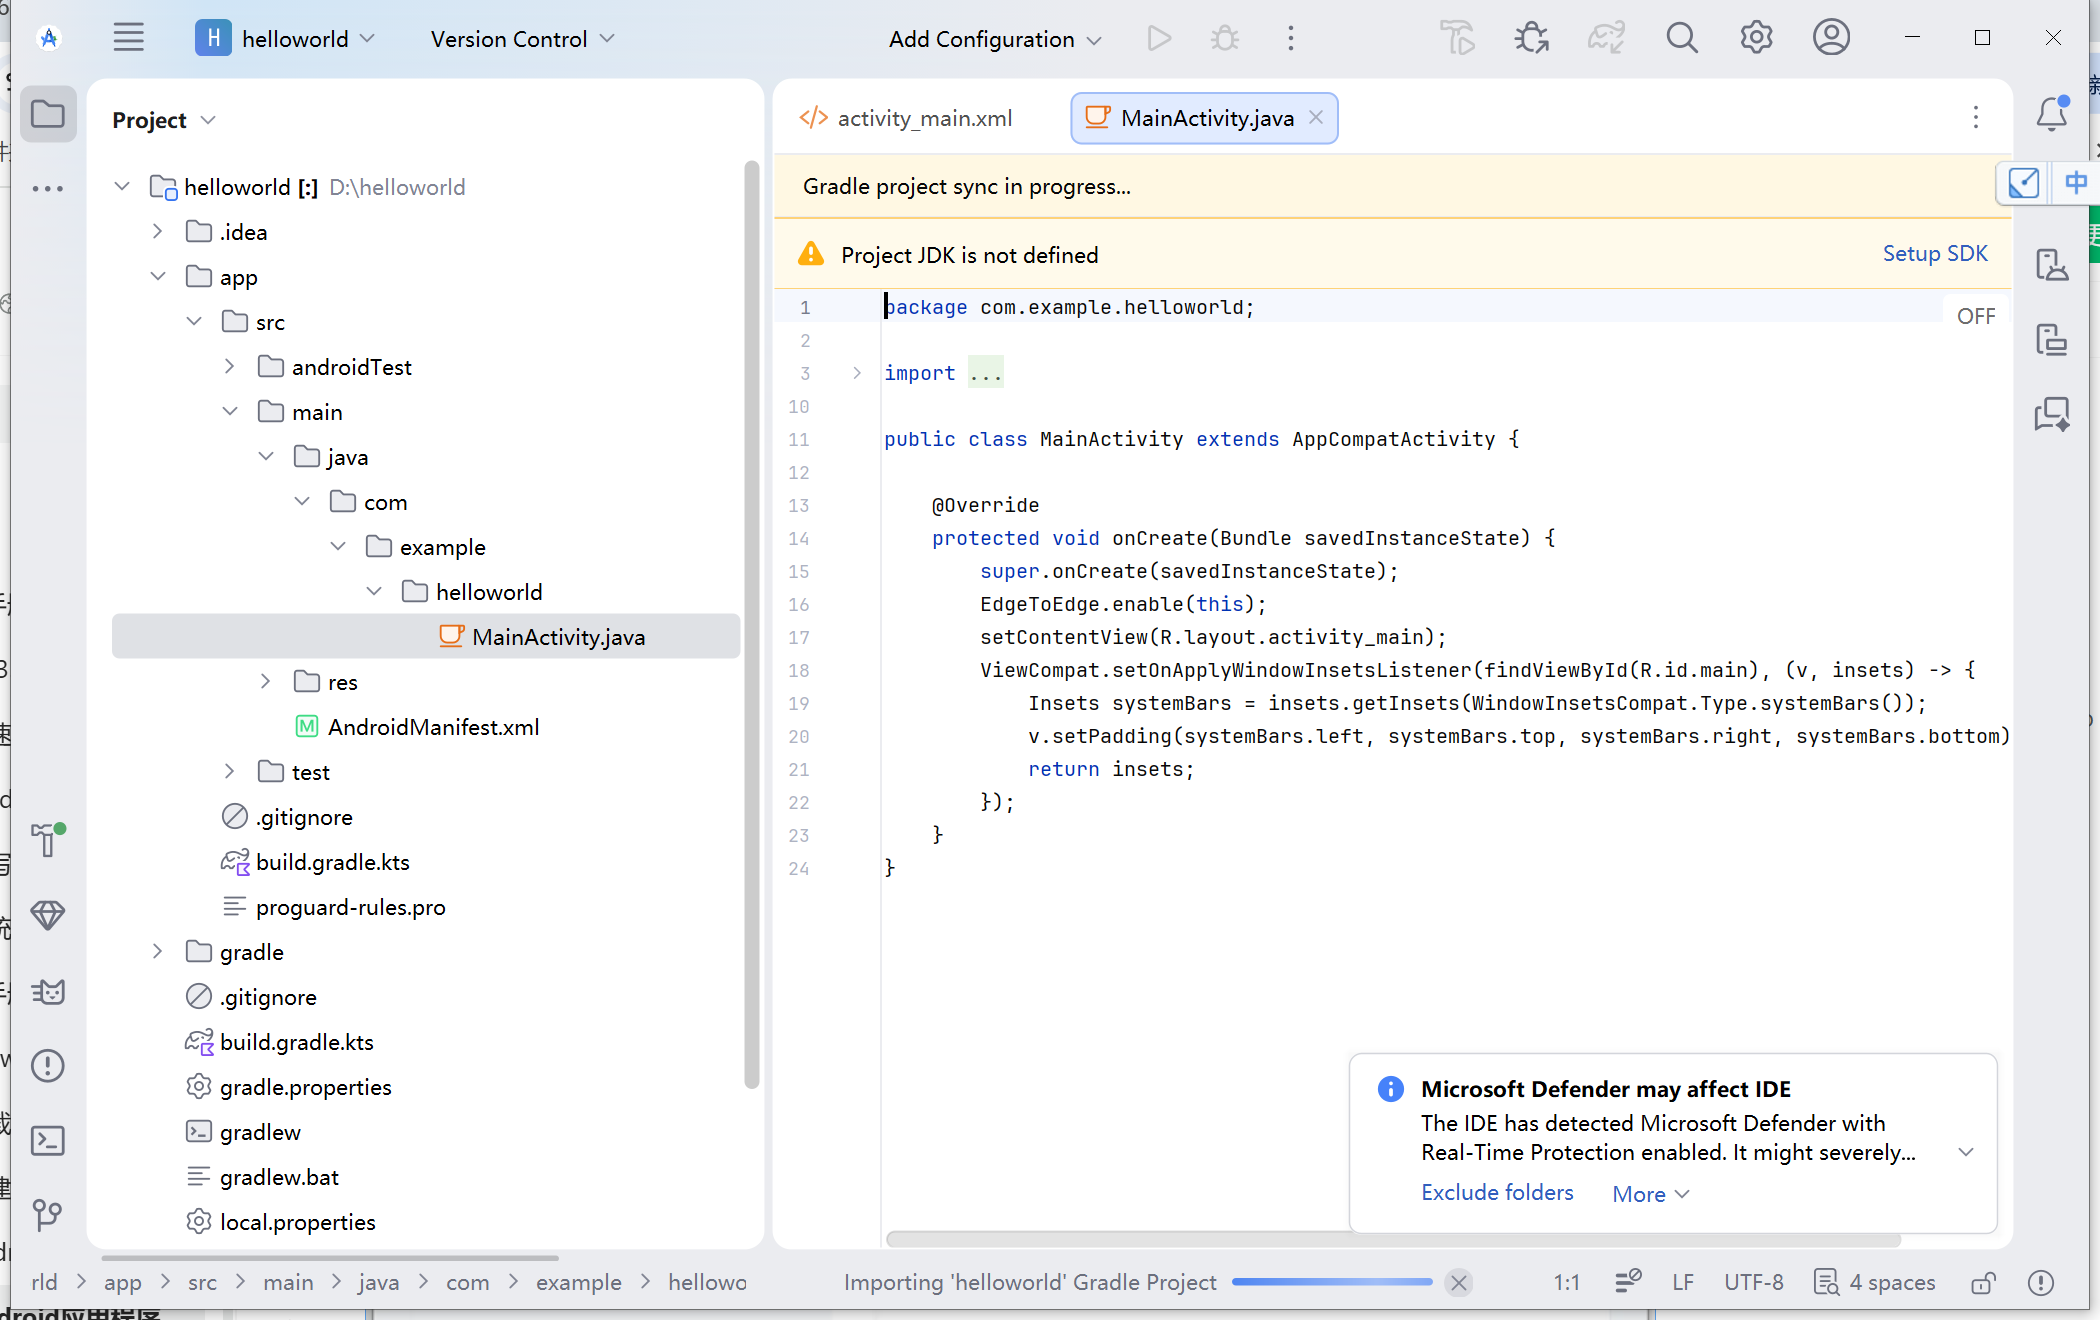
If there are JDK-related errors, click Setup SDK and select the first option.

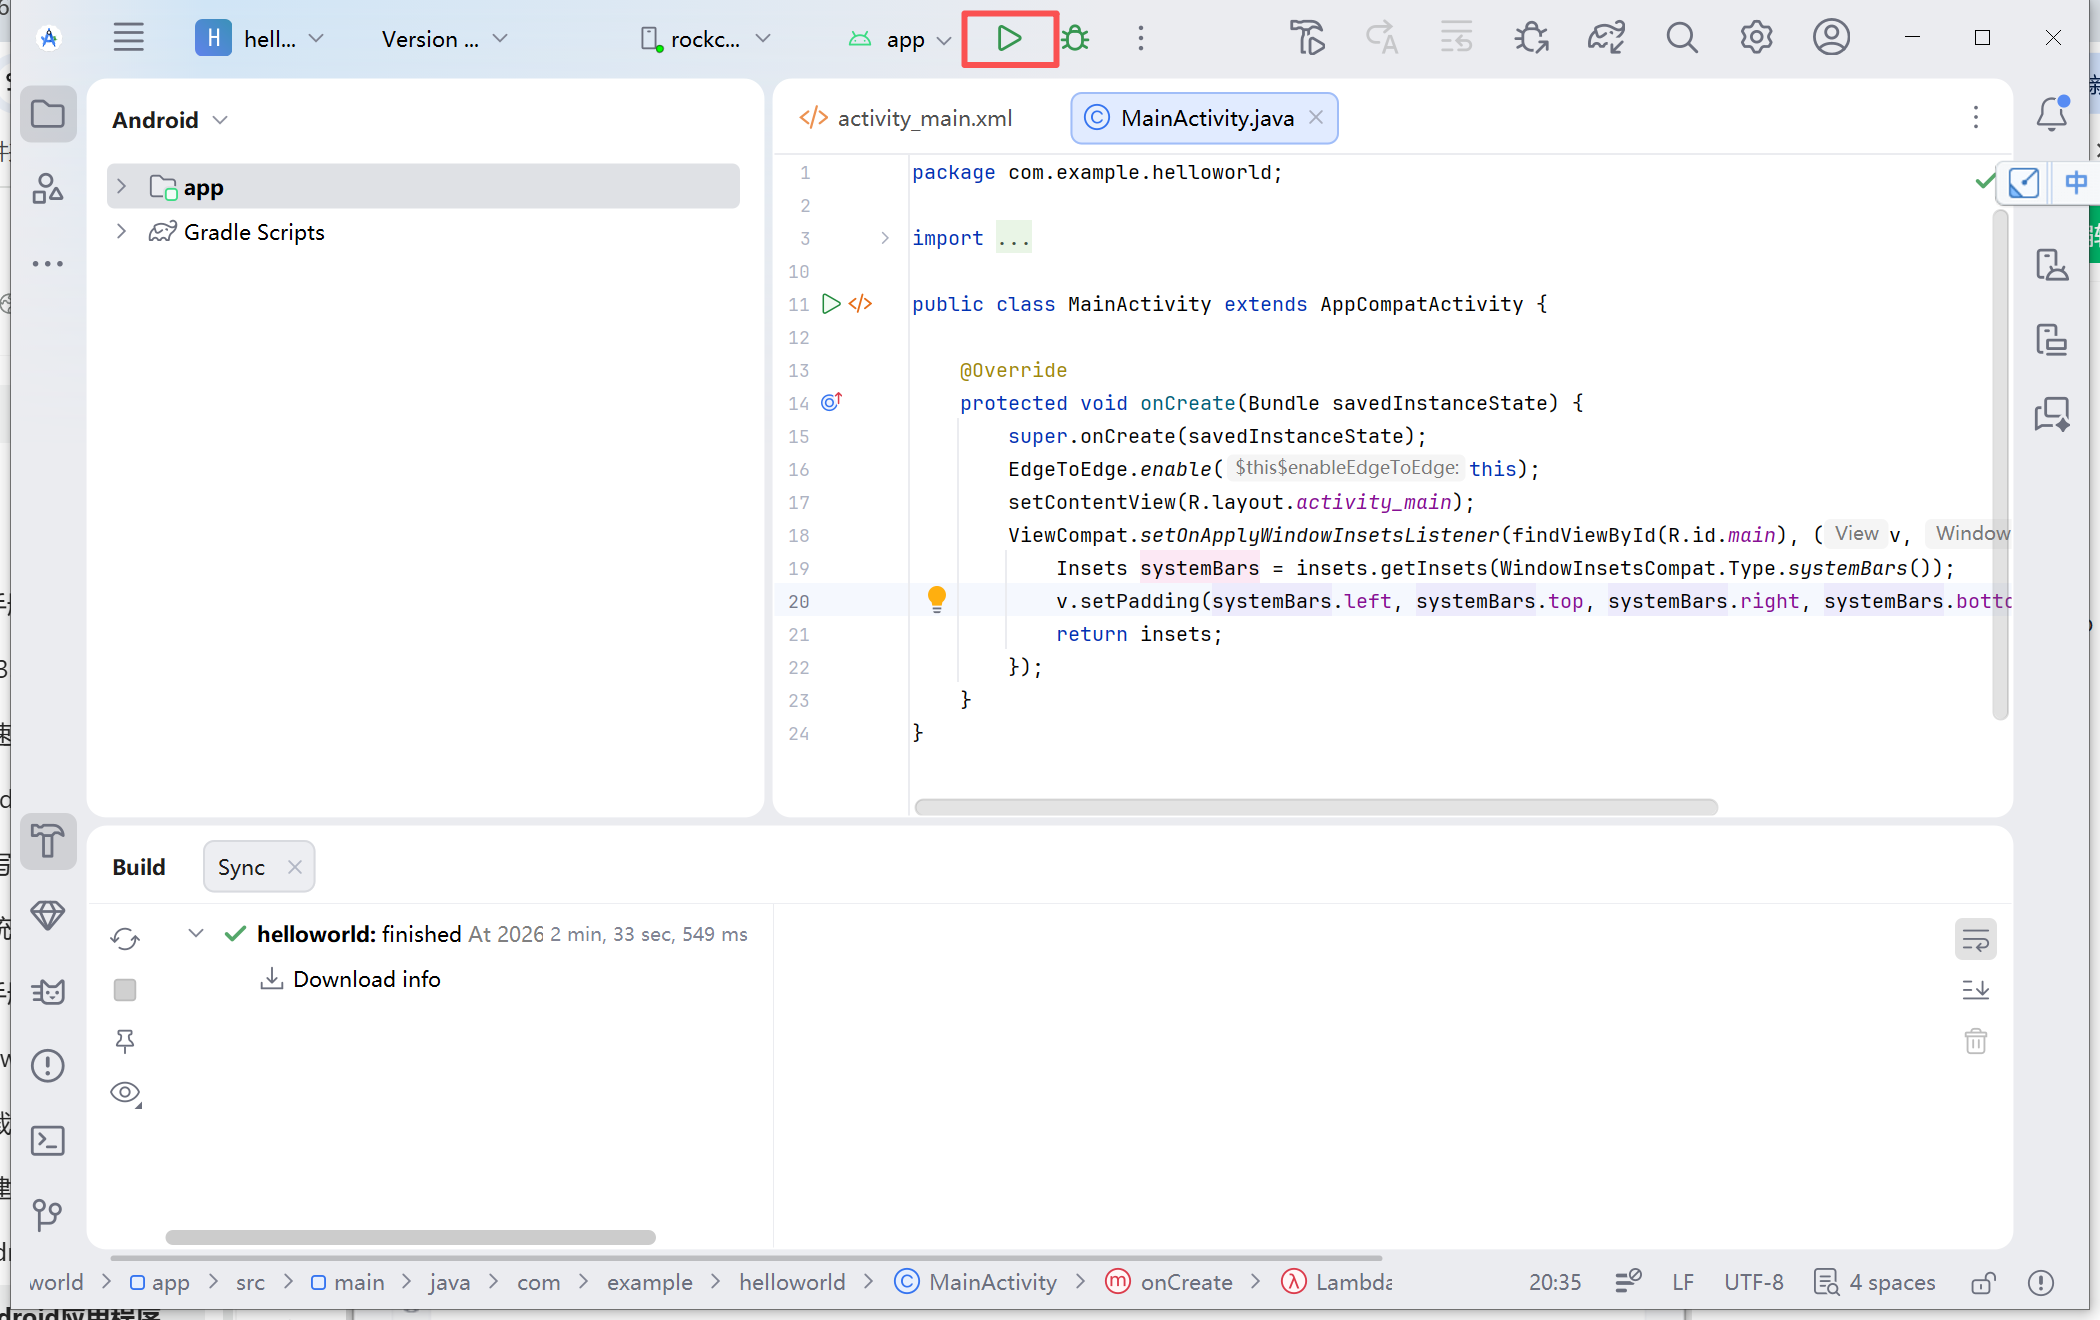
Connect the development board to the computer, ensure adb works normally. Click the run button in the title bar to compile the project and install/run it on the development board.
5.3 APK Platform Signature
If your Windows system does not have the opensslcommand, please download and install it from http://slproweb.com/products/Win32OpenSSL.html and set the environment variables.
In the Android platform, SELinux classifies Apps into three types: untrusted_app without platform signature and system permissions, platform_app with platform signature but without system permissions, and system_app with both platform signature and system permissions. This section will introduce how to sign an APK to obtain system permissions.
5.3.1 Creating a Signature File
Copy the files platform.x509.pem and platform.pk8 from build/target/product/security/ in the Android system to Windows.
Open a command-line window and execute:
openssl pkcs8 -in platform.pk8 -inform DER -outform PEM -out shared.priv.pem –nocrypt
openssl pkcs12 -export -in platform.x509.pem -inkey shared.priv.pem -out shared.pk12 -name androiddebugkey
Enter the password android.
keytool -importkeystore -deststorepass android -destkeypass android -destkeystore debug.keystore -srckeystore shared.pk12 -srcstoretype PKCS12 -srcstorepass android -alias androiddebugkey
You can modify the key-alias and password as needed. Save the signature file debug.keystore to your commonly used directory.
5.3.2 Configuring Android Studio
Open the Android Studio project and add a shared UID in AndroidManifest.xml, for example:
5.<?xml version="1.0" encoding="utf-8"?>
<manifest xmlns:android="http://schemas.android.com/apk/res/android"
    xmlns:tools="http://schemas.android.com/tools"
    android:sharedUserId="android.uid.system">
Click File -> Project Structure:
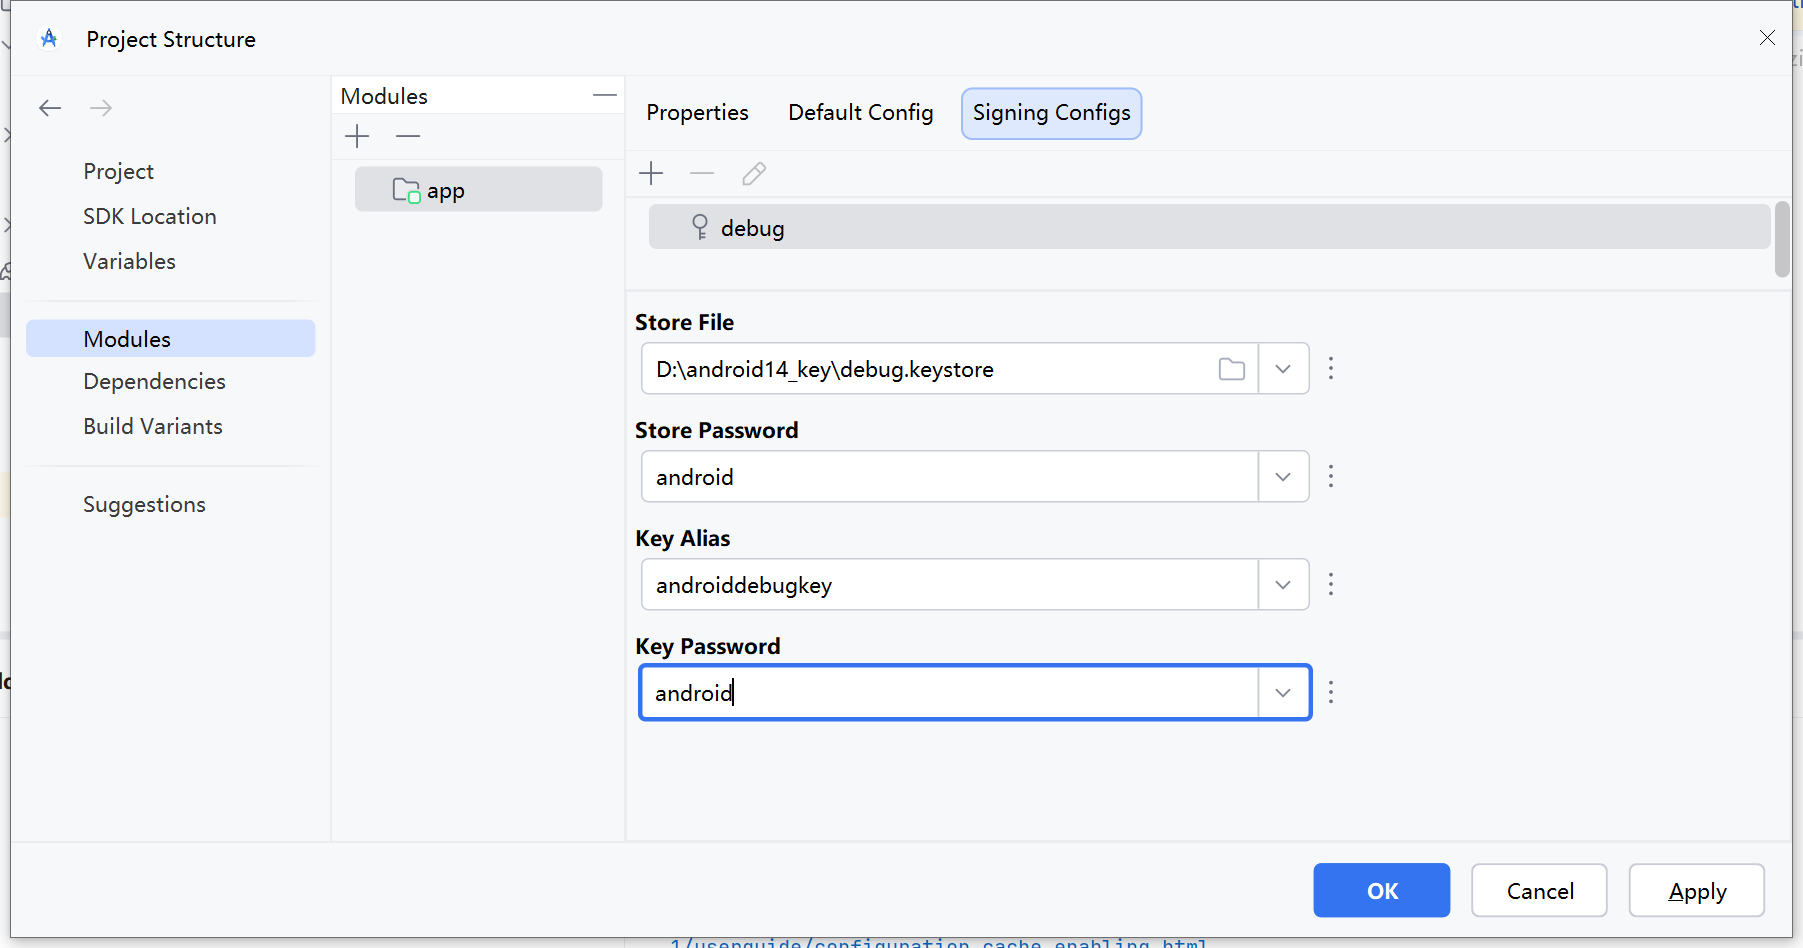
Click OK.
Click the small + sign, fill in release in the same way as debug.
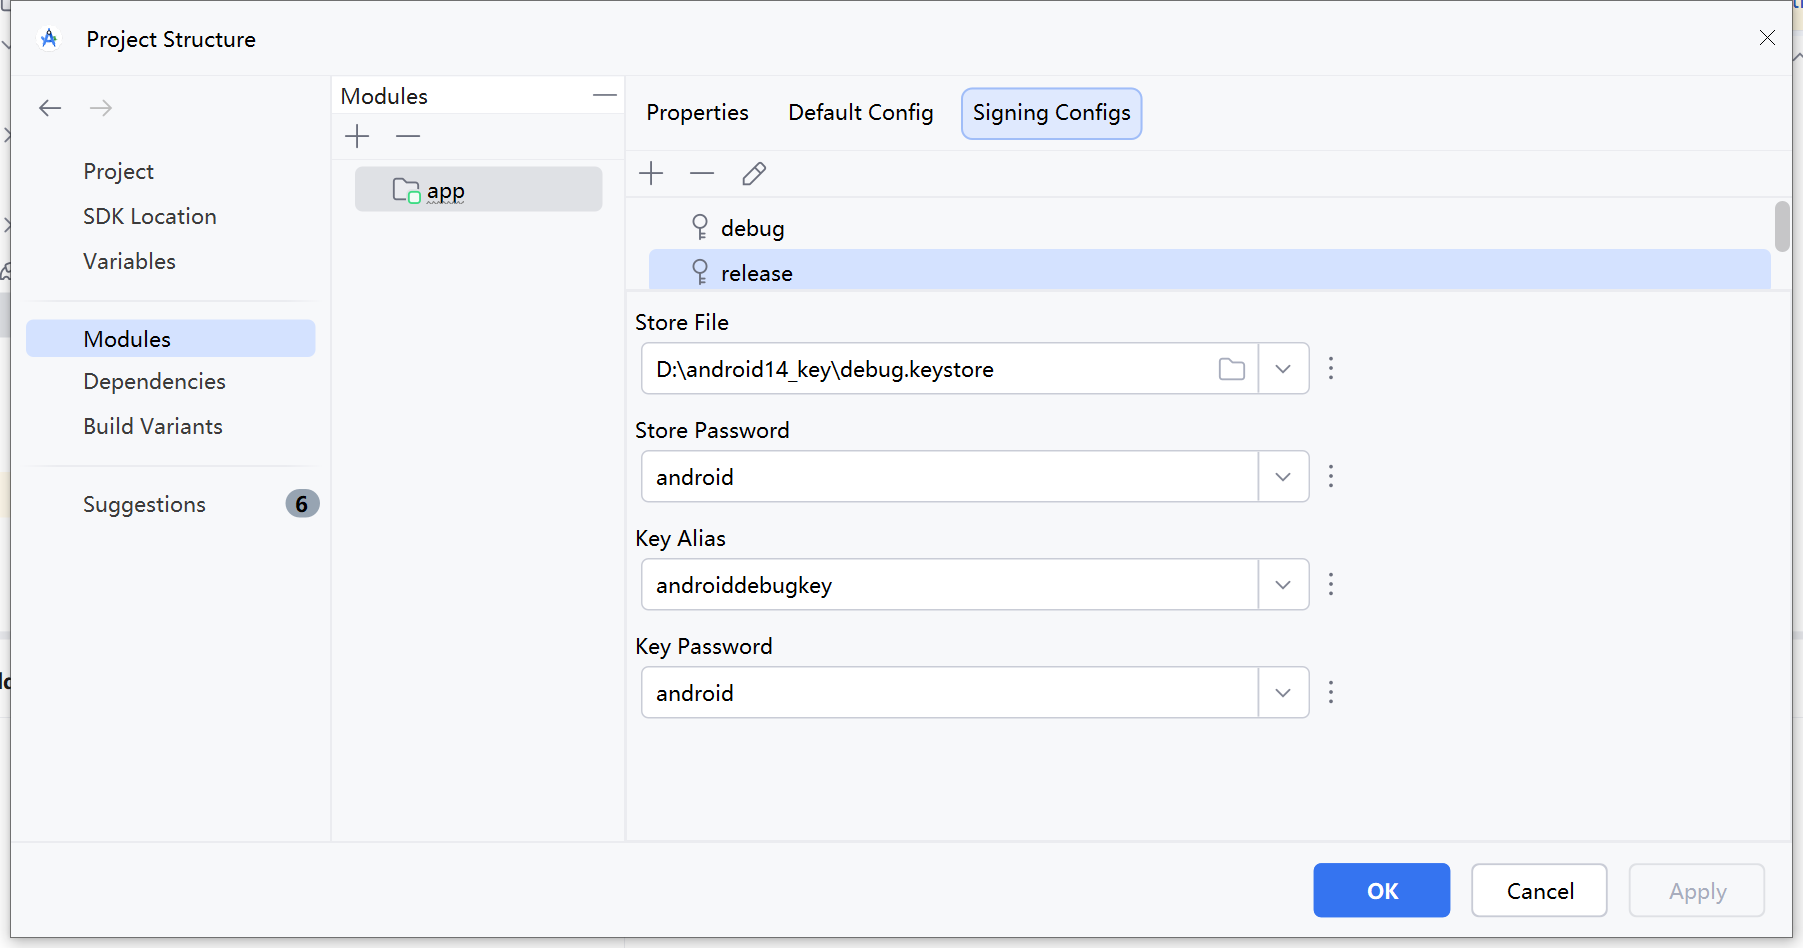
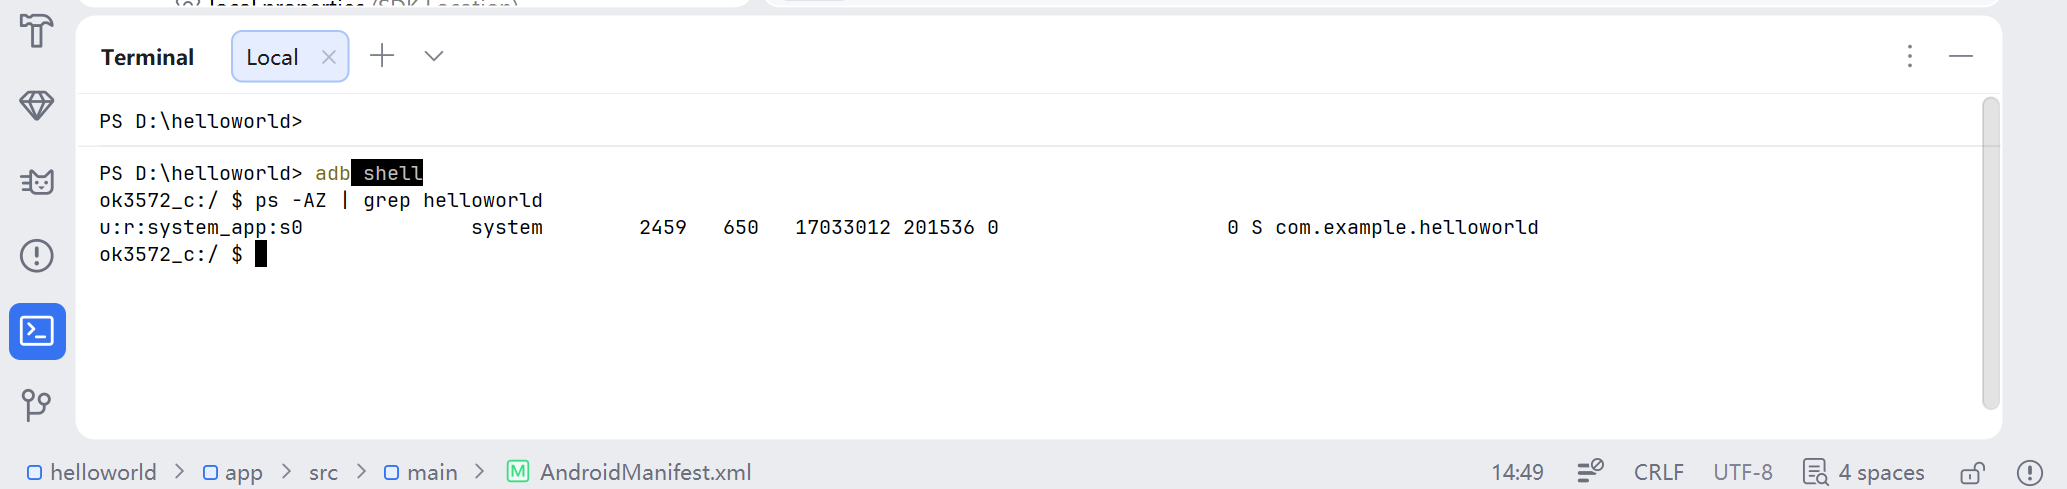
After modification, recompile and run the app. Now, using the ps command, you can see the app is running as the system user system_app.
5.4 Method for System Pre-installed APK
Create a new directory in the Android system:
forlinx@ubuntu:~/work/OK3572-android-source/android$ mkdir packages/apps/helloworld
Copy the APK to be pre-installed (unsigned) to the directory. Using helloworld.apk as an example:
forlinx@ubuntu:~/work/OK3572-android-source/android$ cp helloworld.apk packages/apps/helloworld
Since Android 16 disables using Android.mk files for compilation in the packages/app directory, create a new Android.bp in packages/apps/helloworld.
package {
    // See: http://go/android-license-faq
    default_applicable_licenses: ["Android-Apache-2.0"],
}

android_app_import {
    name: "helloworld",
    apk: "helloworld.apk",
    certificate: "platform",
    privileged: true,
    dex_preopt: {
        enabled: false,
    }
}
Modify device/softwinner/ok3572-c/ok3572_c.mk and add the following content.
PRODUCT_PACKAGES += \
    helloworld
Recompile the image.
5.5 App Obtaining Root Permissions
Currently, only system_app can obtain root permissions. The Root access switch needs to be enabled in Developer Options. For related steps, refer to the 《OK3572-C_Android16_User Manual》. Refer to the app source code in vendor/forlinx/RootChecker/